We remain fully operational. Our teams are working around the clock to ensure your deliveries continue safely.

DOWNLOAD THE APP


Copyright © 2025 Desertcart Holdings Limited
DOWNLOAD THE APP


Buy anything from 5,000+ international stores. One checkout price. No surprise fees. Join 2M+ shoppers on Desertcart.
Desertcart purchases this item on your behalf and handles shipping, customs, and support to Thailand.
🚗 Brighten your drive, don’t replace it!
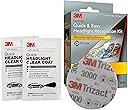
The 3M Quick and Easy Headlight Restoration Kit uses advanced 3000 grit Trizact abrasive discs and clear coat wipes to remove yellowing and buildup from plastic vehicle lenses in just 15 minutes. Designed for easy use without tools or with a household drill, it restores clarity and protects headlights, saving you hundreds compared to replacements.


| ASIN | B08749H19D |
| Best Sellers Rank | #45,560 in Automotive ( See Top 100 in Automotive ) #56 in Automotive Headlight Restoration Kits |
| Brand Name | 3M |
| Contains Liquid Contents? | No |
| Customer Reviews | 4.2 4.2 out of 5 stars (2,073) |
| Global Trade Identification Number | 00051131391932 |
| Included Components | masking tape, light sanding discs, wax protectant |
| Item Form | Wipe |
| Item Type Name | Headlight Restoration Kit |
| Item Volume | 1.2 Fluid Ounces |
| Manufacturer | 3M AAD Consumer (Domestic) |
| Material Features | Non-Toxic |
| Model Number | 39193 |
| Number of Items | 1 |
| Part Number | 39193 |
| Scent | Unscented |
| Size | 2 Count (Pack of 1) |
| Special Features | Restorer |
| Specific Uses For Product | hot-rod-vehicles |
| Surface Recommendation | Plastic |
| UPC | 051131391932 |
| Unit Count | 2.0 Count |
| Warranty Description | Limitation of Liability: Except for the limited remedy stated above, and except to the extent prohibited by law, 3M will not be liable for any loss or damage arising from or related to the 3M product, whether direct, indirect, special, incidental, or consequential (including, but not limited to, lost profits or business opportunity), regardless of the legal or equitable theory asserted, including,… |
J**A
Effective headlight restoration kit
I used this kit before a weekend trip when my headlights seemed dull. It quickly removed the yellow haze and was straightforward to use thanks to clear instructions. I was pleased with how quick and easy the process was, giving my car a fresher look in just a short time. It’s a handy tool to keep in your garage for those moments when your lights need a little refresh.
S**D
This works
I was sceptical at first but this kit definitely works and is quick and easy as it states, the pad is impregnated with some sort of paste when wet and that is what brings off the grime, the clear coat gives the lenses the clear look. Hopefully it will last but we'll worth the money, no need to watch YouTube for complicated advice on how to clean your headlights, this kit is all you need you won't be disappointed.
P**T
Good headlight cleaner for quick results
Finding this product was a pleasant surprise. It wiped away grime from my headlights in no time and made my lenses look much clearer. The paste-on pad works well when wet, helping to lift dirt efficiently. I appreciate how straightforward it was to use without hunting for extra tools or watching tutorials. For the price, it feels like a practical choice. I’m glad I tried it out and believe others will find it helpful too.
J**N
Simple and effective headlight restore kit
Okay, so I tried this 3M kit while working on my car before a road trip. i was surprised how quickly it cleared up the cloudy, yellowed headlights. just in about 15 minutes, my headlights looked noticeably clearer. it was a handy tool to have around and saved me a trip to the shop. really pleased with how easy it was to use and the results. 🚗
B**D
Simple fix for cloudy headlights
Lately, i've been using the 3M headlight restoration kit, and it's been pretty handy. it really cuts down the yellow look in just about 15 minutes. now my headlights look clearer, and it saves me from buying new ones or spending a lot. happy with how easy it was to do at home during a weekend. definitely a good find for anyone wanting quick results without the fuss.
W**S
Brightening headlight cleaner is effective
Perfect for quick improvements. I used it on my headlights that had turned yellow from age, and they now look much clearer. It was simple to apply and didn't take much effort. I’ve attached some before and after photos to show the difference. Quite pleased with how well it worked for regular car maintenance.
A**Y
Simple fix for cloudy headlights
Working on my car's headlights was quick and simple with this kit. I used it during a weekend project and was pleased with how clear they looked afterward. The process only took about 15 minutes, and the difference was pretty noticeable. It’s a handy little set that saves you from expensive repairs or headlight replacements. 🚗
G**D
Headlight Revival.
headlights get super clear when wet but lose clarity when dry. Might need multiple applications for lasting results.
A**X
3年前の施工から、その効果を長期にわたって実感していましたが、この度、経年による再度の黄変が見られたため、再度のメンテナンスを実施しました。本製品の最大の魅力は、その作業の容易さにあります。専門的な技術を要せず、誰でも手軽に扱えるため、高い費用対効果(コストパフォーマンス)を発揮します。性能と利便性の両面で満足しており、今後も定期的なケアのために継続して購入する予定です。
J**I
Juste exceptionnel. Conseillé par un ami, ce produit remet vraiment a neuf les phares blanchis par le soleil et les intempéries. Il est, de plus, facile a utiliser (et bien expliqué!)
A**R
I used wet sanding paper in grits 320, 600, 1000, 1200, 1500, 2000 and 2500. Only after that I used the 3000 grit and sealant from the box. And the results are very good, headlights looks like new.
J**Z
Me sorprendió como quedó mi faro estaba tan feo que pensé que no iba a funcionar pero quedo muy pero que muy bien. Muy recomendable.
A**H
Product is good,, but the box in which it was delivered was fully damaged
Trustpilot
1 month ago
1 month ago