Buy anything from 5,000+ international stores. One checkout price. No surprise fees. Join 2M+ shoppers on Desertcart.
Desertcart purchases this item on your behalf and handles shipping, customs, and support to Thailand.
✨ Marbleize your space, upgrade your vibe! 🏡
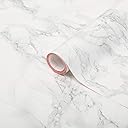
d-c-fix Grey Marble Self-Adhesive Film is a 17.7" x 78.7" vinyl/PVC roll designed for easy, residue-free application on flat surfaces. Featuring precise gridlines for cutting, water resistance, and durable material, it offers a cost-effective, stylish way to refresh furniture, walls, and cupboards with a realistic grey marble finish—ideal for millennial professionals seeking quick, elegant home upgrades.


| ASIN | B00504QXM0 |
| Additional Features | Washable |
| Best Sellers Rank | #149,620 in Tools & Home Improvement ( See Top 100 in Tools & Home Improvement ) #1,446 in Wallpaper |
| Brand | d-c-fix |
| Brand Name | d-c-fix |
| Color | Grey Marble |
| Customer Reviews | 4.5 out of 5 stars 6,930 Reviews |
| Global Trade Identification Number | 00841532007101, 04007386128263 |
| Included Components | 1 Roll |
| Is Stain Resistant | No |
| Item Dimensions L x W | 78.74"L x 17.72"W |
| Item Type Name | Grey Marble contact paper |
| Item Weight | 0.19 Kilograms |
| Manufacturer | DC Fix |
| Manufacturer Part Number | 346-0306 |
| Manufacturer Warranty Description | Replacement if defective. |
| Material | Plastic |
| Material Type | Plastic |
| Model Number | 346-0306 |
| Number of Items | 1 |
| Number of Pieces | 1 |
| Pattern | Marble |
| Product Care Instructions | Wipe with Dry Cloth |
| Product Dimensions | 78.74"L x 17.72"W |
| Recommended Uses For Product | Furniture |
| Shape | Rectangular |
| Size | 17.7"W x 78.7"L |
| Special Feature | Washable |
| Theme | Grey,Marble |
| UPC | 885598739132 604945283315 885738419924 759455253256 885490797759 885946243809 885498459109 |
| Unit Count | 9.67 Square Feet |
B**.
A seriously awesome product for small projects
I used this marble contact paper as part of a makeover on two ikea dressers. I was hopeful yet skeptical, so I was thrilled at the quality and the results! It looks amazingly real! Everyone who sees it has thought that it was real - I only know this because I proudly announce, "DUDEEEEEEE THIS IS CONTACT PAPER!" to anyone that sees them, whether they care to know or not. It's only a little bit of a pain in the butt to put on, which is ok because I expected it to be a large pain in the butt. Here are a few tips: 1) I think the most important thing is to unroll it slowly as you work so that you can hold the excess paper as tight and taut as possible while you smooth it on. I used a 6 inch plastic ruler to work out the air bubbles. Slow and steady wins the race when putting this on, but the results are worth it for the money! 2) I followed the suggestion of another reviewer and googled "how to do corners with contact paper" and found a lot of helpful suggestions. As usual, the internet makes everything look a little bit easier than it really is, but I was able to finagle a few ideas together and make them work for me. 3) The paper was just a little too narrow to cover the entire top of the dressers, so I had to use two strips. There's a seam where the two meet - this would be almost impossible to avoid as it's not an actual slab of marble and I am not some sort of contact paper whisperer. For my purposes, this is totally fine - I used as wide of a piece as possible and then used a smaller strip at the back of the dresser. Since the dressers are against a wall, and I have various tchotchkes on them, it's really not noticeable. If you are covering a large and/or highly visible surface, this something I would consider. It's hard to get the patterns to match up along a seam - and even if you did, it would likely mean wasting a lot of paper AND the seam would still be visible if you were looking at it from close up. If this is the type of thing that would drive you bonkers, it might not be the right fit for you. I also think curved surfaces/corners would be tough. Do-able for those folks out there that are pluckier and more patient than me, but I probably would have lost my marbles. 4) Have your tools laid out within arm's reach before you start - once you remove the backing from the adhesive, it's really all systems go time. Here are the things I found most helpful: • Plastic ruler to use for a "squeegee". Obviously it doesn't have to be plastic, or even a ruler, but you are going to want something rigid/strong for this. I found the advantage of the ruler to be that there's no handle - I did this project on my own, so I found myself contorted at odd angles for much of the time, and a squeegee handle would have been unwieldy to manage. • Scissors • X-acto knife - I used the scissors for making big cuts and the x-acto knife for cleaning up the edges and doing the corners. • Pencil - helpful to measure/mark the back of the paper for extra strips/pieces. All in all, for the price, it's a seriously awesome product for small projects. I ended up needing to buy two rolls for this project (two dressers), but have most of the second roll leftover for a rainy day DIY.
J**T
Over 2 years later -- still looking great!
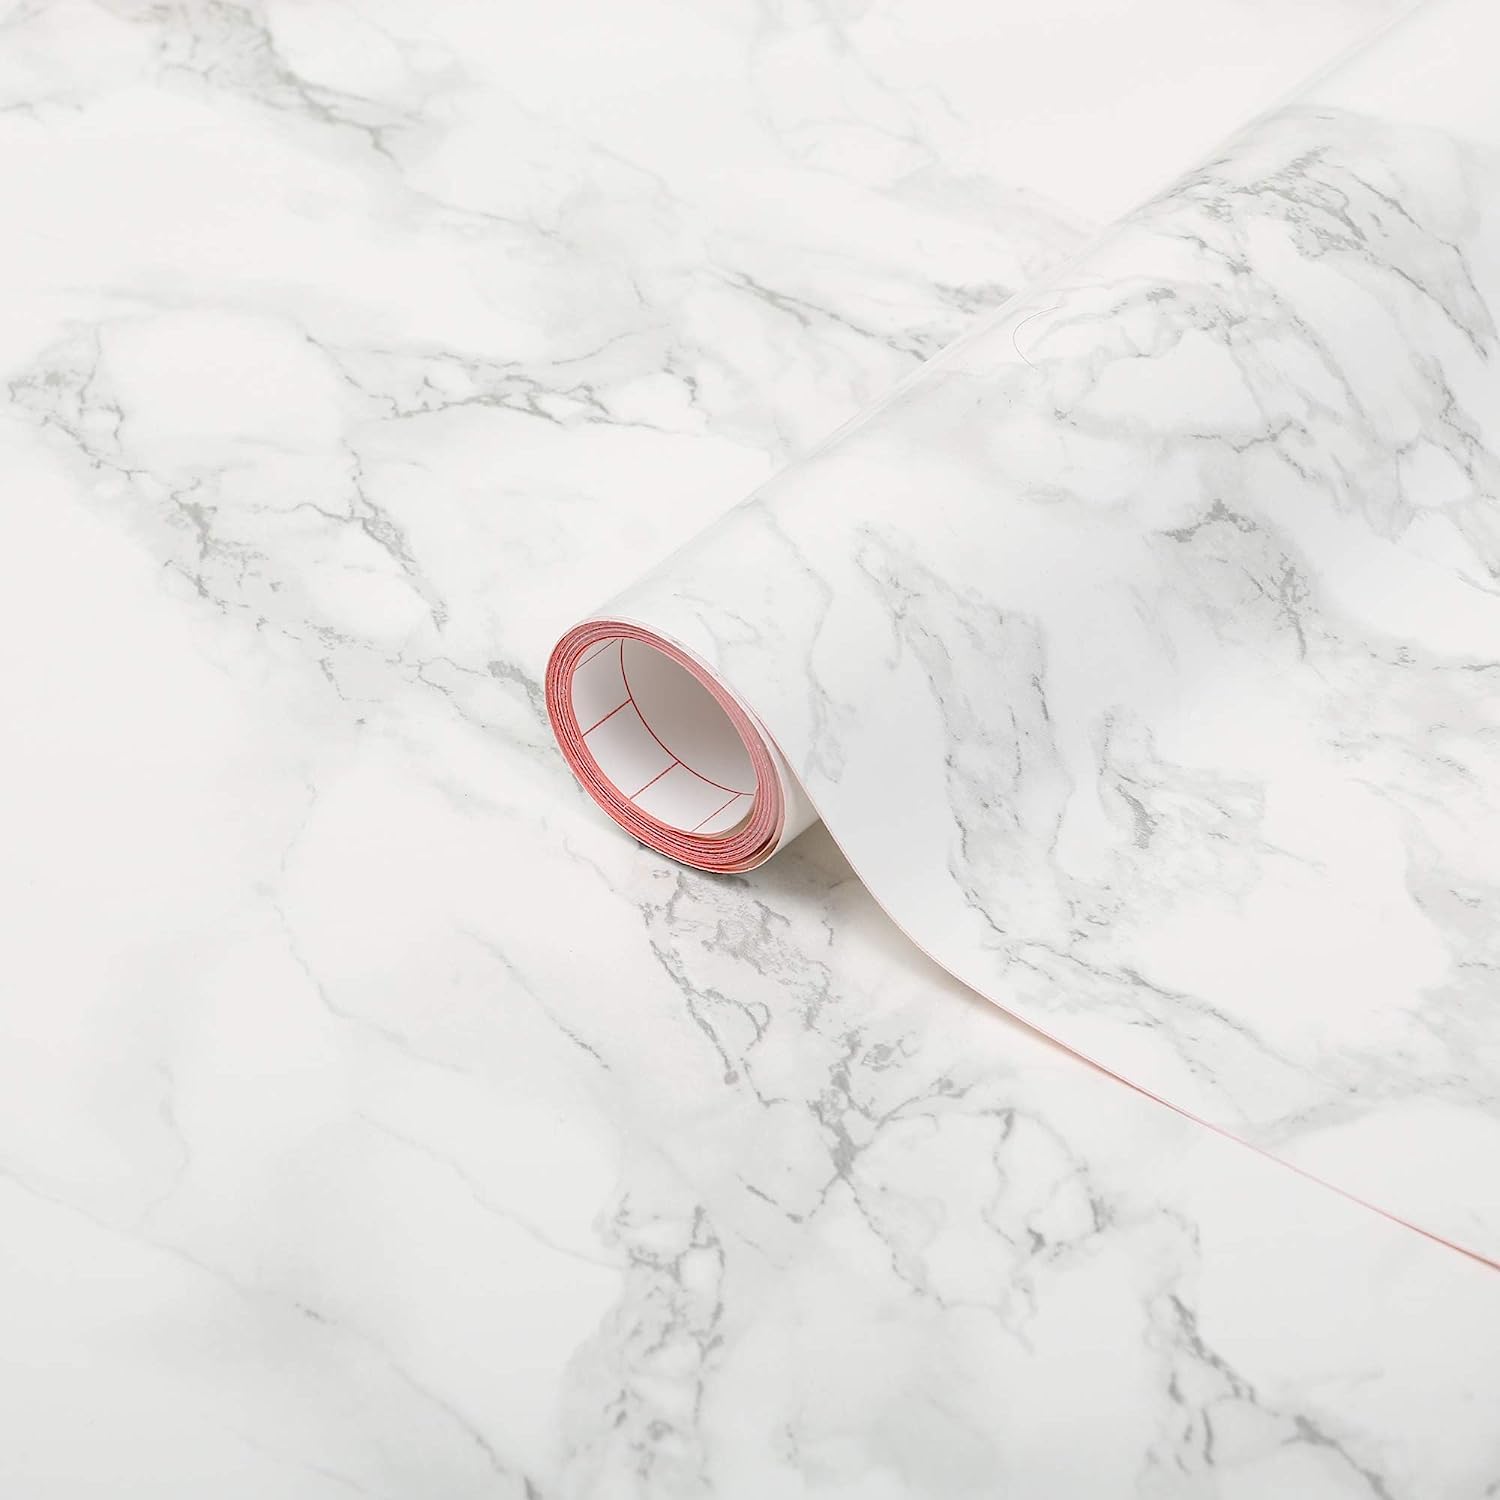
This review is for folks who want to know how well this paper holds up -- in my experience: amazingly well! I applied the paper to my Formica kitchen countertops (see before and after pics) over two years ago. Since then, the paper has not peeled or stained -- it looks like when I applied it. Honestly, I'm shocked. I thought the edges would pop up at some point, but nope, everything has stayed stuck. These counters are pretty high traffic since my kitchen is tiny. To keep the paper nice, I just make sure of a few obvious things: 1) I don't put anything hot directly on it; 2) I wipe it regularly; 3) I keep sharp things away (don't cut stuff on it, duh). The last point I was actually a bit lax on, so I have some superficial scuffs where i dragged a coffeemaker back and forth every day for like a year before I realized I was scratching the paper. The bottom line is, the paper was only meant to be a temporary glow-up until I remodeled my kitchen, but it's held up so well, I'm fine with keeping it and continuing to save money! I won't go in-depth into the application process since many other reviewers have shared tips -- I'll just say I watched a couple Youtube videos and used an Exacto knife and credit card. It was pretty easy, and it turned out really well -- just a few tiny bubbles that I fixed easily. My one minor beef (because I am anal) is that I got two rolls, and I swear one roll had a warm undertone and the other had a cool undertone. No one has said anything or probably even notices, and I stopped obsessing about it as soon as I put down the paper and saw how good it looked compared to mint green laminate (sorry, retro fans). I haven't tried removing it, so can't speak to that. But if you're into the long-term outlook, I say go for it!
P**M
Great way to easily add a marble-look surface
I had originally ordered the d-c-fix adhesive film in Blackwood to redo my bed frame (review here: https://www.amazon.com/gp/customer-reviews/R3N74ZCP6RAIMX?ref=pf_ov_at_pdctrvw_srp) and I loved how it held up. I have a windowsill that I was never happy with because the paint made it hard to clean, especially once I started growing plants -- the dirt often smeared and I worried that spilled water would be missed and cause damage. I had thought about repainting it with a gloss/semi-gloss paint but never got around to it and it occurred to me that I could try the roll of the Grey/Black marble adhesive film that I had purchased with the Blackwood for another project I have planned but never actually got around to starting. Unfortunately, the black veining in the marble was a bit too dark for my liking on a windowsill, so I purchased this grey one instead. I think it was a success and I love it! After redoing my bed, applying the film to my windowsill was mostly a breeze. I ran into issues because the windowsill isn't an exact rectangle, it's more a slight trapezoid, and I misjudged the length I needed so it was short in one corner by a few millimeters. You could definitely tell because the glossy surface of the adhesive and the matte paint contrasted each other. I fixed it somewhat with a little more adhesive film, but this pattern isn't forgiving at all -- unless you manage to match up the pattern it's very easy to tell where you overlap. So far it's done exactly what I want it to do -- cleanup is a breeze and because of it's glossy nature, the shine makes it look like real marble from a distance. Two things give it away when up close: 1) the texture of the windowsill below shows through the film so it's not a smooth marble look and 2) the pixelated look of the marble pattern (the latter of which is why I docked a star.) I applied this in mid December 2019 and it's now almost May 2020 and there's been no warping despite the temperature changes by the windowsill, it looks and feels like I just applied it. I've included photos of before and after the adhesive was applied as well as a comparison with an actual marble tile so that you can see how closely it looks to the real thing. Again, from a distance it looks pretty good, it's only when you get closer can you see the pixelation on the marble print. d-c-fix is now my go-to for decorative adhesive films. I do wish they could improve the marble patterns so it's not as pixelated. Quality-wise, however, the ones I've used are excellent. (edited on 5/22 to add photos)
L**H
HEAVEN SENT
Wow. I LOVE this stuff so much. I was really worried about the reviews, some mentioned pixelation. I didn't see any of that. It applies beautifully with the soap & water spray method but if you're apply it to something where you want to wrap the edges, let the soapy stuff dry out first. If you didn't use liquid to help avoid bubbles, you can just go ahead and wrap the edges anyway. I put this on a painted wood nightstand and my glass/metal desk, both from ikea. I saw someone else did the same thing with their same Ikea desk, so I knew what to expect and it was MORE than I expected. It looks like an expensive marble desk. It's super shiny contact paper, so it definitely looks like real marble. Even on my wood desk it looks like marble! I did both items and still have a few feet left over. My only gripe is that I wish the lines on the back for cutting were solid lines instead of being short lines with breaks. It's annoying to have to get out a ruler to connect the lines. I did not have issues with bubbles, and we even removed it two times and then put it back on cause we messed up and it didn't lose its stickiness. On the glass, I wrapped the edges but it wouldn't stay because of the liquid, so I had to tape the edges on the reverse side, but no one will see it so who cares. This is my vanity, so I will update on the wear n tear. I am putting a thick piece of material on top so that my hair straightener will not melt the vinyl. I'm nervous to see how this stuff will react to cleaning, but I'm so happy with how it turned out! This stuff is inexpensive but it gives great results. I will buy from them again.
Y**W
Looks Like Real Marble
This self-adhesive film is a great way to refresh countertops, shelves, or furniture on a budget. The grey marble pattern looks very realistic and gives a clean, modern touch. It’s easy to cut and reposition during application, and the adhesive holds well without damaging surfaces. I used it on a small desk and some kitchen shelves — it completely transformed the look! Durable, wipeable, and much more affordable than replacing surfaces. Highly recommend for quick, stylish DIY updates!
A**C
Love the paper! Watch YouTube videos first!!
The paper itself is great!! The grid on the back is extremely helpful. My sink only needed 1.25 rolls to complete (probably could have just been one, but I messed up a few pieces and had to discard). As far as the application, watch YouTube videos first!! I should’ve watched more with my type of sink before trying this. All of the videos I saw were for non-sunken, square sinks, if that makes sense. Where I messed up is I cut the paper before getting to the sink and then tried to cut smaller pieces around the sink. DON’T DO THIS!!!!! You can see the lines and it makes it more obvious that it’s fake. Also, because the width of the paper only covered 3/4 of the width of the sink, I thought overlapping the bottom 1/4 with the top 3/4 would make the pattern blend better... DON’T DO THIS EITHER!!!! You can see the overlap! I attached pics to try and show what I mean. Also with the application, I tried using the windex and squeegee method to apply. It worked for the top left corner, but I couldn’t get the bottom/edge part right. Maybe I used too much windex, but the corners kept sliding. I finally just wiped off the windex, cut a new piece, and just laid it using a credit card to press out the air bubbles. It worked but it took MUCH longer than the windex method. Doing the curve into the sink was a bit of a challenge. I watched some YouTube videos and they said to use a hair dryer (blow dryer) to get the plastic to bend. It worked well. I’m going to order another roll and redo. The sink looks good from afar, but up close it’ll drive me mad to stay like that where I can see the lines. What I’ll do differently next time is measure out the paper from the wall to the right edge and cut out holes for the sink and faucet. I’ll get a nice clean layout without att the lines around the sink. Also, I will not overlap the bottom part to avoid those lines too. The whole thing took me two hours, but my method was not very efficient. When I redo, I will update my review with pics and how much time it took. I will say I am the most DIY-inept person on the planet, so if I can do this (once I try again lol), you can too!
C**N
It's a just ok product
I'm really obessed with marble and bought this to jazz up a few pieces of small furniture (night stand and coffee table top). The unfortunate thing about this product is the adhesive. It's not strong - the paper was even coming off the backing before I started using it. This makes difficult to cut and measure accurately. It leaves a lot off bubbles (most can be worked out) and tears at edges that you place it over. As tip. I would recommend cutting a piece a bit larger and placing heavy objects on it for a few days to make sure it stay flat during application. With all that being said, I only purchased this product for 7 dollars and was not expecting high quality. I think the quality of the print is good and from a distance it is very striking. All in it looks alright, and did what it was supposed to do despite some of its flaws.
A**A
Made my counter tops not suck so much.
Used this on my kitchen counters. I have tile countertops, which have lots of creases in them (both between tiles and on tiles themselves). They're annoying. So,I figured I'd try this as a way to cover the ugly tile and make them easier to clean until I save up for new counter tops. This did the trick. Putting it down was easy - definitely didn't take me more than an hour for all of the counter tops, including cleaning etc beforehand. Air bubbles are annoying, and I had a problem with them, but I think that was because the creases in the tile let air get trapped easier. If I had flat counter tops, I don't think I'd have had that issue. Important notes: if these are not wide/long enough for your counter top, you will have to use sheets next to one another, and they DO NOT line up. The pattern does not have an easy to find connecting point. So, consider that. I didn't mind it much. I suggest using a blowdryer on it (not too much) after you're finished so that the heat will shrink it a little closer to your counters. This was very helpful in getting it to stick into the creases and reveal any annoying bubbles. It's best to work bubbles out with something like a credit card while the film isn't all the way on, but if it's too late for that, pop them very carefully with a pin and it shouldn't be too noticable. Obviously avoid putting anything hot (pots) on this, because it will probably melt onto it. I've had it down for a few weeks now. It's white, so I expected it to stain easily, but so far I only have one little red mark from tomato sauce that was sitting for several hours. Red gatorade spilled and wiped off easy, tomato sauce that was cleaned off before drying didn't stain at all. I have it all around my kitchen sink and I haven't had much trouble with water getting underneath it. I would recommend using a clear caulk to seal down the edges if you're worried. Watch some videos about applying it before doing it yourself - it'll help with getting an easy idea of how to do it.
A**.
Nice quality, easy to use
Nice one, it was very easy to use, I used it to cover the ikea table to make it look a bit different . Very nice, definitely recommend !
R**A
El vinilo mejor del mundo
Como bien dice el proveedor es impermeable, y de verdad que lo es, yo lo tengo en el suelo de una terraza que ha consecuencia de las lluvias torrenciales que estamos teniendo se ha inundado dos veces y el vinilo ha estado bajo el agua y como si nada ni se despega , estoy maravillada de este vinilo, puedes hacer de todo encima de él que no le pasa nada.
N**E
Papier adhésif DCfix
Facile à poser et repositionnable . Prendre le kit de pose qui facilite le lissage. Très bon rendu. Je recommande .
C**3
Sticky back vinyl covering for a multitude of uses.
bought for grand-daughter to cover desk shelf in room - she did it herself and it looked great. Good product and good price.
J**Z
Producto muy deficiente con mala relación calidad precio.
Aspecto exterior bueno, pero el pegamento de la lámina es de pésima calidad. Resulta imposible pegarlo a un panel de madera teniendo que utilizar otro adhesivo adicional.
Trustpilot
1 month ago
2 days ago