

🔥 Upgrade your heat game with precision and style!
The Honeywell TH1100DV1000 Pro-Digital 2-Wire Heat Only thermostat is a battery-powered, backlit digital thermostat designed for simple, reliable heat control. It replaces older analog two-wire heat-only thermostats with precise temperature management from 40°F to 90°F, featuring easy installation, ambient temperature display, and built-in compressor protection. Ideal for professionals seeking a minimalist, efficient heating upgrade.

| ASIN | B00H6ARNXO |
| Backlight | Yes |
| Batteries | 2 AAA batteries required. |
| Batteries Included? | No |
| Batteries Required? | No |
| Battery Cell Type | Alkaline |
| Best Sellers Rank | #11,245 in Tools & Home Improvement ( See Top 100 in Tools & Home Improvement ) #13 in Home Nonprogrammable Thermostats |
| Brand | Honeywell |
| Color | White |
| Connectivity Protocol | BACnet MS/TP |
| Connectivity Technology | Wi-Fi |
| Control Method | Remote |
| Control Type | Button Control |
| Controller Type | Push Button |
| Customer Reviews | 4.6 4.6 out of 5 stars (3,420) |
| Date First Available | October 11, 2010 |
| Display Type | Digital |
| Finish | Matte |
| Finish Type | Matte |
| Global Trade Identification Number | 00085267133852 |
| Included Components | Thermos |
| Is Discontinued By Manufacturer | No |
| Item Package Quantity | 1 |
| Item Weight | 7.3 ounces |
| Item model number | TH1100DV1000 |
| Manufacturer | Honeywell |
| Material | Plastic |
| Model Name | TH1100DV1000 |
| Mounting Type | Wall Mount |
| Number of Batteries | 2 AAA batteries required. |
| Part Number | TH1100DV1000 |
| Pattern | Solid |
| Power Source | Battery Powered |
| Product Dimensions | 4"D x 5"W x 6"H |
| Screen Size | 1.5 Inches |
| Shape | Rectangular |
| Size | 1 Pack |
| Special Feature | Temperature Display |
| Special Features | Temperature Display |
| Specific Uses For Product | Electric Baseboard Heater |
| Specification Met | UL, BACnet MS/TP |
| Style | Modern |
| Temperature Control Type | Heating |
| UPC | 085267133852 |
| Voltage | 230 Volts |
| Warranty Description | No warranty. |
M**U
The best upgrade you can do for your trailer
Works perfectly as a replacement for the manual two-wire factory thermostat. Easy to install. Only works for controlling your furnace not for combination ac/heater thermostats!! Very glad I did this replacement because the switch to turn the factory unit on/off was so tight it hurt my finger plus its spring was very iffy for setting the temperature. During the winter I keep the furnace turned on but the thermostat set at 35 degrees (which is its lowest setting) so it will kick on only when temps get close to freezing. Went thru a winter season winterized once so far and it used just a little propane from one of my tanks since our winters aren't very bad. YMMV.
S**S
An excellent choice for replacing older verticle shaped heat only analog thermostats
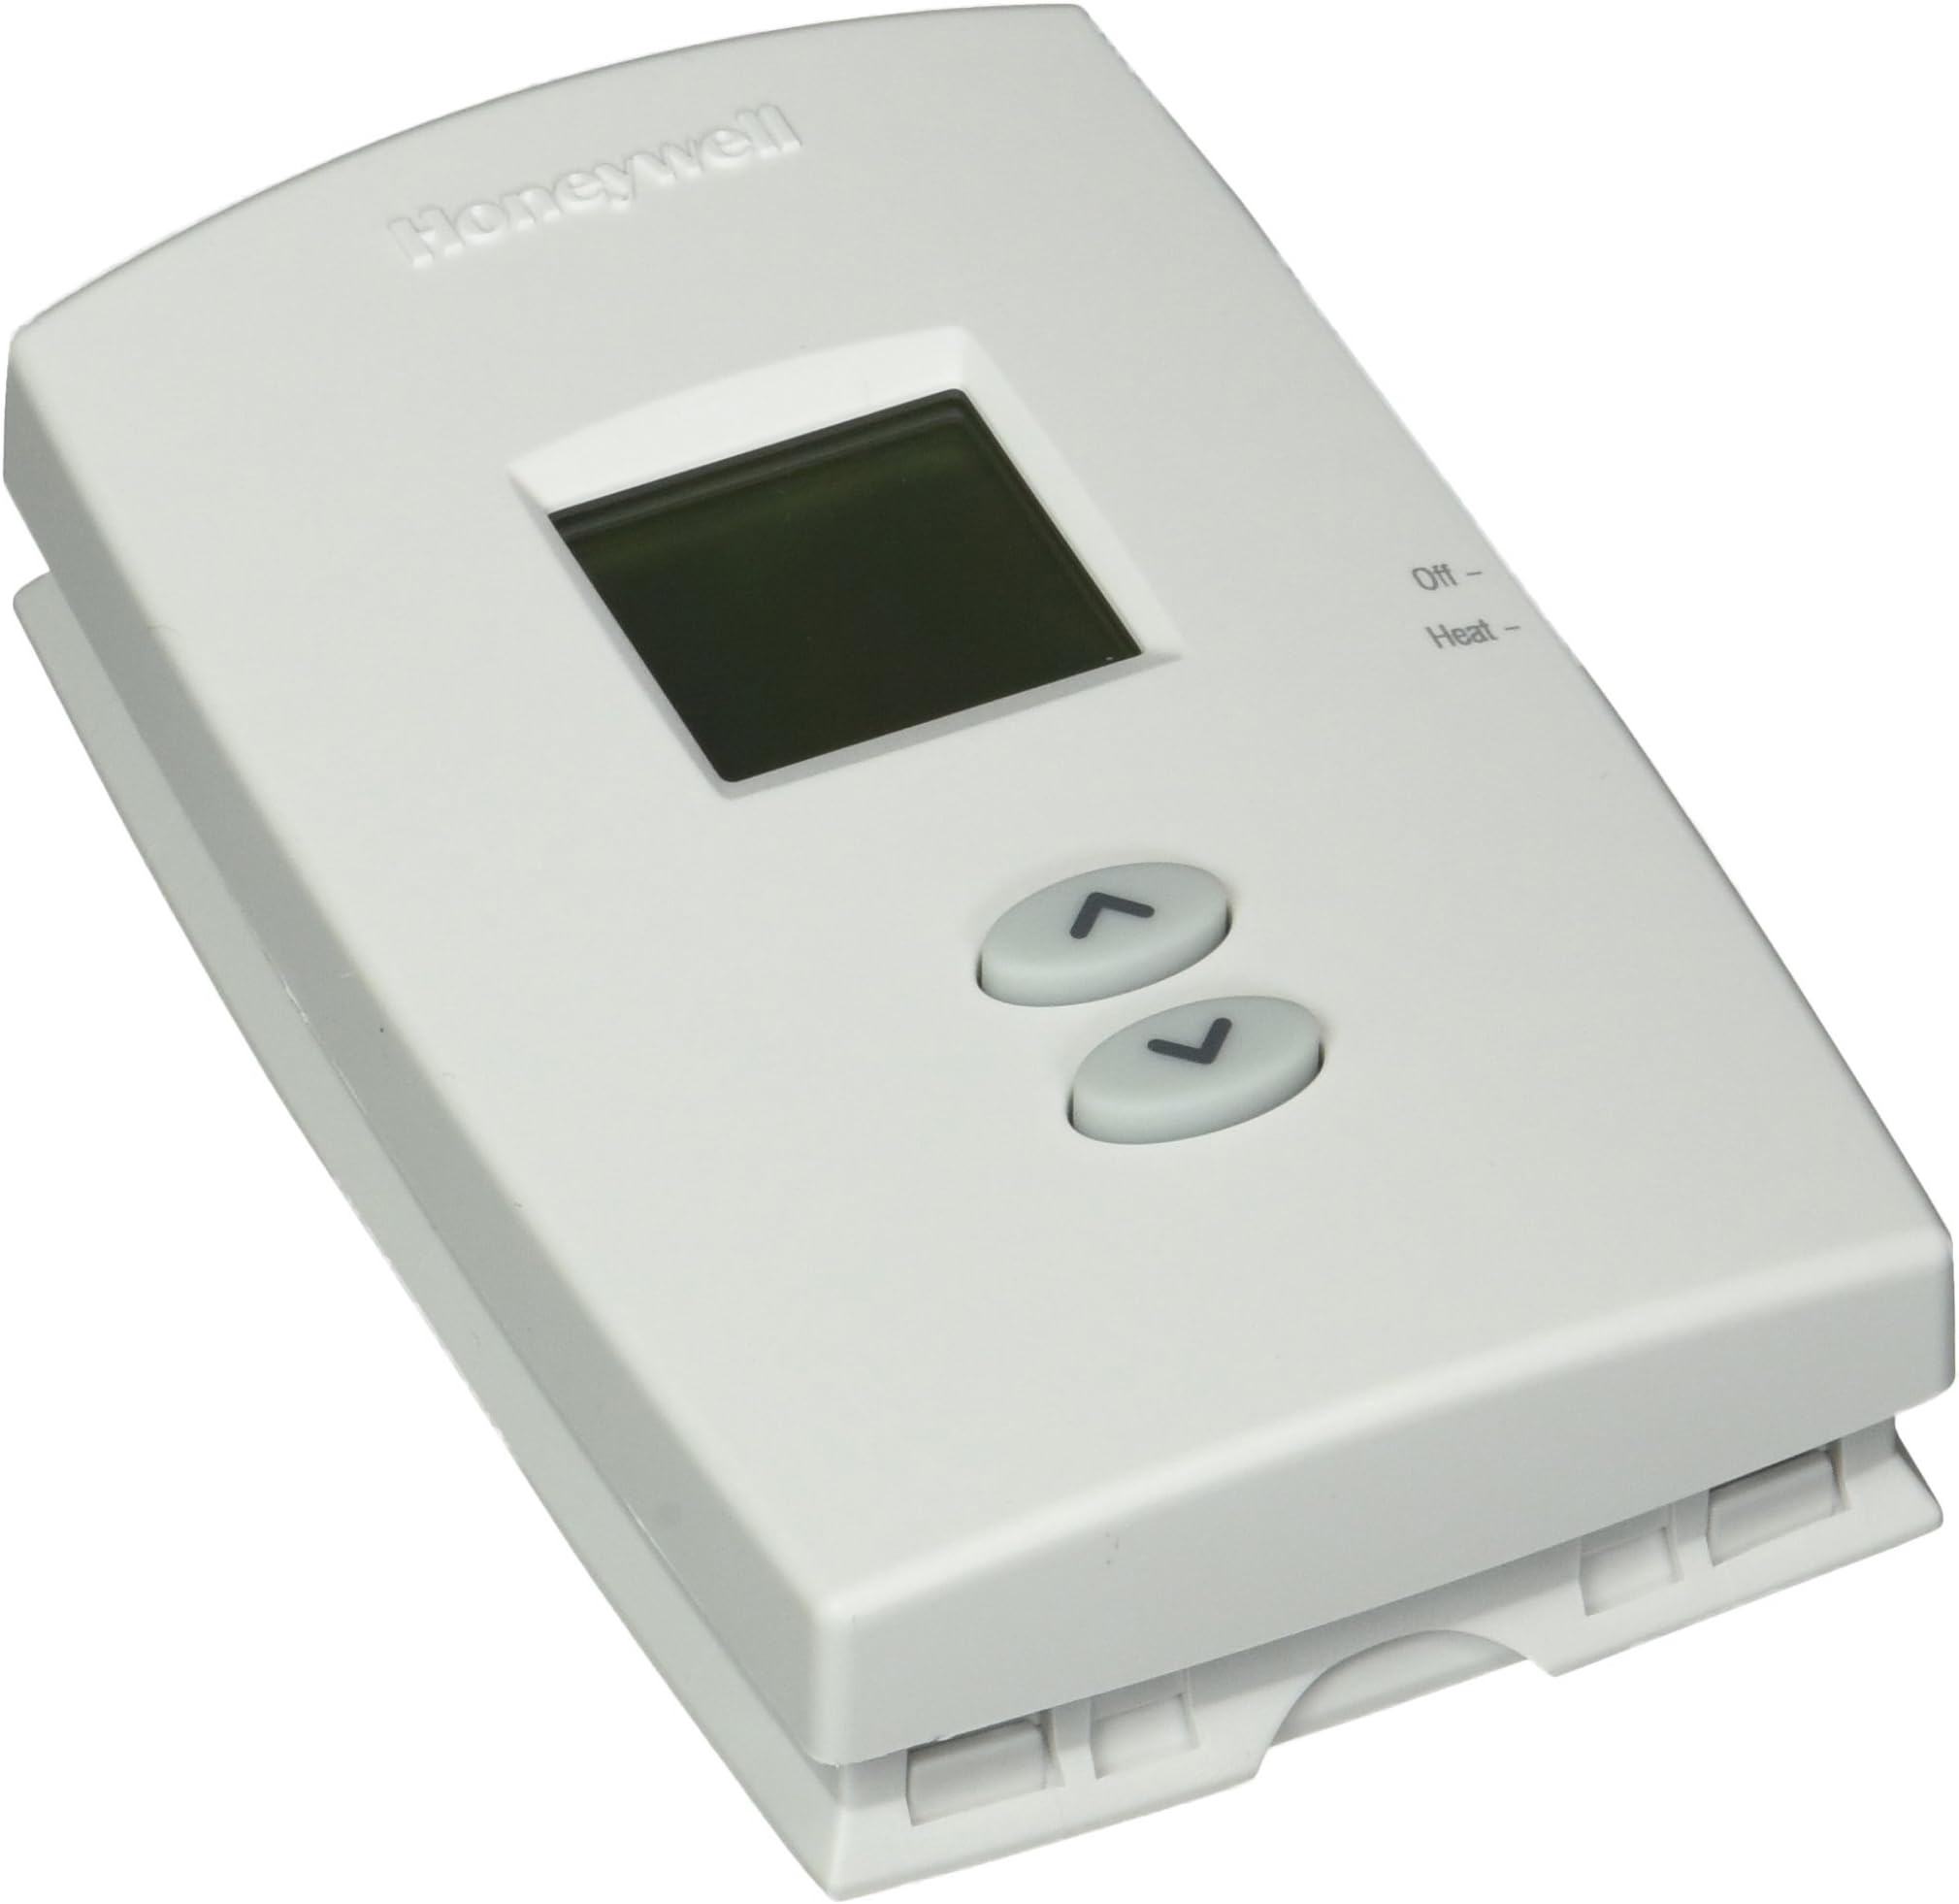
This Honeywell TH1100DV1000 Pro Digital Heat only thermostat replaced a more than fifty year old General Controls brand model T-80 analog thermostat that wasn't reliably controlling an old natural gas "gravity" furnace. The old analog thermostat wasn't reliably turning the furnace on or off. It would often fail to turn off the furnace within a reasonable range of the set temperature. More often than not it would fail to turn the furnace on at all regardless of the set temperature. The natural gas furnace and the thermostat had been serviced and checked several times in the past by a HVAC technician who indicated that everything seemed to be working ok but for whatever reason my experience was that it was not reliably turning on. Before I removed the old analog thermostat I used a digital multi-meter to read the voltage and polarity of the heat only system and used red and white colored electrical tape to wrap and mark the two wires. I measured 450 millivolts DC and marked the positive side wire as red and the other wire as white. I removed the old vertical shaped metal cased thermostat and this new vertical digital thermostat back plate fit exactly over where the old thermostat had been so I did not have to paint, patch or cover any unsightly difference for the new thermostat wall plate. I was also able to re-use the older wall plate screws to mount the new wall plate. I did notice that the hole behind the thermostat wall plate was a few inches high and and inch wide. I had read that a large hole behind the wall plate can cause cold wall drafts that can negatively effect thermostat temperature readings. I used strips of thick extra sticky Gorilla (restricted trade mark) brand tape to cover that large opening and cut small holes for the two wires and wall plate screws. I connected the two wires to R for red and W for white (C was not used for my two wire millivolt system) onto the wall plate wire junction according to the simple instructions provided in the new thermostat booklet, placed the included AAA batteries into the new Honeywell thermostat (required for a millivolt heat only system) and I pushed it over the plastic wall plate. I left the new digital thermostat's advanced settings as default. I turned the simple switch to Heat On and set a temperature for testing. The final result is that this new Honeywell digital thermostat is working perfectly. The natural gas furnace turns on and off when it should. The furnace now cycles as needed to maintain the temperature within one degree of the set temperature. It doesn't overheat or under heat like the old analog thermostat used to do. I really like the minimalist non-programmable, single switch, heat only design. The only decision I had to make was what temperature to set on my new digital thermostat. In conclusion this is an excellent choice for anyone looking to replace newer or older two wire heat only analog thermostats. Notes: I purchased this thermostat from Filter Pro, Fulfilled by Amazon. Filter Pro was great.Their delivery was fast and on time. I ended up changing the cycle rate in the advanced settings mode (using the simple directions) from the default of "5" CPH to "4" CPH. The cycles per hour setting or CPH tries to adjust how many times the heating system is supposed to cycle on and off every hour. CPH is usually optimized for each type of heating system to improve the heating efficiency and energy usage. Even analog thermostats utilize a type of predictive CPH setting. For many basement gravity heating systems in larger homes the CPH recommendation can be as low as "1" or "2" because older gravity heat systems usually require a longer time for the entire system to heat up and for the heat to dissipate into the entire house. However it depends on the size of the home, size of the gravity heater system, how well the home is insulated, seasonal cold outdoor temperatures, etc.. For my smaller and poorly insulated one story home with a smaller gravity heat system a CPH of "3" or "4" seems to work best. You can refer to the included instruction booklet and test what setting works for your home (it's very easy to change it) or contact Honeywell or your local HVAC technician for recommendations on the CPH setting for your home and heating system.
B**.
Worth the money
Easy to hook up and works flawlessly. Great buy if you need something just for heat.
M**D
Easy to Use
Easy to use thermostat that shows the temperature of the room at all times. It also shows when the heater is on. The only issue that we have with this thermostat is that it is in our bedroom and when the heat kicks on and off , you hear the thermostat relay make a noise. My crazy ears hear it at night sometimes clicking on and off. If this was in the main part of the house like it should be, the noise would not be an issue. Thank You
P**R
Good product
Works great!
M**O
Simple to install, included basic instructions that make more sense
I had upgraded the old mercury type thermostat in our mother’s place last year to a smart thermostat. I would have preferred to do that at our home however due to age, construction type and lack of any affordable means to connect a C-wire I ended up going with this basic digital thermostat instead. As said we have a very old home that has steam heat type radiators. We can easily get down to -40F during the winter here and continuing to use the old mercury type thermostats, we have four, was costly let alone wasteful. That is why I decided to make the change before we get into the coldest winter months. The units arrived with batteries and mounting screws included. However there was no tool to tighten/loosen the internal wire post connections. Thankfully I have a set of wrist watch screw drivers that due to their small size worked out well. **FYI you need a small flathead screw driver to install.** First open the thermostat housing. To do so place your thumb or finger in the lower portion where there is a curved ‘cutout’ and then gently pop that end out and up. Next to get the upper portion to release, and do not overly force this, but on the upper rear portion you will see a small inset clip. Again gently pry that back and then the upper section comes right out. Once both sections are apart you will see the slot for the batteries, go ahead and insert both. There should just be two wires connecting to your old thermostat. Disconnect both BUT be careful not to allow them to touch each other or let your fingers make contact with both at the same time. While it isn’t a lot of voltage you will feel the minor jolt if you make accidental contact. You only need to concern yourself with just two of the connection screws inside. The one labelled “R” and the one labelled “W.” the positive wire slides into the R while the ground/negative goes into the W slot. The screws that hold the wires securely to the thermostat can be tricky to tighten down and hold the wires securely. I had two units that took several attempts before they held tight. I mention this as the casing for these is plastic so try not to over tighten them as you could risk cracking that plastic around them. So don’t be surprised if when you go to screw the back plate to the wall and a wire comes out and you need to reinsert and tighten it again. Then use the two included screws and mount the back plate to the wall where your previous thermostat was. Make sure you have the plate facing the proper direction. If you flip it or reverse it then your digital display will be flipped as well. Once that’s done carefully try to line up the pins and corresponding sockets on both the front and back sections of the thermostat. Then gently press the front onto the back section. If lined up it should just snap into place. FYI it is simple to do and you know if it isn’t aligned quite right if you need to apply too much force. Just eyeballing it does the trick. Once snapped together on the upper right side you’ll see the switch which reads off and heat. These all ship with that switch set to off. Move the switch to the heat position and then adjust the temperature to what you want. The display always defaults to showing you the room air temperature unless in the process of changing the ‘on’ temperature then it automatically switches display modes and shows you the temperature you are adjusting. It then goes back to showing current room temperature a second or so after being adjusted. As to accuracy I found that it is within a half degree or less to that shown on the display compared against another digital thermometer I used to test out with e.g. thermostat shows 65F while my thermometer read 65.3F. We tested this out last night as we got down to 24F overnight and everything worked out perfectly. I would suggest getting some AAA lithium batteries and use those if possible instead relying on the generic alkalines that come with. Doing so should give you a couple of years before needing to replace them instead of a few months or at most a season. Other than a minor amount of difficulty getting wires to hold securely to the screw posts I have nothing negative to say about these units other than the unnecessarily confusing instructions. Otherwise these really are simple to install. Just two wires, two batteries and two screws and a bit of common sense. Just don’t forget you’ll need a small flathead screwdriver. Even someone with zero experience putting things together shouldn’t have any problem putting this into place. I am extremely happy with ours and wouldn’t hesitate to get these if needed again.
L**T
Easy to install Bd works great. I use it for my gas fireplace
T**E
Bought this for my Travel Trailer. It works great compared to the old mercury switch model. A few degrees off but that is not a big issue. Even though it is not designed for 12 volt system, it does a great job. This is second season for it and still going strong.
T**T
Second time I’ve replaced the basic rv style propane furnace control. Nice upgrade. Simple 2 wire setup.
B**N
Works good but wish it was in Celsius instead of Fahrenheit
A**R
Easy to install I upgraded the old gas fireplace thermostat to this one Very straight forward
Trustpilot
2 months ago
1 month ago