Buy anything from 5,000+ international stores. One checkout price. No surprise fees. Join 2M+ shoppers on Desertcart.
Desertcart purchases this item on your behalf and handles shipping, customs, and support to Thailand.
💡 Illuminate your space, command attention.
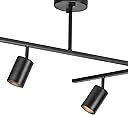
The Globe Electric 59829 64" 6-Light Track Lighting fixture features a matte black finish and a center swivel bar with six adjustable heads, offering highly customizable directional lighting. Compatible with GU10 base bulbs (LED or halogen) up to 50W each, it is fully dimmable with a compatible switch (sold separately). Ideal for kitchens, studios, and large rooms, this semi-flush mount fixture combines modern industrial style with versatile, efficient illumination.


| ASIN | B08NTSMR17 |
| Best Sellers Rank | #59,198 in Tools & Home Improvement ( See Top 100 in Tools & Home Improvement ) #17 in Complete Track Lighting Kits |
| Brand | Globe Electric |
| Brand Name | Globe Electric |
| Brightness | 3000 lumen |
| Bulb Base | GU10 |
| Color | Matte Black, West |
| Control Method | Remote |
| Controller Type | Push Button |
| Customer Reviews | 4.4 out of 5 stars 778 Reviews |
| Efficiency | Highly Efficient |
| Finish Types | matte |
| Fixture Type | Non Removable |
| Included Components | Track Light Kit; Mounting Hardware; Instruction Sheet |
| Indoor Outdoor Usage | Indoor |
| Installation Type | Semi Flush Mount |
| Item Dimensions L x W x H | 4.8"L x 64"W x 14"H |
| Item Type Name | Globe Electric 59829 West 64" 6-Light Track Lighting, Matte Black, Center Swivel Bars, Adjustable Spot Light Fixture, Flex Track Lighting, Flexible Light Heads And Arms, Interior Track Lighting |
| Item Weight | 5.72 Pounds |
| Light Color | warm white |
| Light Fixture Form | Track Light Head |
| Light Output Maximum | 3000 Lumens |
| Light Source | Halogen |
| Light fixture form | Track Light Head |
| Lighting Method | LED |
| Manufacturer | Globe Electric |
| Manufacturer Part Number | 59829 |
| Manufacturer Warranty Description | No warranty. |
| Material | Metal |
| Material Type | Metal |
| Model Name | West |
| Model Number | 59829 |
| Mounting Type | Ceiling Mount |
| Number of Items | 1 |
| Number of Light Sources | 6 |
| Other Special Features of the Product | Matte Black, 6 Lights, Swivel Bars, Dimmable, Adjustable Track Heads |
| Power Source | Hardwired |
| Recommended Uses For Product | Indoor, Decorative, Functional |
| Required Assembly | No |
| Room Type | Kitchen , Living Room |
| Shade Color | Black |
| Shade Material | Metal |
| Shape | Round |
| Size | 64" |
| Specific Uses For Product | Interior Lighting, Hallway Lighting, Kitchen Lighting, Hallway Ligthing |
| Style | West |
| Style Name | West |
| Switch Type | Push Button |
| UPC | 058219598290 |
| Unit Count | 1.0 Count |
| Voltage | 120 Volts |
| Water Resistance Level | Not Water Resistant |
| Wattage | 50 watts |
S**A
Beautiful modern looking!
Love how it looks! > Doesn't come with light bulbs so make sure you get 6 GU10 50watts bulbs. >The brightness depends on the bulbs you decide to get Installing: >You will need some help. Someone to hold one end while the other connects. So 2 ladders or something high enough for your helper. > Installing the light bulbs is a bit tricky since there's no space. But be patient. Match the probes and turn to lock it. Other than that we absolutely love the track light. Value for money Sturdiness is 👍 Performance is great with the desired light bulbs >Adjusting the hanging string was a bit confusing but you twist the bottom of the fat screw that's feeding the string, pull up to shorten and to release the string you push on the bottom little nipple and it releases. Hope this helps!
D**E
Great light!
We bought this light to use in our kitchen. It fit perfectly and looks great. We did buy high output led lights for it to get maximum light output and it has been awesome. Super easy to install and looks great!
D**B
Love!
This light was the perfect addition to my kitchen space. Plenty of light and im able to focus it right where I need it. I added 4,000k lights and it's perfect. I didn't have much of issue inserting my bulbs with the suction piece included. Definitely put them in before you install. The fixture itself has a nice build save for the middle connecting piece. It droops ever so slightly in the middle. Not enough to be noticeable to the naked eye. The installation process was fairly straightforward. I had some issues connecting the base to my junction box but that is a problem with my landlord special build than the light. Ideally this should be a two person installation but I was able to install it by placing the fixture on my shoulders. With no fitting issues, this could easily be installed in about an hour and change. I was nervous based on reviews that there were two black wires instead of a black and white wire shown in the installation video on YouTube. When I opened up the box I was pleasantly surprised to see the wires labeled. If you don't understand which wire goes to which wire in your ceiling, you honestly shouldn't be installing anything. All in all I'm a happy camper.
A**S
Nice light
I have installed quite a few lights and this one initially gave me a run for my money. From start to finish it took me 1 hour. Yes you can install by yourself but trust me when I say it's the workout you never knew you were getting ready to have. I chose to connect my wires (ground and black wires) first before hanging the support cable. I did use an anchor for the support cable for a really secure connection. The light is pretty light so I was able to support on my shoulder while I worked with my hands. The main pain points for me; 1. Getting the screws through the holes of the base cover. I had to adjust the screws to extend down lower, otherwise I wouldn't have been able to put on the decorative cover caps. Be sure to leave a nice length of the screw out to account for the space you will need to screw the black caps on. 2. Initially installing the light bulbs. After watching a YouTube video the bulbs were pretty easy to install. Gently push in and you can tell once the bulb has linked into place and once it does turn clockwise and it is secure. I got the bulbs in with no problem after about 5 minutes. Although it was fairly easy to install the bulbs I could think of 99 other things I would rather do, so I purchased LED smart bulbs which should last me about 5-7 years. 3. Instructions are horrible. I also had to YouTube the instructions which were very detailed. If I didn't see that video I would have returned the light. Overall I really like the light so far. It is very secure to my ceiling and I am happy with the purchase. Lots of light, you will surely see everything, but with the smart bulbs I can adjust as needed. Because of the way my junction box is off centered, this is the type of light that worked best for the length of my kitchen.
B**.
Great! Nice and big.
A rare find: lots of positionable e26 sockets in one fixture. Looks good and very functional.
R**S
Difficult to install, but here is what I found and I installed it BY MYSELF!
I bought this fixture because it was end fed, not center fed like most. I needed to replace a failing low voltage track light that had intermittent connections. So here is what I found out. 1. Put the lamps in while the fixture is down, on the floor or a table. It is much easier than after the fixture is up. The manufacturer supplies a worthless suction cup gizmo, it doesn't work if the face of the bulb is textured. I made a loop out of painter's tape, just long enough to get a couple fingers in, then locating the prongs of the lamp into the socket, then a push down and twist secures the lamp. I used the Philips Bright White 3000K lamps, very satisfied. The Philips lamps cost a bit more, but I think they are worth the money. 2. If you are brave and can be safe, plug the 2 black wires into an extension cord, then plug the cord in, verifying all of your lights work. Be careful and make sure the fine wire strands don't touch the other wire. 3. Remove the mounting plate and secure it to your junction box. There are slots and holes for many different configurations, get this on correctly before proceeding any further. Next assemble the fixture's adjustable height rods to the desired height and tighten these up securely by hand. 4. All the other reviews say you need help to put this up. I put mine up by myself and here is how i did it. First, carefully measure the distance from the center of the height rods to the center of the wire hanger on the opposite end. Be careful and measure twice; on the 6 lamp it was 43-3/8". Now measure from the center of your electrical junction box that distance and locate the hanger wire mounting. Once that mount is up, then you can attach the fixture from that end and proceed to the junction box end. First attach the stranded ground wire; it goes between the 2 washers on the green screw, the building ground wire goes between the upper washer and the plate. DO NOT USE WIRE NUTS FOR THE GROUND; YOUR FIXTURE MAY NOT BE GROUNDED! With the ground wire secure and holding the junction box end up, attach the hot and neutral; the two black wires from the fixture can go on either wire. Now try to get the junction box cover on. You may need to twist it a bit for the holes to line up with the mounting plate. If the fixture it drooping too much, leaving it hanging by the wires and adjust the hanger wire raising the fixture a few inches, then get the junction box cover on and the decorative nuts on and tight. Finally put a level on the fixture and adjust the fixture for the final level position.
B**G
Great for corner areas and transitioning ceiling heights
Old flush ceiling light didn't light up hallway enough. Also needed more light into the adjoining room. With a little DIY when it came to mounting the main post/base, it worked perfect. Freshened up look and provided plenty of light. Being able to adjust crossbars and articulate lights let you fine tune direction and amount of light. For our case, not only was it a corner area but the height difference in the ceiling was ~11in. To get more clearance and easier install, we used the old bezel with it's spring attachment and a picture frame. Removed lens and bulb from old light mount. Painted bezel black. Removed glass and backing of pic frame and screwed onto bezel. Screwed on light fixture base to revised mount and hooked up existing wires. Then mounted secondary small post to ceiling and level by adjusting wire hanger. Note: required 2 people to mount onto ceiling. One end needs to be held in place while the other is being worked on.
A**L
Great Farmhouse Style light!
Love this light! It worked perfect for needing a long light but something that doesn’t come far off of the ceiling! Easy to install and put together! Modern farmhouse vibes
T**S
Great Light Fixture
I really like this lighting. It did a great lighting the sink, stove, and prep area in my kitchen. One thing I really liked about the fixture is that the post from the ceiling (at least in my case) came in two pieces which screwed into each other. This allowed me to take 3 inches off the drop from the ceiling by removing one of the post pieces. This ability was not included in the marketing documentation nor the instructions. I was worried (rightly) that the lights would drop to low and be in the way of the cupboard doors opening and closing. Taking these 3 inches off solved that problem and actually makes the fixture more attractive by allowing it to hug closer to the ceiling. With that said, this fixture does have a minor negative. It is really hard to get the lights in and out of the fixture. It ships with a suction cut for bulb install and removal which was absolutely useless for the LED bulbs that I had.
X**.
Lo que quería!
Tenía tiempo buscando una lámpara de techo con estás características y a pesar de haber visto varias me alegra haber elegido está porque es el tamaño que quería, las características que se pueden mover los spots y la forma en la que se empotra usando la misma instalación donde previamente había un socket normal. El armado fue muy sencillo, lo complicado o más bien incómodo fue la instalación en el techo. Primero porque debes estar bien seguro en donde vas a poner el perno que va a sujetar el cable y que quede bien alineado para que no se vaya a ver chueco después y segundo porque definitivamente es IMPOSIBLE instalarlo sin ayuda. Necesitas a otra persona que esté sujetando la lámpara mientras haces la instalación eléctrica y después la dirección del otro extremo. En nuestro caso solo contamos con una escalera y era muy difícil que una persona estuviera sujetando y la otra instalando. Así que lo ideal sería que tvieras al menos dos escaleras Fuera de eso repito fue justo lo que quería y se ve hermoso y moderno en mi sala
E**E
Easy to install. Beautiful lighting.
This looks absolutely gorgeous and it is very easy to assemble and install if you are comfortable with wiring procedures.
C**.
Beautiful piece, easy install
Super easy to install, quick and affordable way to totally update a room. I put this light fixture in my kitchen and I absolutely love that I can point each individual light exactly where I want It.
C**N
Superbe !
Fonctionne très bien et beau look !
Trustpilot
3 weeks ago
2 weeks ago