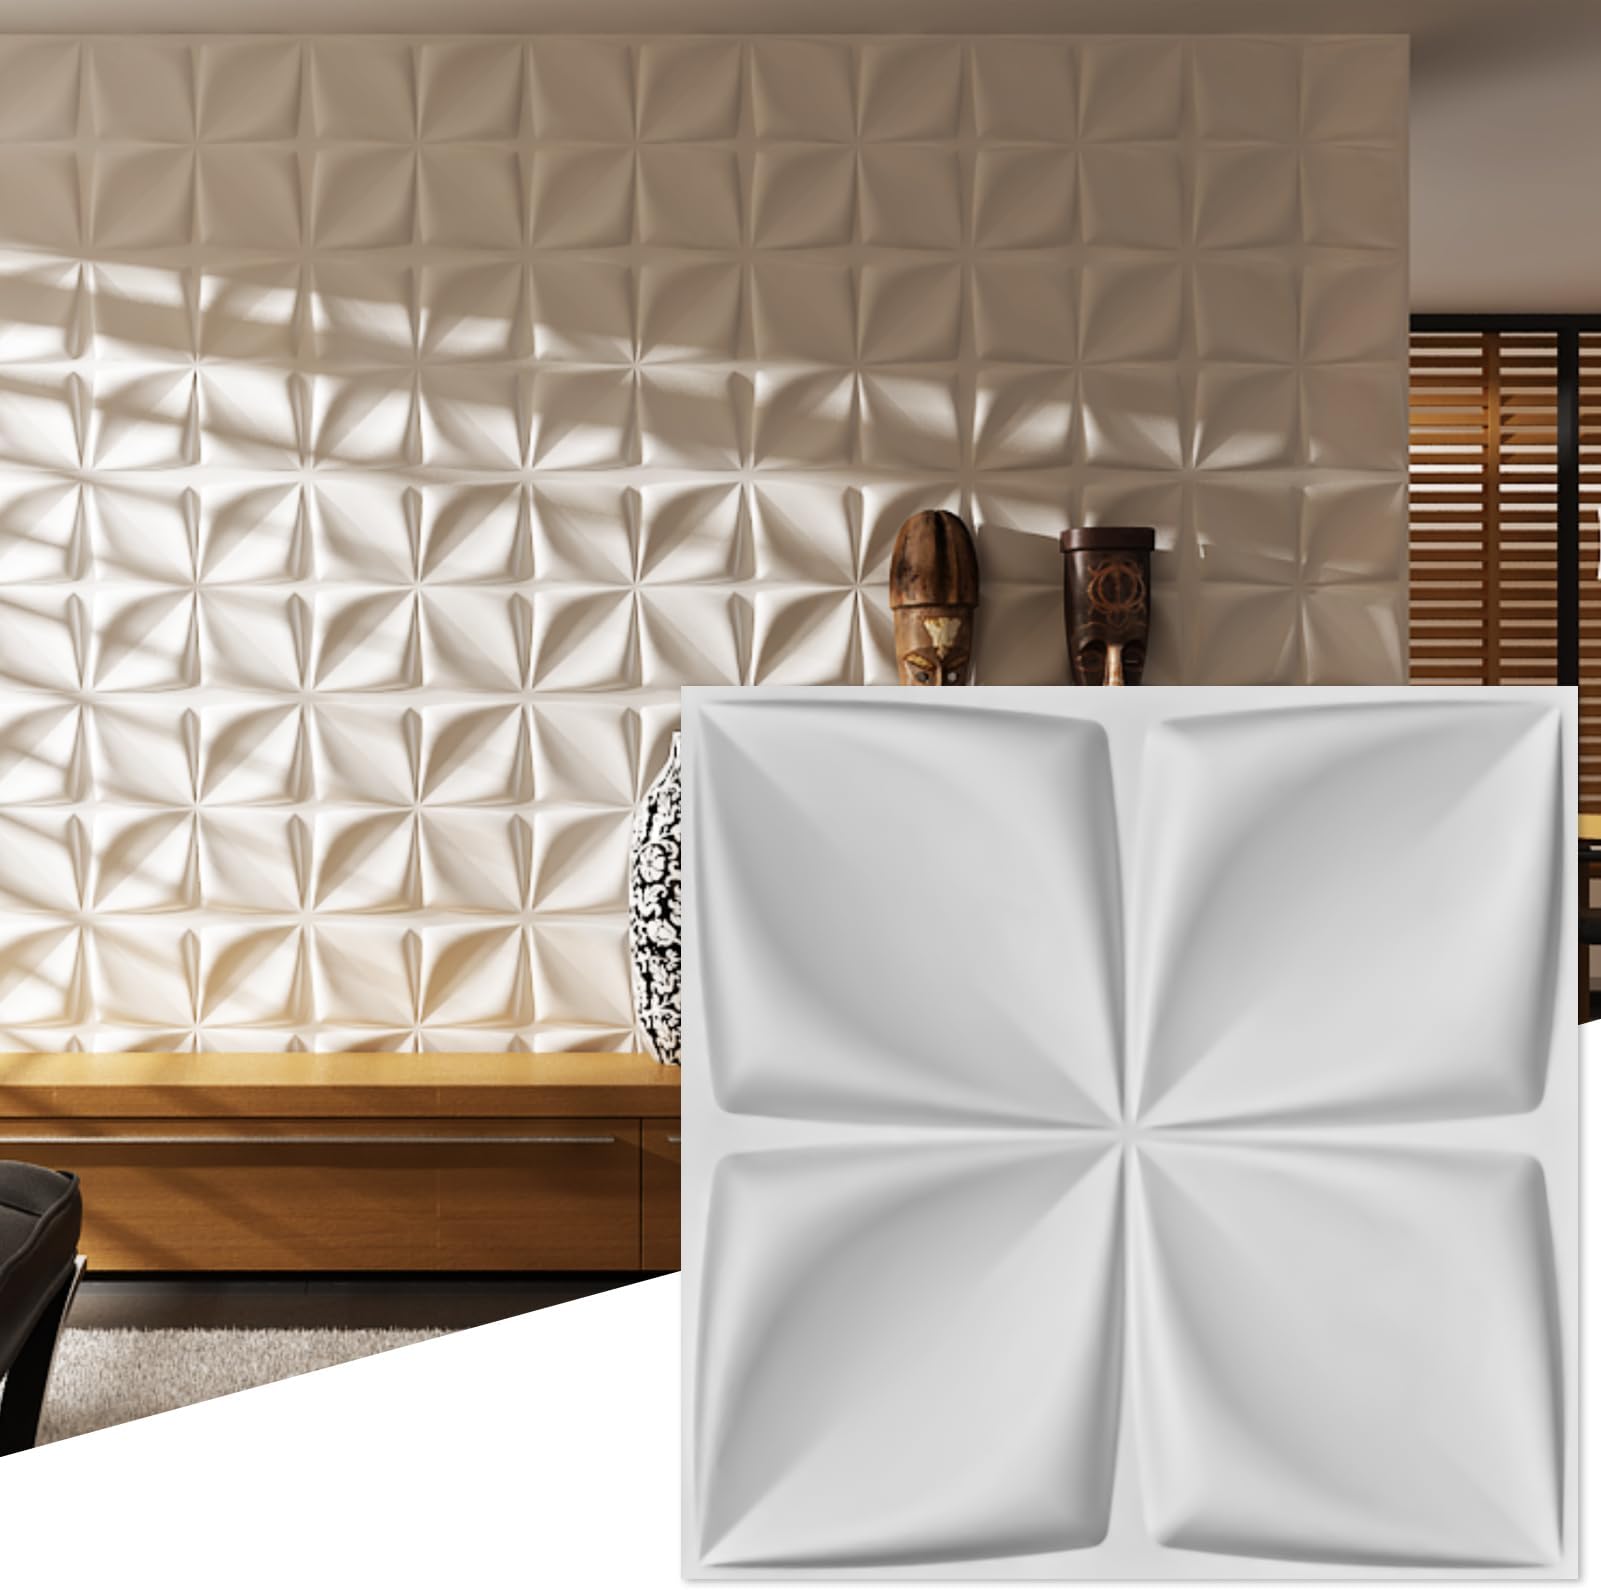
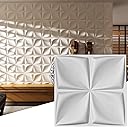

Buy anything from 5,000+ international stores. One checkout price. No surprise fees. Join 2M+ shoppers on Desertcart.
Desertcart purchases this item on your behalf and handles shipping, customs, and support to Thailand.
🌟 Transform your walls, transform your world!
Art3d Decorative 3D Wall Panels feature a polished Art Deco Cornus Angustata design made from 100% recycled plant fiber. Each box includes 12 lightweight, paintable panels covering 32 square feet, ideal for elevating interiors from living rooms to office lobbies with eco-friendly, customizable style.


| ASIN | B01A6TV512 |
| ASIN | B01A6TV512 |
| Additional Features | 4 sides repeatable pattern, eco-friendly plant fiber material, polished finish, Art Deco style |
| Brand Name | Art3d |
| Color | Plant Fiber - White Matt Cornus Angustata |
| Coverage | 32.00 Square Feet |
| Customer Reviews | 4.3 4.3 out of 5 stars (78) |
| Customer reviews | 4.3 4.3 out of 5 stars (78) |
| Date First Available | 27 May 2016 |
| Edge Type | Square Edge |
| Finish Types | Polished |
| Form Factor | Square |
| Included Components | No |
| Installation Method | Glue Down |
| Is Discontinued By Manufacturer | No |
| Item Dimensions L x W | 50L x 50W centimeters |
| Item Display Dimensions | 50 x 1.5 x 50 x 1.5 centimeters |
| Item Type Name | 3D wall panels |
| Item Weight | 0.6 Pounds |
| Item model number | A21030 |
| Manufacturer | Art3d |
| Manufacturer | Art3d |
| Manufacturer Part Number | A21030 |
| Material Type | plant fiber |
| Model Number | A21030 |
| Pattern | Cornus Angustata Design |
| Product Dimensions | 50.04 x 50.04 x 1.52 cm; 272.16 g |
| Recommended Uses For Product | Living room, bedroom, kitchen room, TV background, feature walls, ceiling |
| Shape | Petal |
| Size | 19.7"x19.7" |
| Style Name | Art Deco |
| UPC | 712809587353 |
| Unit Count | 32 Square Feet |
| Water Resistance Level | Not Water Resistant |
L**E
Installation facile avec un pistolet à calfeutrer et de la colle sur tout les morceaux. Il suffit de mettre du latex pour que les joints ne paraissent pas. Et on fini avec la peinture choisi. Pour les interrupteurs ou prises de courant il faut ajouter des rallonges de boite électrique. Voilà.
A**A
I liked the end result— but I’m not sure I can justify the price tag for what I got. For MUCH less than what I spent, I could have used trim or mounding to create a “board and batten” kind of accent wall and would have finished 4x as fast— not to mention how much easier removal would have been in the event I move. This project took FOREVER to finish and costs much more! You’ve got to find a decent construction glue and get many bottles of acrylic caulk to finish all the seams. AND you need to buy paint because the panels come in an awful yellowish color. You need a drop cloth, a caulk gun, rags to clean up the crazy mess this turns into, etc. The panels aren’t made of plastic. It feels like paper plate material and it needs heavy duty construction glue to remain on the walls until the glue dries. It was such a pain to glue them as corners would stick up and using tape to hold them down only made rips on the panel (the way cardboard looks when you rip tape off of it) If this is exactly what you’re looking for then go for it. Personally I wish I’d read a comment like mine to let me know this was going to be wayyyy more work and money than I intended (~$260) for a small ~8ft by ~8ft wall. All that said— the wall looks pretty good. Tip: place the glue on the panel AND the wall for better adhesion.
B**Y
These lightweight tiles are beautiful! We chose to use them on the ceiling of our mud room. Install was a unique experience. We did not find any previous reviews on using them on the ceiling, but forged ahead regardless. The seams did not line up perfectly and this was triggering for my perfectionist self. My husband, the installer, did not personally see this as an issue, but he knows me well enough to know I would. We used super glue in each corner and the center as well as gorilla glue along all of the sides to attach them to the ceiling. The super glue dries faster so it got them to stick while the gorilla glue dried. We found ourselves needing to use tacks as an additional method to keep them hung until the glue dried. My husband then went around the seams with white caulking to hide the imperfections. We cut holes for recessed lighting. This was a mild challenge due to the edges peeling at times, but the caulking was able to hide that too. We then chose to paint over everything with white paint to give a uniform look and feel. All in all, a manageable, slightly obnoxiously time consuming task. My husband and I agree we would do it all again even knowing what we know now, because the final outcome feels beautiful and unique.
R**1
The end result was striking, but they take a bit to put up properly. Keep in mind that the paper absorbs moisture so the wall paper paste cased many of the tiles to expand and they no longer sat flush on the wall and pulled away in some areas. I had to reapply and then pin down the area that had warped from the past moisture and push pin to wall till it dried in place and re-blocked flat. Then I had to fill the holes and seams with plaster, dry and sand. Then I primed, and then I applied 2 coats of semigloss. You still see the seams a bit up close, but from away it looks like a large plastic headboard mounted on the wall. I was concerned about the durability, but with all the layers of paint, they now have a vinyl coating and they are quite durable. We lean on it and there are no dents.
D**N
Added these to a wall in our bar and its the first thing people ask about when they come in! Im a contractor by trade and would definitely recommend using a table saw to make your cuts...im sure a rotary tool like a dremel or grinder with a cutting wheel would work as well....not sure about a razor knife. They're pretty easy to work with. I had used an 1/8" trowel to spread a glue on while installing them. A couple corners wanted to pop away from the wall while installing and I just stuck a thumb tack in it until it set. When everything was set i used a little caulk and my finger to fill any little seams that you could see then painted!!
Trustpilot
1 week ago
3 weeks ago