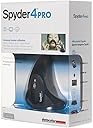
Spyder4Pro S4P100 Colorimeter for Display Calibration
Product ID: 431214
🎨7-color full-spectrum sensor
💡Ambient light adaptive luminance
📊26% improved calibration accuracy
Desertcart purchases this item on your behalf and handles shipping, customs, and support to Thailand.
🎯 Calibrate like a pro, see the difference everywhere.
The Datacolor Spyder4Pro S4P100 is a professional-grade colorimeter designed for photographers and creatives who demand precise color matching across multiple displays. Featuring a patented full-spectrum 7-color sensor, it calibrates monitors, laptops, tablets, and TVs with 26% improved accuracy and adaptive ambient light sensing to maintain optimal image contrast. Its fast ReCAL feature and advanced Monitor Quality Analysis tools empower users to achieve consistent, true-to-life colors effortlessly, making it an essential tool for any serious digital workflow.
| Asin | B006TF37H8 |
| Best Sellers Rank | #698,639 in Industrial & Scientific (See Top 100 in Industrial & Scientific) #87 in Lab Colorimeters |
| Customer Reviews | 4.2 4.2 out of 5 stars (927) 4.2 out of 5 stars |
| Date First Available | January 4, 2012 |
| Item Model Number | S4P100 |
| Item Weight | 9 ounces |
| Language | German |
| Manufacturer | Datacolor |
| Product Dimensions | 2.6 x 6 x 8 inches |
User
Good consumer-grade calibrator
I got this to replace my previous Spyder 3 Pro model, which was already out of warranty and developed an intermittent disconnect problem. When it finally arrived a couple of days, I unpacked it, downloaded the Spyder 4 Pro software directly from Datacolor's site (you should never use the included CD/DVD disks unless the software is not available elsewhere), installed it (it will ask for product key during installation, which is printed on the envelope with included CD) onto my PC which is running 64-bit Win 8.1 Pro, connected the sensor (which you must do AFTER installing the software) and started the calibration process.Configuring the settings before starting the calibration process was as easy as with previous Spyder model - you just select the type of the monitor, select which type of user controls it has, select the gamma (I use 2.2), the white point (I used 6500k), then brightness (I use "native" settings because I manually adjust the monitor's brightness according to my eye's sensitivity), then "ambient light" sensor option (I disable it because I can control the room's lighting manually). Then you simply place the sensor on your monitor's surface according to on-screen guide (make sure the monitor's surface is clean and there's no gap between sensor and the monitor's surface) and wait. After the calibration process was finished, I compared the results to the results produced by Spyder 3, the difference was barely noticeable, which is actually good (it means the sensor is not defective and I know that my Spyder 3 sensor was relatively accurate). After that, you just disconnect the sensor (you don't need to keep it connected, unless you use automatic ambient light function, which you really shouldn't) and store it in some place where the dust won't accumulate on its surface. Pretty simple process, takes very little time and your eyes will thank you for that, especially if you have multiple monitor setup or many other devices with displays at home.All in all this product is well worth its price and works very well, although you can run in some issues, for example you may notice the "weird" tint after the calibration is over or inconsistent calibration between different monitors, or the Spyder software might complain that it cannot actually detect your monitor. If you run into similar problems - first of all, make sure you select correct settings for your particular monitor type (such as the type of backlighting - LED or fluorescent, and if "correct" one does not actually work with your particular model - don't be afraid to try the different one), also make sure your monitors are detected correctly in Windows, with a correct driver loaded for them (yes, even monitors need them and many reputable monitor manufacturers provide these at their official sites). If you still get an inconsistent results between each calibration or with heavy tint towards blue or pink or other color - your particular sensor might simply be defective, such things happen with EVERY product by EVERY brand, this is why they have warranty, use it and try replacing it before completely giving up on this product. Amazon is VERY good when it comes to replacements during first 30 days as long as you buy the products directly from them (which you always should, instead of "experimenting" with any 3rd-party resellers).
User
This Device Has Changed My Life!
Until recently is that i started printing my own prints at home, and then i started getting BAD prints with discolored unmatched photos from my camera, well, actually unmatching from what i was actually seeing on my TV screen. Oh, yes, what i am using as my computer monitor is a BIG 32" Samsung LED HD TV. And yes, this Spyder4 PRO does calibrate a TV. Again, i have been going nuts trying different things to get matching prints, i tried different methods of "calibrating" my TV by "eye" and by using my own PC video card settings, and windows monitor settings, and thru my own photo editing "calibration method", but NONE of these things helped, my prints were all out of wack.To make it short, i thought getting one of this calibrators was a waste of money! Boy was i wrong. This tool really works, and yes, it has worked on my TV also. The only thing i had to adjust a little was to set my TV's back light very low, all the way to 1 or 2, and my TV is serving me very well for photo editing now. I am not a PRO photo editor, i just do this as a serious hobby, so i have not had the need to sell my LED TV to buy a very EXPENSIVE and tiny 22" $700 dollar pc monitor. This calibrator has really saved me more headaches, time, and specially INK, since i am not wasting ink anymore by printing out OVER and OVER when trying to match out my monitor's photos to the actual prints.By the way, regarding the bad ONE STAR review bellow, i find that interesting because i have contacted Datacolor myself to ask them questions and they always answer the phone. Second, regarding the "GREENISH" tint, that is supposed to be completely NORMAL. Before i calibrated my TV the screen was of course very blueish and it had the more cooler color tone, which all or most monitors do. After the calibration the program set my monitor with that same more "warmer" and "greenish" looking tone. I have asked many folks this same question and they told me that it's supposed to do that, so there is absolutely nothing wrong with that, that is the correct effect you will see after calibrating, that is the way you are supposed to print. Believe me, my prints are matching now.
User
Simple to use, big improvement
I have a Planar PX2611W IPS monitor and I use it for many things, including amateur photography with my Canon 5dMkIII. This Planar is no longer available but like it for the 1920x1200 resolution in a larger monitor. I like to see some content at native resolution (unzoomed) so not wanting larger resolution. I had tuned the monitor best I could using some web searches on forums, sites like Lagom's LCD monitor test images and a good utility (CLTest...Russian, very good), but was never completely satisfied. Primarily because it seemed like the gamma was off (not adjustable with the monitor controls) and I couldn't get the deep blacks I thought I should get out of this quality IPS.After considering several calibration tools, I purchases the Spyder4Pro. It arrived in 2 days, and it was a breeze to install the software, and intuitive to run the calibration process. It walks you through it quite well. Results are very good. Solid 2.2 gamma, and it advised me that the previously 'fixed' setting was at 1.9. Blacks are much better and all the Lagom black and white test images are clearly there. Contrast test on same site is much better, showing the full range. Everything looks clearer, and the colours display much better.Two suggestions. Monitors usually have multiple viewing modes, with some modes being better. With the Planar, I had banding and red error problems with every mode except 'text.' Might want to try other modes if you are having problems getting good results on your monitor. Also, if you are doing photography, the LCD recommended brightness of 120 cd/m2 is ideal. However, for games or working in bright environments, you might want to set it to 200 cd/m2 to get a lot more pop. If you can't do this on your monitor, set the brightness to a point you like and then change the calibration settings to "native" for brightness.Cons: Would really like more reporting capability to be able to see before/after of grayscale tracking and other information.
User
Easy to use, consistent results across displays. A must for print/publishing.
I was having problems with my photographs looking different across my multiple displays, and prints coming out with different color tonality than they looked on my screen. No matter how many manual "match the color" tests I went through, I was never happy with the calibration. Tired of wasting prints and having images look fine on one monitor but overly blue or dark on another, I ordered this Spyder4Pro to help give me some consistency.Installation was fast, and it downloads its updates inline (no need to download and run another installer). The steps that it walks you through are clearly illustrated. You simply place the reader on your screen and let the weight on the wire, which you place over the top of your display, hold it in place. It runs for like 5-10 minutes and then gives you a brand new calibration profile. I ran it on three monitors that I use, all made by different manufacturers, and it came up with profiles for each of them which are worlds closer than they used to be. I can drag an image across the three screens without it going through color and temperature shifts.The Spyder4 Pro can be installed on multiple computers and used on multiple displays. You can also use it to sorta calibrate your iPad. The way that works (because I was wondering too) is that you download the iOS Datacolor app to your iDevice, then download the corresponding software to your PC. Plug the Spyder into your PC, pair the two, and let it run. When it's done, it comes up with a profile for your iDevice, but it is not universal. It only affects the way pictures look when using the Datacolor Gallery program. It won't make Safari or anything else show pictures accurately. So... this may not be as worthwhile as you were expecting.To everyone saying "Dude, I bought this and it made my monitor look all weird" probably don't know what a monitor calibrator actually is. This isn't supposed to make your display look better, it's supposed to make it look more accurate. As in, when you send your pictures off to a professional print shop, the blue that you see on your screen will be the same blue that gets printed on their muulti-thousand dollar professional printers. If you think it made your screen look blue or messed up or something, it's probably because it looks different right now. Do what I like to call the "get up and do something else, then come back and look at your screen with a fresh set of eyes" test. If you let this run how the instructions say to (let the display warm up, set the display parameters to neutral, kill any harsh room light, if you've got a laptop, make sure it's plugged into power, and make sure the screen doesn't dim to save power during the calibration.It's good stuff... I think some people just don't bother reading instructions.
User
The Best Bang for the Buck!
This is the fourth Datacolor product I own. I still have the original SpyderPro, Spyder2Pro, Spyder3Print and the newest addition the Spyder4Pro. I also own an Eye-One Display but prefer my Spyders any day of the week. The Spyder's user interface ( Wizard ) is so much more user friendly than the Eye-One that I will not recommend the Eye-One to my clients. I've had more tech support questions about the Eye-One than I care to mention.Besides being a photographer I'm also a freelance Macintosh Tech that installs Mac systems and teaches color management and workflows using Lightroom, Bridge and Photoshop. As mentioned I'll recommend the Spyder to my clients over the Eye-One for a number of reasons. First the monitor profiles are excellent, I can't ask for any better and of course the user interface, the wizard, is much more user friendly than the Eye-One. With the Eye-One Wizard I don't know if it's asking me to do something or if it's telling me the results and I need to do something else, it gets confusing for my clients. Enough said about the Eye-One!... Let's move on to the Spyder4Pro.The Spyder4Pro package consists of the Spyder4Pro unit, Stand, Software Installation Disk for Mac/Windows and Quick Start Guide. I know this isn't important but the design of the Spyder4Pro is really sleek and sexy! Mama-Mia! The USB cable attached is nicely supple so there's no need to twist the USB cable for the unit to remain flat on the monitor's screen. Also a little trick is to tilt the monitor up slightly so there is additional weight of the Spyder4Pro pressing against the monitor screen for a nice tight "seal". I recommend doing this regardless of profiler brands.Installing the software is straight forward. Install the software using the installation disk and let the installer find the latest Spyder4Pro driver via the internet. ( Also Datacolor is very, very good about updating their drivers in a timely manner... another big plus with Datacolor ) During installation enter the serial number that's on the DVD sleeve label, the installer will contact Datacolor servers and return a License Code that will be used if you need to re-install the software. There's an option to print the License Code, which I recommend, and also Datacolor emails the License Code to you for safekeeping. I'm going to guess here, once you have the License Code you don't need to be connected to the internet for further installations... I could be wrong!Once the software is installed attach the Spyder4Pro directly to the computer's USB port if possible. USB hubs/keyboards sometimes don't have enough power to run a unit so this is the best approach. Launch the software and you are greeted by the Spyder4Pro Wizards's Welcome screen. The screen prompts are easy to understand and have a Help and "?" button if further explanation is needed. The first time around you'll be prompted to do a "FullCAL" ( Full Calibration ) and on subsequent calibrations there will be options to not only run "FullCAL" but to "ReCal" and "CheckCAL".After the "Welcome" screen, that suggests/recommends certain display settings, there is the "Measuring Ambient Light" screen. Place the Spyder4Pro on it's stand in front of your monitor and click the "Next" button and the Spyder4Pro will read the amount of light falling on the monitor. The "Ambient Light Analysis" screen will display the results. You'll have the option to "Keep current settings" or "Accept suggested settings". Select your choice and click "Next" to bring you to the Calibration screen! Hang the Spyder4Pro over the monitor and slide the counter-weight along the USB cable until it's nicely balanced and center the Spyder4Pro right over the outline shape. Click "Next" and the Calibration process begins... I nice feature is the software displays the status of it's brightness readings in realtime and checks the stability of brightness over a period of time. My Apple Cinema Display is getting long-in-the-tooth and I could see that it was having trouble staying stable at the recommended brightness setting. Calibration completed in about 7 minutes and the "Saved Profile" screen appeared. I saved the profile adding the current date in the file name and set the Calibration Reminder for 2 Weeks.Next is the "SpyderProof - Calibrated View" screen where you can switch back and fourth from the profiled calibrated monitor view and uncalibrated monitor view. This gives you an idea on what the profile is doing. Clicking the "Next "button brings us to "Profile Overview" screen where you can compare old and new profiles and how they related to each other in a specific Colorspace. Looking at my results... dang I think I need a new monitor! You can "Quit" or there's an "Advance Analysis" feature that can test the profile's "Gamut", "Tone Response", "Brightness and Contrast", and "White Point at Different OSD Settings". But I'll let you play around with this!My monitor is dead neutral - displaying a grayscale in Photoshop CS5.1 there is no rain-bowing in any of the gray steps. ( Meaning there's NO color banding/color contamination along the grayscale )Spyder4Pro is great for novices and advance users alike. The software has nice advanced features that users can grow with.
User
Leaves a strong, Red Cast on my monitor
The spyder4pro comes with a base holder which is handy for keeping it undamaged. I appreciate the small size and the moveable counterweight on the USB cable which makes the Spyder4pro a snap to use.I think this device must work better with some monitors than others.. unfortunately, on my glossy w2207, it does not work so well for me.I kept my monitor on for more than 30 minutes to warm, I reverted to monitor defaults, 6500k, I removed any direct lights as requested by the software, and I, slowly, followed the instructions to the letter.5 out of 6 calibrations with the spyder4pro and latest software in win7 64-bit resulted in a very strong red/brown cast on the screen, to the point where there were no greys displayed (many shades of red)! 1 of the 6 there was still a slight red cast but it wasn't as strong, and instead was a strong yellow cast.The upside is my photos appeared very 'warm' indeed. ;c )One odd thing is before 80% into calibration the screen looks terrible (red cast) then around 80% into the calibration the screen looks pretty good. Unfortunately, shortly after around 80%, the spyder4 reverts back to the red cast nonsense.The default ICC profile for my monitor looks night and day better than anything this device has generated for me. I had such high hopes for this product too.
User
Appalling Customer Support
I used the Spyder3 Elite before buying the Spyder4 and was very happy with the results. However, on getting the Spyder4, the appearance of all my monitors had a strong green/blue cast. Calibrating the same monitor with Spyder3 and Spyder4 produced vastly different results and looking in detail at the color profiles (using ICC Profile Inspector) confirmed the difference. The brightness adjustment I had to make to get the same luminance was also vastly different.I contacted Datacolor about this not long after buying the Spyder4 but it took weeks for them to respond - despite multiple emails. They eventually replaced the hardware unit but the new one had the same problem - possibly indicating a wider fault with the product or a problem with the Pro software. I've now been trying for over a month to get a response from the company but they are totally uncontactable. They don't respond to emails and their phone number has a constant ansaphone message saying that the offices are closed.My advice is to stay clear of this product, not least because of the appalling customer service (or lack, thereof!).
User
Great Product, Great Company
I received my Spyder4Pro several months back but due to health reasons had not installed it until recently. The product was shipped and arrived within days of the order. It was packaged securely with attention to product safety.Installation of the product went without any problems. I installed it on an XP and Win7 machine and both OS's took the install without any problems. After installation, both OS's recognized and accepted the "New Device". Since there had been some time between receiving the product and installing it, there was an update available from Datacolor. The update also went without any problems.Monitor profiling went without a hitch. The Graphical User Interface (GUI) led me through the profiling process from start to finish leaving no unanswered questions as to what it was doing at each step or as to the results each step should render. BTW, you have a choice of normal or advance GUI. The normal will give you the same great results but the advanced gives the inquisitive user and more detailed avenue into the process.The final profile left me with a color rendition from my monitors that were absolutely stunning and Perfect Renditions of the photo as far as Photoshop was seeing it. I now know for a fact that each image that comes off my Photoshop is being displayed with perfect color accuracy on my monitors. There is no longer any question as to what my prints coming back from the printer will look like.If you do photo editing, you MUST profile your monitor. You can't get good results unless you do. Datacolor products have made this not only possible for me but have also made the process painless in achieving. IOW, even a caveman can do it with their product line.Customer support is also first class with these people. They are also active on most color profile forums. I am a member of some email list forums where Datacolor products are covered and Datacolor people are always unofficially joining in and offering suggestions and helping people with their products. Needless to say, I have been very impressed with Datacolor as a company and Datacolor products. They have made my photography results exactly as I demand and expect it to be. I could not produce what I do without the use of their products.I trust and recommend Datacolor Monitor profiling products to anyone that demands that their photos come off their computers just as they remember seeing them when shot. I am getting a Medium Pro-Level Photo printer and plan of getting Datacolor printer profiling products for that also.
User
Para asegurar la mayor fiabilidad posible en los colores
El calibrador es uno de los componentes que pasan desapercibido pero que sí se quiere asegurar una fiabilidad a la hora de interpretar los colores se hace imprescindible. El Spyder 4PRO lo cumple a la perfección vista la mejora evidente de los colores de la pantalla y su facilidad de uso. Barato no es pero en esto de la fotografía ya se sabe...El perfil de pantalla que se crea tras la calibración se puede usar lógicamente como ICC a la hora de imprimir por lo que es una gran ayuda.
User
Verbesserung eindeutig erkennbar ...
Also ich bin begeistert. Ich habe zwei LCD-Bildschirme (1x Benq V2420, 1x Samsung Syncmaster 2494HS), die auf einer Grafikkarte hängen (ja es geht auch mit einer Grafikkarte) kalibriert. Es ist eindeutig eine Verbesserung der Bildqualität feststellbar und endlich zeigen meine beiden Bildschirme das gleiche Bild.Die Durchführung der Kalibrierung geht total einfach vor sich.1. Software installieren2. Spyder4Pro in USB-Port (nicht in einen Hub oder am Bildschirm) sondern direkt am Rechner einstecken.3. Software starten und den Anweisungen folgen (vorweg beim ersten Start Software aktivieren)Die Software findet sofort beide Bildschirme von selbst und nimmt alle Einstellungen eigenständig vor. Nach Abschluss der Kalibrierung des ersten Bildschirmes zeigt das Programm den Unterschied vorher/nachher - und das kann sich sehen lassen. Noch dazu kann nach Abschluss direkt durch einen Klick auf "Weiteren Bildschirm kalibrieren" der zweite Bildschirm kalibriert werden. Die Software trägt dann gleich das neue Profil in Windows (bei mir Windows 8) ein. Man muss gar nichts mehr tun. Weiters wird in einstellbaren Zeitabschnitten das Umgebungslicht gemessen und die Bildschirme darauf abgestimmt. Auch eine zeitlich einstellbare Erinnerung für eine Wiederholung der Kalibrierung gibt es.Also ich finde das Ergebnis ist meiner Meinung nach deutlich sichtbar - eine Verbesserung der vorherigen "nicht kalibrierten" Bildschirme. Ich kann den Spyder4Pro nur empfehlen und bin voll und ganz zufrieden --> also volle Punktzahl: 5 Punke ...PS: Übrigens es steht in der "Lies mich"-Datei, dass für jeden Bildschirm eine eigene Grafikkarte benötigt wird, damit die Kalibrierungsprofile verwendet werden können. Das stimmt nicht! Ich habe eine Grafikkarte im Rechner auf der beide Bildschirme hängen. Die Kalibrierung ist für jeden einzeln einwandfrei möglich. Und noch etwas: Bei den Systemanforderungen ist Windows 8 nicht angeführt, jedoch lässt sich die Software anstandslos installieren und verwenden!
User
Sonda per calibrazione monitor
Acquistata per calibrare un monitor LCD utilizzato per fotoritocco svolge degnamente il suo lavoro e si nota una differenza notevole fra il profilo calibrato e quello originale del monitor stesso. Confrontando i risultati con le stampe sicuramente si nota che il profilo calibrato è decisamente molto vicino a quello delle stampe rispetto ai risultati precedenti ( per avere una corrispondenza perfetta al 100% occorrerebbe settare il monito con il profilo colore del centro di stampa ecc...cosa un po' più complicata che non ho fatto). Tuttavia i risultati che si ottengono dalla semplice calibrazione sono, a mio avviso, già ottimi e assicurano dei risultati in stampa più che accettabili.Semplice da usare, con una procedura guidata che passo passo indica gli step da seguire.
User
Génial !
Photographe amateur, j'ai acheté cet appareil après avoir réfléchie très longtemps. Je prends, je ne prends pas, est-ce bien utile ? Et bien oui, c'est très utile ! L'installation est très simple (j'ai Windows7), l'utilisation aussi. Et quel rendu ! le temps de lancer le programme, on attends quelques minutes, et hop. L'écran est calibré. Et les impressions ont d'un coup un rendu superbe. J'ai des photos avec de la neige que je trouve "jaune" à l'impression. Après avoir fait l'étalonnage de l'écran, la neige est ... couleur neige, et sans rien avoir touché à mes curseurs LR.Pour l'heure, je recommande vivement ce produit.Reste à voir sa longévité.
User
Spot On
bought for correcting my colors output on Print in comparison to my monitor. I thought my monitors were well calibrated for color before I bought this. I was actually surprised how off my screens were. Now my Printed Photos are much closer to matching what I have printed. makes a nice difference in my PC Gaming as well. This device will not calibrate your HDTV, but all Flat Screen PC and MAC monitors.
Trustpilot
1 month ago
3 weeks ago