


Buy anything from 5,000+ international stores. One checkout price. No surprise fees. Join 2M+ shoppers on Desertcart.
Desertcart purchases this item on your behalf and handles shipping, customs, and support to Thailand.
🔋 Mount Smart, Live Green: The No-Drill Solar Bracket Revolution
The Renogy Corner Bracket Solar Panel Roof Drill-Free Mount offers a lightweight, durable, and eco-friendly solution for mounting solar panels on RVs, boats, and flat surfaces without drilling. Made from UV-resistant ABS plastic, it ensures long-lasting performance and universal compatibility with aluminum-framed solar panels, including all Renogy modules, while preventing roof leaks and simplifying installation.


| ASIN | B01LWASUU1 |
| Best Sellers Rank | #48,081 in Patio, Lawn & Garden ( See Top 100 in Patio, Lawn & Garden ) #182 in Solar & Wind Power Parts & Accessories |
| Brand | Renogy |
| Brand Name | Renogy |
| Color | Corner Bracket |
| Customer Reviews | 4.5 out of 5 stars 1,216 Reviews |
| Finish Type | Black |
| Finish Types | Black |
| Global Trade Identification Number | 00816360023883 |
| Included Components | 1 x Renogy Corner Bracket Solar Panel Roof Drill-Free Mount |
| Item Depth | 2.3 inches |
| Item Dimensions | 7 x 4.6 x 2.3 inches |
| Item Type Name | Renogy Solar Panel Roof Drill-Free Corner Bracket Mount for RV, Boats, |
| Item Weight | 7.2 Ounces |
| Item dimensions L x W x H | 7 x 4.6 x 2.3 inches |
| Manufacturer | Renogy |
| Manufacturer Part Number | Solar Panel Roof |
| Manufacturer Warranty Description | 1 year |
| Material | UV-resistant ABS Plastic |
| Material Type | UV-resistant ABS Plastic |
| Model Number | Solar Panel Roof |
| Mounting Type | Corner Mount |
| Set Name | 1 Set |
| UPC | 816360023883 |
| Unit Count | 1.0 Count |
D**.
Surface prep is key
I did a lot of research and this product gives strength to the claim that you can do a no holes solar panel installation. I'm happy with the product it is a strong and well built. Looks like it had a good amount of surface area for the adhesive to use. I will add that they are hollow and it would be a better grip if it wasn't but... Instructions seemed a little off... So in my research I found that 3m vhb tape was the 1# go to for drill free installation. So I got some 3m vhb tape 4950, sikaflex and eterna bond tape to hold it. Also de natured alc. And sand paper or surface prep. NOTE. The surface prep is key you must have a good clean surface for a good bond. If I could do it over again I would have done better surface prep. My first misake was screwing the legs to the panel befor it was on the roof (im glad I didn't vhb or sikaflex the legs to the panel.) My roof had a slight pitch so I had to take off a few legs and re screw some so all the legs were flush to the roof for maximum bondage. I put the legs on the panels on the roof I put vhb tape on the bottom of all the legs. Clean roof well let dry, mark corners, peel vhb tape, set, press and seal with sikaflex. Let it dry and cure then I added some eternabond tape as an extra precaution that stuff is strong. Also to note had my panels on the feet bracket mount when I did the installation so I didn't get to seal the back of the legs. I'm going to just use a spray sealant like flex seal on that inside area.
M**W
Worked great on my RV roof
Z**A
Don't forget the roof sealant!
While this entry gland provides a cover for an opening on the roof and stabilze the connection to MC4 connectors, the rubber gland in the provided clamp seemed loose around the 10 AWG wire the trailer OEM provided. It was also not easy to tighten the provided clamp to the housing without distorting the rubber gasket provided. It seems well made and should last a number of years IF you take the precaution of coating all edges, screws and clamps with DICOR to aid in keeping the water out of your roof opening!
T**Z
Solid no drill mounting solution with the right adhesive materials and preparation
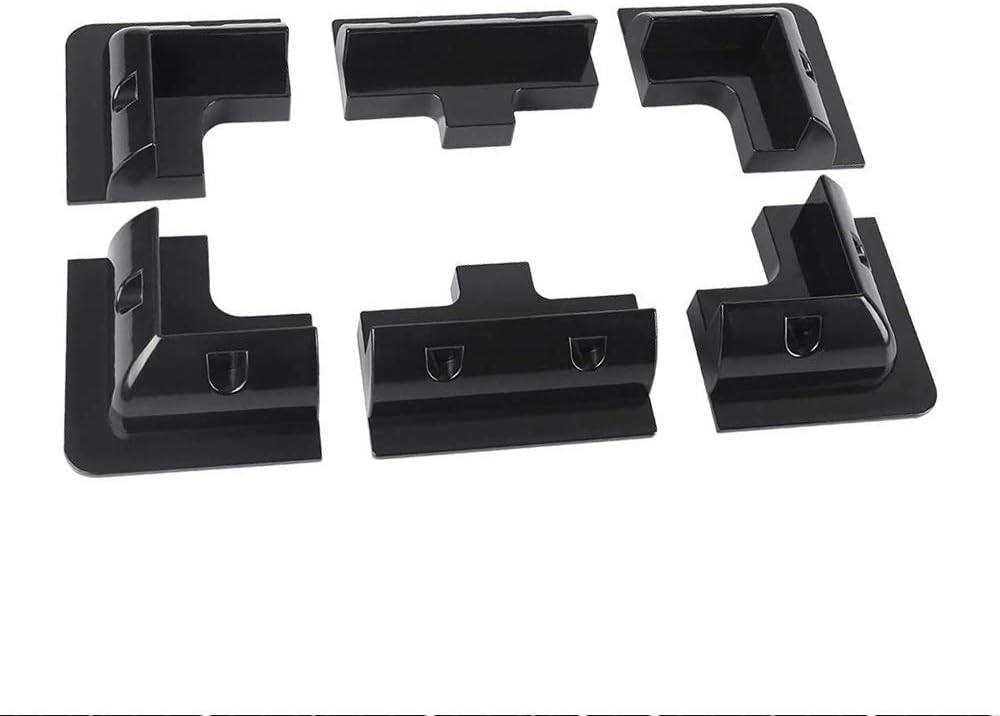
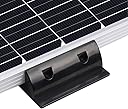
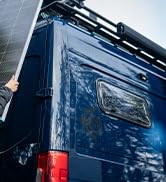
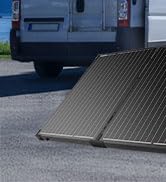
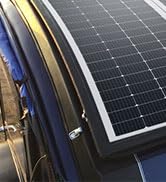
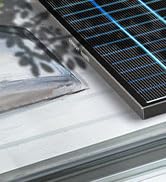
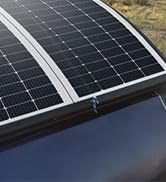
Mounted a 175 watt solar panel on my motorhome roof. The roof was flat lenghwise, but curved widthwise. To overcome the curve, I mounted the brackets on the roof first, then installed the solar panel. With the roof curve, the panel will not sit entirely flat on the mounts, but that is not a problem, just put some adhesive foam tape on the top of the mounts underneath the panel, and use self taping screws on the sides to secure the panel. This also allows for easy removal should the panel need replacing. Draw the outer dimensions on the roof as if the mounts with the panel were installed, adding a 1/4 inch to adjust for the curve. Preparation to secure the mounts is key, use a 5/50 mix of alcohol and water to clean the surface. Apply 3M VHB tape universal primer uv to both the bottom of brackets and the roof. Attach 3M VHB 4950 tape to the bottom of the brackets and then attach to the roof. Be sure to check and recheck the inside dimensions before attaching, because once the mounts are attached, they are not going to move. Seal around the mounts with Sikaflex 221 sealant/adhesive. Now, set the solar panel inside the mounts, screw in the sides to secure. All done.
B**L
Works for me!
This is a sturdy piece I used on my camper. Mine is nearly always shaded, but it is made of fairly thick material so UV wise it should be fine. I don't think it came with a gasket, but I used SikaFlex and am confident no water is going to get into my wall.
T**W
Nothing special
I expected these to come with something that holds the panel in place. There were no clamps, tape, or anything included. You have to buy and apply glue to both sides of this gluing it to the roof and then to the panel. This is essentially just a platform to lay your panel on, in which case you might as well get some wood or other object as this is a simple plastic riser. I followed their instructions and made a sticky freaking mess. I have no idea why they advised to glue this product to the panel first instead of roof first. Impossible to flip over the panel and lay it perfectly in place on the first attempt with glue all over bottom. Ignore the instructions and lay out where you want these parts to sit on your roof and mount them first.
J**R
Works to hold panels to trailer roof
Perfect, using Sikaflex 252, glued to panels, cured 24hrs, then glued panels to 6x10 trailer roof. Been perfect for four years !!
F**T
Great alternative to making holes
These in combination with Sikaflex 221 is an unbeatable combo. The first time I installed solar panels on an RV roof, I used regular steel mounting brackets and screws. Big mistake. The screws did not find much to bite into, since RV roofs aren't made of much other than insolation. And of course, any time you drill a hole, you are making a potential leakage point, meaning careful sealing and constant maintenance. With these brackets, you have plenty of surface area to get really good adhesion to the roof. Use a bunch of Sikaflex, and you are good to go. I mounted my Renogy solar panels to the brackets by drilling holes (each bracket has recessed points specifically for this, and using bolts. After the brackets were bolted on, I glued them down to the RV roof using Sikaflex. This will allow me to change out the panels easily should one become damaged, but I did not have to drill holes to mount the panels. I have driven all over the country with this setup, through all weather conditions. Zero problems.
A**O
SIN PERFORACIONES EN EL TECHO
Piezas de excelente calidad y buena construcción, ideales si no quieres hacer tantas perforaciones en el techo o no tienes rieles de agencia para la fijación, las piezas las tuve que modificar un poco para que ajustaran en las ondulaciones que tiene el techo y para su fijación utilice Sikaflex 221; las únicas perforaciones que tuve que hacer son las de ingreso de los cables al interior de la camioneta
B**E
Glue is very stiff.
Excellent product but be well prepared as the glue is very stiff. Our glue gun broke during the job causing the glue to stiffen further before we could complete the job. Recommend you buy a good quality heavy duty glue gun.
A**R
Would recommend
Was easy to install and holds solar panel well
R**S
New Housing Mount
I admit I didn't pay too much attention to the design on this mount, I had thought that it would have had holes drilled for attaching but there were none, then I realized that wasn't the intent, they had a grove ready for some silicone and once I had the concept it went very smoothly, the product was well made.
K**Z
TOP
Einfach genau das was wir schon lange gesucht haben!!! Top Qualität. Sehr schneller Versand! Danke.
Trustpilot
4 days ago
3 weeks ago