Desertcart purchases this item on your behalf and handles shipping, customs, and support to Thailand.
🚀 Elevate your maker game with speed, precision, and effortless control!
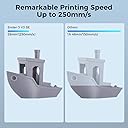
The Creality Ender 3 V3 SE is a high-performance DIY 3D printer boasting a rapid 250mm/s print speed, CR Touch auto-leveling, and a reliable 'Sprite' direct extruder compatible with multiple filament types. Its dual Z-axis and reinforced Y-axis ensure stable, high-quality prints, while the 32-bit silent mainboard delivers quiet operation. Designed for both beginners and pros, it assembles quickly and features intuitive UI graphics, making it a top choice for efficient, precise 3D printing within an 8.66x8.66x9.84 inch build volume.


| Best Sellers Rank | #23,667 in Industrial & Scientific ( See Top 100 in Industrial & Scientific ) #34 in 3D Printers |
| Brand | Comgrow |
| Color | Ender 3 V3 SE |
| Compatible Devices | Laptop |
| Customer Reviews | 4.2 out of 5 stars 26,167 Reviews |
| Item Weight | 15.4 pounds |
| Material | Aluminum |
| Product Dimensions | 17.32"D x 17.32"W x 18.31"H |
M**G
Excellent introductory printer for The Tinkerer.
I am very happy with my Ender 3 V3 SE. It is my first 3D printer, having some experience with them in the past. This printer performed to an excellent standard and required very little setup out of the box. Unfortunately, the SE does not talk to the Creality Print software, and does not have WiFi or Ethernet network connectivity. Basic functionality is through physically moving an SD-card from your computer to the SD slot on the printer. It has a USB-C outlet that can be connected with a data cable to a computer and communicated serially with COM ports and the CH340 communications driver, it’s not complicated, but it’s not a straightforward process. After about 50 prints or so, the bearings on the Y axis optical rails came loose and resulted in a bed wobble that could register on the Richter scale. I upgraded the Y axis and X axis to linear guide rails, I do believe these upgrades are wholly necessary if you wish to print at the printers upper accelerations for any extended period of use. Changing filaments is a breeze with the direct drive extruder, I have printed in PLA, TPU, and PETG all with very good quality, adjusting settings along the way. If you enjoy tinkering, and learning how FDM printers work, how slicers and gcode work, and want a less expensive start to the hobby I would highly recommend the SE printer. I have also heard good things about its sister the KE.
L**Z
Amazing printer!
The Ender 3 marked my entry into the 3D-printing world, and I love it! The 3D printer has been a godsend! If you're also newbie and searching for advice, here's my brief take on the Ender 3. It's awesome! The Ender 3 arrives in pieces that you must assemble. Since it is essentially a robot, assembly can seem overwhelming at first, but if you take it one step at a time, you'll be printing in no time. I found the printed instructions accompanying the unit to be more sizzle than steak, but, fortunately there are several videos on YouTube that make assembly a breeze. Believe it or not, assembling the unit yourself is beneficial because it familiarizes you with the device. It will allow you to easily make the minor adjustments that 3D printers often require. My wife and I have found that 3D printing comes with somewhat of a steep learning curve, but it's fun. YouTube and websites such as "all3DP dot com" have proven themselves to be life savers. The most common adjustments you'll make while 3D printing is "bed leveling." In truth, though, you're not actually "leveling" the print bed, but rather you're ensuring that the print nozzle is uniformly distanced from the bed (the print surface) on all its 4 corners. The nozzle needs to be super close, too. ...not about an inch or two away from the print bed, but rather it needs to be no further than the thickness of a piece of paper. Crazy, huh? When my wife and I printed a test file provided by Creality (the manufacturer), we frankly sat mesmerized at the unit's precision. It was like staring into a campfire and getting lost in the flames. The nozzle just zipped back and forth across the print bed leaving tiny bits of corn-based "plastic" one layer at a time, and eventually (over time) created a cat/dog thingy. In search of more things to print, we settled on two websites with tons of 3D-printable files that are very often free to download. The websites are "thingiverse dot com" and "cults3d dot com". The latter site takes longer to load, but seems to have more options. Creality has one too, but I haven't really checked it out yet. It's important to note that the files you download from such websites are *.stl files, whereas the Ender 3 needs *.gcode files. To make the file conversion, we downloaded a piece of software called Cura. It appears to be the best (free) software on the market for "slicing" 3D files into *.gcode files. That too has a steep learning curve, complete with complicated settings. But fortunately there are lots of tutorials online along with settings you can copy from experts. I mostly rely on "all3DP dot com" for that. After a while, we decided to invent our own designs and then print them into existence. In my opinion, the cat's meow -- the best and easiest 3D design application -- is Fusion360. It has a limited free version for students and schools, but otherwise it's quite pricey. My wife then found free, open-sourced design software called FreeCAD. We love it, and haven't turned back since. The filament we prefer is PLA. In our experience, PLA produces little to no fumes and it's guilt-free because it's corn-based and biodegradable. It should be noted, though, that not all PLA is created equally. This is primarily because (according to what I've read) pigments affect the PLA in different ways. So, when I order PLA from Amazon, I always look for the PLA with the most and highest reviews. Then, I refer upon their temperature recommendations. Overall, we absolutely love the Ender 3. At under $200, it's extremely affordable, and the process of printing things into existence can be (in my experience) somehow transformative. And if you find yourself confused about something, take my advice by not wasting time by trying to figure it out for yourself. Just refer to the experts on any of the websites I mentioned so, later on, you can focus on things that really matter...like design. Note: the bearing on a little fan went out. So, I reached out to Comgrow, they got back to me immediately, and now a new fan is on the way. No fuss no muss. Finally, at the risk of getting to personal, I'm a disabled veteran who benefits from focusing on tangible things. The process of 3D printing has proven itself to be such a godsend in that regard, that I think the VA should seriously explore ways of getting more vets 3D printing. I hope this helped newbies like me. Happy printing!
K**R
Wow. Almost perfect!
Looked at several printers and decided this was the best bang for buck printer, here in mid 2019. Also popular and a large support community. The assembly was moderate. An internet videos is a MUST as no one could easily assemble or understand the brief picture instruction sheet it comes with. Took me two hours to do things meticulously. Leveling the bed was not so bad. Took me a lot of fine tuning but I wanted it perfect for that first print. Leveling is also a task that is best done after watching several youtube videos. Seriously, no matter how smart you think you are, there is no replacement for real life people who have done this stuff and learned some lessons. First print was underway. I was confused for about 10 minutes the head/nozzle was down on the build mat doing all its motions and the filament was going in but I was not seeing anything being built. Strangely nothing was coming out. In hind site, I think maybe it was putting down a very thin base to build on. So thin it was hard to see. Because eventually it got into the actual feet of the dog and you could see it come together. Its amazing how that nozzle of goop can make such a fine print. Truly amazing. The two bad things: The First bad thing was, the demo dog you print, as a test, would have taken about 2 and a half hours, But they are not even nice enough to give you enough filament to complete it. It printed up to the dogs neck and then ran out. This was disappointing, but I would get over it. The second bad thing and the reason I took a star off was this. When the print was "done". (with no head) I decided to pull it and get ti ready for the next day when I would have more filament. The dog was stuck to the mat like Iron. People on the internet say "oh just give it a little twist, or a hard pull", or "get a putty knife" or some crap like that. Some even say put it in the freezer and the temp diff will just pop it loose. Let me tell you, I tried it ALL. I was even beating the object against the leg of my coffee table like a hammer, and it would not let go of the build mat. It could not have been more attached to that build plate if I had super glued the thing down. The ONLY thing that finally worked was to get a heat gun and seriously heat the mat up, almost to the point where I was melting the printed object, then after some force, it peeled off. IF it had printed it to completion, and I wanted to keep it, I would have had a crazy skirt of plastic around the bottom to trim off. I love the printer, it does some amazing work, but I need to find a way to get my finished projects off the mat without damaging them.
D**D
I wanted this to work well but customer service is great!
EDIT: Update 8-9-18 The company reached out to me and offered to replace some of the parts that I was having trouble with. I've changed the review from 3 stars to 5 starts for excellent customer service. Original review: I wanted so bad for this printer to be the best entry level printer on the market. Key word: wanted. I purchased this at the end of June as a small step into the 3D printing arena. With the success of the CR-10 (made by the same company as the Ender 3), I felt that the Ender 3 was a wonderful option if you didn't have a need for the large print space that the CR-10 has and were on an entry level budget. That's not to say that the Ender 3 has a small print space. For the price range, this has one of the largest. Assembly of the Ender 3 can definitely test your patience. If everything is not lined up just perfectly when you tighten all of the screws down, your end result will be a wobbly 3D printer. (FYI, the packaging that the printer came in helps resolve this issue if you set the printer on top of it.) Some of the first prints that I did weren't difficult to print as I wanted to ease into all of the features this has. Here's a quick list of my pros and cons: Pros: - Ease of use - The menus are easy to find and understand. It's incredibly simple to put your stl file on the micro SD card and start printing. While the placement of where the SD card goes in is a bit of a headache, you can get used to it over time. - Bed surface - I like the surface of the heated bed as it really grabs the plastic and it's one less thing you have to worry about (i.e. putting glue on the bed). Some times, it can grab the print a little too well and it makes removal quiet interesting. Cons: - Quality - In general, overall quality of the printer is lacking, but that just may be par for the price point. Prints can greatly vary from "it looks fine" to "what happened?" While I admit some of this may be my fault and inexperience with Cura, I've found that printing the same successful print can also give different results without any of the files being changed. Another quality issue were the rollers either being too tight or too loose from the factory. While some experienced 3D printing people know to look for this, someone who is taking this printer as their first step may not know how this will affect their prints. - Heated bed - Again, I like the build surface of the bed but I thoroughly dislike the bed overall. After spending so much time and effort into leveling the bed, making sure that all four corners are the right height and stay there consistently, disheartened is the best way to describe how it feels when you try and level the center of the bed. No matter what I did, the center of the bed was always too far from the nozzle. To fix this, I raised the bed but that causes all of the corners to now be too close to the nozzle. After much searching online, I came to find that this is a common issue and that the bed could be "cupped". A simple fix is to buy a 235mm x 235mm glass bed but that can be like throwing money at the problem. - PTFE tube and couplers - This issue may not present itself in the beginning but over time, you may notice consist under-extrusion (like having holes or gaps in the print lines) no matter what your settings are. A quick synopses of the issue is the coupler that holds the PTFE tube in the hotend slowly lets the tube back out as filament is fed in. This causes the filament to melt and expand to create a jam. No matter what your settings are in general, you're going to end up with poor print quality. There are videos online on how to get around this but again, you're spending money to fix the problem. Overall, I recommend this printer. While my experience may be vastly different from someone else, I seem to be having a similar experience to many other people online. I love the price point of the printer and that it helps you understand the 3D printing world. My advice is to do your homework. If this printer is exactly what you want and you don't mind that you may have to learn some things to get this running smoothly, then I hope my review has given you some insight.
M**.
Not as good of a deal as it seems: hidden costs, poor QC
Overall, I think this printer could be a good fit for you if you mainly want to print PLA and don't mind spending a LOT of time tinkering and fiddling with it to get it to work in the first place. If you want something that works well out of the box, look elsewhere. I'd suggest getting in touch with some of the online 3d printing communities for recommendations based on your budget and what country you live in. Like many people, I decided to buy an Ender 3 v2 because of the plentiful good reviews and affordable price. After owning it for a while now and tinkering and upgrading it to get it working properly, I think it's important to share a bit of my experience with those of you thinking of getting one. I've talked with quite a few people in the 3d printing community about this model, and it seems like my experience might be a bit better than what many people experience buying and getting an ender 3 v2 up and running. The printer wasn't difficult to assemble, but I was missing some of the hardware. Luckily I had some replacements on hand. It took a bit of time to figure out which extrusions were meant to go in each spot, as the instructions weren't the best and the extrusions were not labeled at all. Luckily, mine were not bent or warped, and they were tapped properly, although I've heard of people getting unusable extrusions. After getting the printer assembled, which took me about two hours, I levelled the bed, loaded PLA, and printed a test benchy. It turned out fine, thankfully. But due to the benchy's small footprint, I hadn't yet realized that my bed was warped upon delivery until trying a larger print later on. I ended up needing to purchase an auto bed leveling sensor (crtouch) in order to compensate for the uneven, warped bed surface just to get larger prints to adhere to the bed on the whole first layer, as some spots were too high and some too low due to warping. This got me a reasonable result for a while, until I decided I wanted to print something besides PLA. I decided I wanted to print drag chains to help my cable management on the ender, and with PLA they weren't flexible enough to snap each link together without the link breaking. So I ordered some petg, and loaded it up. I did a couple small test prints with petg at different temperatures, starting on the low end and then increasing it to get a result I was happy with. Once I got to 230°C, not an unreasonable temperature to print petg, the printer started smelling really bad like gross burnt plastic. The print seemed fine, but something was wrong so I turned off the printer. Talking to people online, they told me this was probably the PTFE in the hot end getting too hot and starting to degrade, giving off toxic fumes. Sure enough, upon removing the Bowden tube from the hot end, it was discolored and a bit misshapen. In theory, this is not supposed to happen until 240°C+, but it must either be that the PTFE was some impure formulation or other material, or possibly the thermistor is inaccurate making the hot end get much hotter than it thinks it is. Either way, I was already invested in this printer and didn't want to write it off as a sunk cost and move on, so I ordered an all metal hot end which doesn't use PTFE, so it can safely print at higher temperatures. I got that installed, along with a new thermistor, and went on printing daily in petg for the last few weeks without any major issues, but that's after spending ~80 hours troubleshooting the issues I mentioned as well as plenty of other smaller problems due to the (lack of) quality of some of the parts and hardware. Apparently, from what I'm told by several ender 3 v2 owners online, I'm lucky to only have had the issues listed above, and should be glad I didn't have to try to contact Creality, because from what I'm told their customer service is pretty much non existent. It's been a learning experience for me, but not one I would choose to go through again.
D**W
Very addictive!
I have been thinking about buying a 3d printer for a little over a year. They have been pricy so I've not stepped into this arena, especially with so much information to wade through. So I bought this printer on a whim with a "lighting deal." First, I read other reviews and found YouTube for assembling the printer. The instructions help a little with the videos, but this is really the only negative. It's well made and simple to assemble so it made for a fun afternoon. Next thing to know is that I didn't know nearly enough. Once it's assembled, you have to level it. Luckily there's a ton of videos on this, and the assembly videos will go through that as well. It's not hard, but something I never thought of. I also got the auto leveler and installed it a few days later. That's a whole different thing that is amazing once you figure it out. Another thing i didn't realize is the print bed. This printer comes with one, obviously, and it does a good job. Keeping the bed level is hugely important for your prints. Also keeping it clean. It's never really clean though. I watched a ton of videos about using alcohol to clean it but that can actually be too harsh. Soap and water seems to be the go to across forums. Using some other adhesive is fair game as well. I didn't realize how much damage I did and bought a glass bed for my prints. Glass was amazing! It actually struggled to get prints to release. But the alcohol was too much and had already started to ruin my new bed. So, just soap and water should get you through most issues (and don't be afraid of the glass bed, it is pretty nice) Now, your filament absorbs water. I also didn't realize this and thought the various filament storage and dryer were just frivolous. They are, and they aren't. I have silica beads, and a vacuum sealer, so I don't strictly speaking need one of those. Also, my oven has a dehydration setting. However, it's nice to just have one on hand and not take up the kitchen or extra electricity from having the oven on. So, need one, no, but I'm not mad that my bundle came with one. Most of the rest of your questions can be Googled. But also, read forums, not just the popular videos and articles (it's how I've ruined two print bed). Everyone loves discussing the slicer (print configuration software basically) settings ands getting the most out of each print. I'm personally looking forward to learning to build my own designs, but don't feel like you have to. My kids love me printing endless frogs and cats for them to display and show off. My nephew likes the toys I've managed so far. Above I've mentioned things I've learned and wish I knew more about ahead of time. However I haven't really talked about the printer itself. It's been great. There's no real instructions because each print is a little different. You need to experiment to see what works best with everything. That may not be for everyone. But you can create surprisingly large prints with great detail with this printer. It's been smooth! It's worth noting that 3d printers can be loud, but it's not very. If say it's more quiet then most dot matrix printers. I can sit by it printing and work on other projects, or leave the room and I can't really hear it. So if you're wanting to break into this as a hobby, this is an excellent printer to start with. It's a little older so there's tons of help out there for it and it's been reliable. Replacement parts are not expensive, nor are upgrades. TLDR: This is a good printer and I'm happy with my purchase.
J**N
LOVE IT!! I've been printing like a madman!
**** Update 3/27 - So after a few days of printing, one of my belts started slipping. That caused my larger prints to slip off to side at certain points during the print. And it's getting progressively worse. I've contacted the manufacturer to see what they can do to get me replacement parts, but as of now, my printer is no longer functional. When it was working correctly, it worked well. But now it's just a very large $200 paperweight. See below for my review before the issues. So there is definitely a bit of a learning curve, but with the Creality Ender 3 and the included Creality Slicer program, learning is both fun and easy. I'm on my 3rd day straight of printing various things. I started Thursday with some small ship models, the Friday I tried some different small models, putting several models onto the same print job. I also did 2 tank models for my second print job Friday night. Today I printed an X Wing Tie Fighter combo and am now working on Klingon battle cruiser measuring 105 mm by 144 mm by 27 mm, my biggest print job yet. And most of my results have been very good. I've had some misses too, but thats mostly in the print settings or because I've scaled on objects print size too small. When you use the slicer program, make sure you choose to set the advance printer options. There you can choose nozzle temp, bed temp, print speed, and fill density, and other parameters that can make or break your model builds. To get started printing, go to some place like Thingverse and choose a model you like. I recommend trying smaller models first, with varying degrees of model complexity and detail. Then play with the settings in Slicer to generate the best gcode file for the model you are trying to print. The assembly of the Ender 3 was fairly straightforward and easy but at a relaxed pace will take about an hour to complete. Be careful during assembly that you don't get the cables tangled in the structure as you will need to have slack when plugging the various cables in. You are provided all the hardware you need plus the tools to complete the assembly. You are also provide a scraper for removing models from the print surface, and wire cutters if you choose to use the zip ties to anchor your cables to each other or the frame. Use the enclosed USB to TF card device to install the Creality Slicer software and the manual for the software. You will also use this to load your gcode print files onto. It's easiest to put your models onto the TF card then print off that directly from the printer. I've had this sitting in my cart for quite some time now, and now that I have it I am sorry I waited so long to buy it and get started. It's an amazing deal for a printer that works so well.
E**N
Great printer, was easy to assemble and use
I bought the Ender 3 because I was unhappy with my previous printer which had severe adhesion problems even with careful leveling of the surface and surface preparation. Additionally I hated changing filament on the printer I had before this one because I would never be able to print after changing the filament without changing the print head. I did follow correct filament changing procedures but it never successfully went from one filament to another. So I feared this one might be the same but it was very reasonably priced and larger so I tried it. I am very good with assembly of things electronic and mechanical. I did not have any major issues with the assembly of the printer. Reading the instructions is very necessary. They are pretty good but there was one or two pictures that I did have some difficulty figuring out the orientation of the parts. My assembly time probably took about an hour and a half. My first print I did was Yui from SAO (The upside down figure pictured) and I never successfully printed that one on the previous printer. She printed nearly perfectly on the first try. Since then my printer has been running night and day printing all kinds of unnecessary items that we really cherish. ;) My longest print was Hogwarts castle in multi colored PLA. I think it came out really well. It took over 60 hours to print and the printer did not have any heating problems. This printer has a resume feature that I have had to use twice due to power outages. The first time it failed to resume properly and started to make spaghetti but the second time it picked it right up and there was no glitch or anything to be found in the final print. Leveling the deck is a manual process but is fairly easy and I have only had one issue with it where after continuous running one of the adjustment knobs vibrated off so I had to screw it back on for the next print. The controls are not complicated, it is a push button knob. You scroll through choices and push the knob when you are on the right one. The slicer program also seems pretty easy, I started printing without having to make any changes to the default settings it came with. Machine arrived with up to date firmware. I would still check yours when you get it because these things change all the time but I found that semi impressive.
D**R
Toller Einsteiger 3D Drucker
Ich bin ein 3D Druck Neuling. Daher war der Ender 3 pro auch mein erster 3D Drucker. Vorerst war ich etwas geschockt über einige schlechte Bewertungen (sowohl auf Amazon, als auch auf YouTube), die über verzerrte Drucker und durchhängende Druckbetten berichten. Jedoch habe ich mich wegen des guten Preises für den Ender 3 pro entscheiden und wurde nicht enttäuscht. Der Aufbau des 3D Druckers war sehr einfach und toll in der Anleitung beschrieben. Auch die Verkabelung war sehr eindeutig in der Anleitung beschrieben. Im Vorfeld habe ich mir schon eine 3D Datei vorbereitet und diese im Prusa Slicer gesliced. Nach dem Zusammenbau habe ich den Drucker an den Strom angeschlossen und die SD Karte mit der G Code Datei eingesteckt. Nun habe ich die Nozzle vorgeheizt um das Filament einzufädeln. Das ging nicht so leicht wie erwartet, ist aber mit ein bisschen Fummelei schnell zu machen. Anschließend habe ich den Druckvorgang gestartet und der Drucker fing mit dem automatischen Nullen der Achsen an und heizte danach das Bett und die Nozzle. WÄHREND DES GESAMTEN DRUCKVORGANG STAND ICH IMMER MIT EINER HAND AM STECKER DES DRUCKERS, UM IHN ZU STOPPEN, WENN ETWAS PASSIERT, DAS SICH NICHT RICHTIG ANHÖRT ODER NICHT RICHTIG AUSSIEHT. Fazit: Ich bin sehr alles in allem sehr zufrieden und habe einen guten Start in den 3D Druck bekommen. Die Druckqualität reicht mir, ist aber wenn es um Feinheiten geht manchmal nicht ausreichend. Für große Drucke reicht es aber alle Mal! Er bekommt von mir klare 5 Sterne, weil er ein super Einsteiger Drucker ist, der mir einen tollen Start in den 3D Druck gewährt hat. Große Empfehlung!
T**R
Bin sehr zufrieden
Die Rezension bezieht sich auf die Version Ender 3 Pro V1. Inzwischen gibt es die V2 die klar bevorzugt werden sollte da diese das Silent Mainboard vorinstalliert hat. Als Einsteiger in die 3D Druckwelt habe ich mir dieses Modell gekauft da es recht verbreitet zu sein scheint und dementsprechend einfach Hilfe bei Problemen zu finden sein sollte. Aufgrund diverser Empfehlungen aus dem Netz hab ich den Drucker von Anfang an nicht in der Standardkonfiguration betrieben sondern ein paar Teile ausgetauscht: - Capricorn PTFE Schlauch - Redrex Bowden Extruder Aus dem großen Thingiverse Schatz hab ich mir auch das ein oder andere Upgrade selbst gedruckt. Für die Druckqualität wichtig scheinen so kleine clips zu ssein die ein wackeln des PTFE Schlauchs verhindern. Der Aufbau ist mehr als simpel und sollte niemanden vor eine Herausforderung stellen. Einzige besonderheit die ich auch im Netz nachgoogeln musste: Der Schlitten der x-Achse also wo der Extruder dran ist war nach dem Zusammenbau seeeeeehr wackelig. In der Anleitung nicht erwähnt wird, dass an der unteren Schraube mit der Rolle eine Exzentermutter angebracht ist die gedreht werden kann damit der Schlitten spielfrei läuft. Jetz der wichtigste Punkt überhaupt: Lasst euch zeit beim Einstellen des Bed Levelings. Für einen erfolgreichen druck ist es das A und O. Beim ersten Versuch hab ich nicht richtig aufgepasst und es zu eng eingestellt, sodass die Düse leicht "durch" die Magnetplatte gefahren ist. Zum Glück nur am Rand, aber es wäre ärgerlich es auf die Art kaputt zu machen. Ebenfalls ausdrücklich davon abraten möchte an diese Platte mit dem Spachtel zu gehen, da man jedesmal einen dünnen teil der Oberfläche mit abträgt. Wenn das Bed Leveling stimmt lassen sich Reste oder ähnliches leicht mit dem Fingernagel entfernen. Auf der beiliegenden SD Karte sind 2 oder 3 Beispiele drauf. Es ist Zeitverschwendung diese zu Drucken. Ich habe in meiner Unkenntnis das Sparschweinchen gedruckt. Es dauert nicht nur ewig, die Qualität ist auch absolut mies. Daher lieber etwas schönes aus dem Netz suchen und durch den Cura Slicer schicken, die Qualität dieser Drucker ist einfach nur unfassbar besser. Keine Ahnung warum der Hersteller hier sein Produkt unnötig schlecht macht. Die Lautstärke in der Roh-Version (die es inzwischen wahrscheinlich nicht mehr gibt da durch die V2 abgelöst) ist... nicht Wohnzimmer geeignet. Definitiv nicht! Durch Austausch des Mainboard und diverser Lüfter lässt sich durchaus was rausholen. Da es mein einziger Drucker ist konnte ich die Qualität nur anhand einiger Youtube Videos mit anderen Modellen vergleichen, aber ich selbst bin überaus zufrieden mit dem was der Drucker ausspuckt. Die Bedienung ist sehr leicht und wie erwähnt empfehle ich den Cura Slicer dessen Ender 3 Profil "perfekt" ist. Hatte jedenfalls keinen Aufwand daran herumzufummeln oder Werte anzupassen, das lieferte Out of the Box prima Ergebnisse. Ich habe bislang ausschließlich PLA gedruckt, kann also über andere Materialien nichts sagen. Nachträglich habe ich mir das Creality Board 1.1.5 Silent zugelegt was die Lautstärke der Stepper massiv reduziert. Inzwischen würde ich allerdings zu dem neuen BigTreeTech 2.0 Board raten, da dieses nicht nur Silent Stepper Driver verbaut hat sondern auch einen größeren 32Bit Controller verwendet, der genügend Platz für alle Features der Firmware bietet während die Crealitiy Boards nur die Sanguino atmega1284p verwenden die einfach nicht mehr den benötigten Platz bieten um "alle" Features der Marlin Software unter zu bringen. Ebenfalls habe ich mir Dämpfer für die Motoren gekauft, diese sind aber nur mit SEHR VIEL gebastel am Gerät anzubringen, da die grundlegende Konstruktion nicht für ein vergrößern der Abstände ausgelegt ist. So müssen beispielsweise die aufgepressten Riemenzahnräder weggeflext werden und durch Schraubbare ersetzt werden um Abstände auszugleichen. Diese Modifikation würde ich nicht nochmal machen. Fazit: Würde ich das Gerät wieder kaufen? Ja definitiv. Es sind zwar meiner Meinung nach einige Mods und damit Zusatzkosten nötig, aber da ich gerne Bastel ist das durchaus Willkommen. Die Druckqualität ist meiner Meinung nach hervorragend und die Bedienung kinderleicht, kompliziertester Teil ist das Bed Leveling.
C**E
A good printer
****UPDATED FEBRUARY 2021**** Most problems have been solved, thanks! They sent me replacement and/or partial refunds for the problematic parts. Thanks a lot! Ender 3 pro is long to build - be sure to watch Youtube Videos as written info isn't enough - but it's fully customizable, affordable and printing quality is amazing. You have to put some efforts into it, beware, but the satisfaction of your 3d printer working perfectly is worth it.
M**X
Super soddisfatto, ottimo acquisto
Comprata come regalo per mio figlio, alla fine è stato un regalo anche per me. È una stampante entry level, ma stampa veramente bene con una qualitá che mi ha sbalordito. Non posso fare altro che consigliarla. Ho comprato poi anche sensore per filamento, indispensabile se non vuoi buttare via la stampa se a metá termini il filamento.
A**A
Wished tech was available 20yrs ago
Product is simple and amazing. I am looking at functionality versus absolute quality and this is perfect for me. The product has been handy for making anything u can think of. I was able to quickly draw a repair part for a washing machine and that has recoverd a third of my investment here. With some free 3d online files, i've managed to make my printer more compact. Only cons for any enthusiast is the purchase of 3d drawing software if Tinkercad aint enough.
Trustpilot
2 weeks ago
2 days ago