

Buy anything from 5,000+ international stores. One checkout price. No surprise fees. Join 2M+ shoppers on Desertcart.
Desertcart purchases this item on your behalf and handles shipping, customs, and support to Thailand.
🤖 Step into the future of DIY robotics — assemble, control, and impress with every move!
The Freenove Bipedal Robot Kit includes a Raspberry Pi Pico dual-core board and all essential parts to build a wireless-controlled walking robot. Featuring LED matrix expressions, obstacle avoidance sensors, and app-based control for Android and iOS, this kit offers a comprehensive hands-on robotics experience with downloadable tutorials and code. Battery not included.


| ASIN | B0D255WG7M |
| Best Sellers Rank | #2,550 in Single Board Computers (Computers & Accessories) |
| Brand | FREENOVE |
| Color | with Raspberry Pi Pico |
| Customer Reviews | 4.1 4.1 out of 5 stars (43) |
| Date First Available | April 19, 2024 |
| Hard Drive | 2 MB |
| Hard Drive Interface | USB 2.0 |
| Item Weight | 1.03 pounds |
| Item model number | FNK0033A |
| Manufacturer | Freenove |
| Number of Processors | 2 |
| Operating System | Embedded |
| Package Dimensions | 7.68 x 3.54 x 3.54 inches |
| Processor | 133 MHz none |
| Processor Brand | Freenove |
| RAM | SRAM |
| Series | FNK0033A |
| Wireless Type | Bluetooth |
B**R
Great kit
For me, the is a great beginner robotic kit to start out with for those looking to learn either about robotics in general or the Raspberry pi or both. Good thing about this kit is it does come with a couple extra parts like a spare servo and spare screws just in case. The only downside was one of the legs cracked where the servos go, but I was a bit lucky that it only cracked where I was able to get the servo screwed in and used a little glue to fix it. The tutorial is downloaded which is a good thing in a sense as its almost 200 pages long to include the setup of hardware and software but the various things that the robot can do. Although the instructions could be a bit clearer than it is.
T**N
A lesson in patience and aggravation - don't buy
First problem was the included hardware didn't match the online information for what you should have. Seemed there were perhaps enough screws to go around so I decided maybe I could scrap by - first mistake, nope that was the second mistake, first was getting this thing to begin with. Third mistake was thinking this would be a cool kit to work on with my son. Nope. I mean Lego's sure but this mess, nope. I have built personal computers, code, work with SQL, scripting and programing languages so this "prepared" kit should be a cake walk - even if the included screws were not completely correct. But sadly it wasn't. It started out somewhat okay, as I got the servo's connected and ran the first sketch - success! Short lived success but success none the less! It was after this that it started going down hill actually. I realized the included screws were not going to be much help with the final pieces, there just wasn't enough longer screws to get it to hold everything together like it should, so it was a bit loose instead - I should have stopped and shipped it back at this point but yet another mistake on my part. Once it was somewhat put together, I reconnected to my pc to upload the rest of the sketches and see how this would work. But all I was getting was error, error, error - and it would have been nice if the speaker worked and had the "Warning Will Robinson!" or something so I could at least be entertained, but this thing would only get the original "blink" sketch to work and then nothing but errors on the rest. I could have spent time trying to figure it out or email support asking why their code for their robot didn't work, but have better things to do with my time than spend more of it trying to fix this mess. I mean the M2 nuts were so damn small it took forever to get them on and the "spreader" included didn't seem to fit anything. Just save your money or find another kit that is hopefully better than this garbage. It's bad enough to waste time on it, let alone your money so my advice is just move along, nothing to see here.
K**B
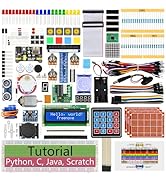
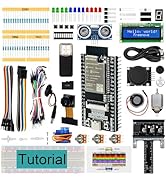
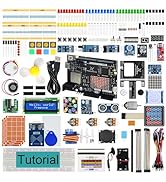
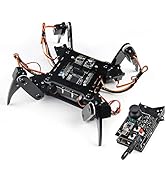
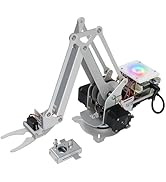
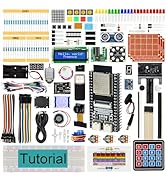
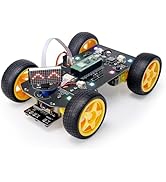
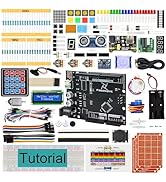
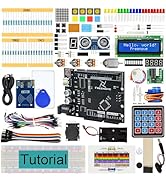
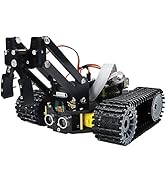
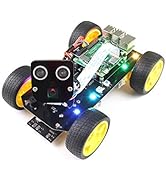
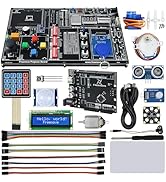
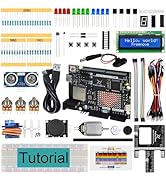
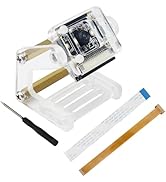
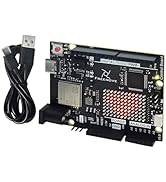
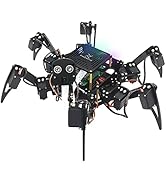
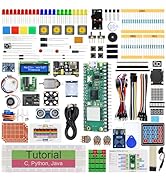
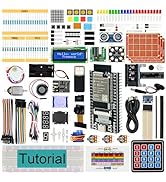
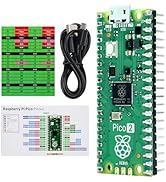
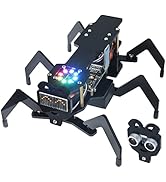
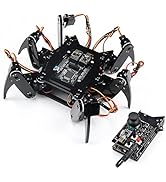
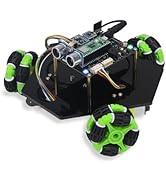
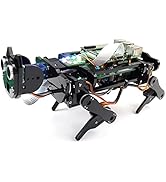
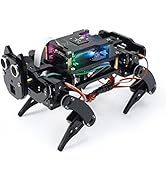
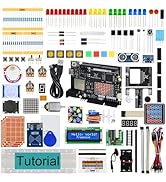
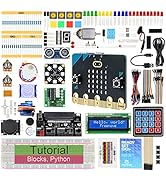
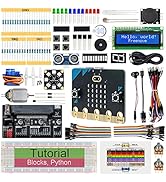
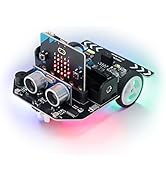
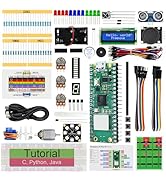
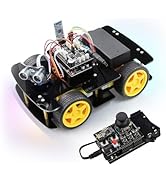
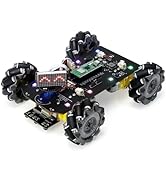
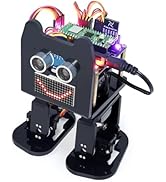
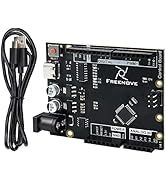
This was a very fun project. It requires you to download a zip file, that contains the full tutorial, and includes instructions, and all the software projects. You will be directed to download and install the Arduino Integrated Development Environment (IDE), and all the instructions to do so are reasonably clear. Note: Depending on your PDF viewer, if you've zoomed in on the PDF tutorial further than a full page view, your mouse wheel may not scroll through the pages. You'll want to ensure that mouse wheel scrolling changes pages, because not all pages are listed in the index at the left. You begin by setting up the Arduino IDE and loading a sketch (program) and installing it on the raspberry PI, which will set all the servos to a known angle, after you connect them. Then comes the hardware assembly. There are a few minor mislabels, and you will need some patience, and some tweezers would be useful, as some of these nuts and very very small and need to go into places that were too small for my fingers. Half way through assembly you will be directed how to connect the servos to the PI and turn it on, which runs the program you already loaded to set the servo angles to 90 degrees, so that you can mount the legs in the proper orientation. Once it's all together, the software tutorial starts. They have included a large number of simple programs to load, each of which demonstrates how a single component is controlled (eg the speaker, the buzzer, the led displays, the coloured LEDs, etc). I was already familiar with the Arduino IDE, and controlling hardware through sketches, but I think they did a great job of simplifying it, and walking you through installing and running each sketch. You can either just use them as a set of component tests, or follow into their detailed explanation of how the software works, right down to what signals the IR remote sends, etc. It's not important to understand everything right away, you can go back later and re-examine it all, and learn it as deeply as you like. There are a few glitches and omissions, but for the most part everything was well documented, and easy to follow. eg 1: For the Chapter 1.5 LED matrix sketch, the instructions appear to have left out a library you will need to install to compile the sketch: the "adafruit_gfx" library. Install it when you see the instructions for installing the Freenove_VK16K33_Lib, by following the same procedure. eg 2: In chapter 4, it says "Sketch 04.4_Multi_Functional_Robot.ino is almost the same as 04.3_Multi_Functional_Robot.ino, except that it is added with the music play function." I found that the 04.3 sketch worked fine, but the 04.4 sketch didn't work well - the robot would stop responding after almost any button press, and the music functions didn't work at all in this sketch. As I said, I was familiar with the environment, so I pushed through the entire tutoral in one session, testing each component, and finally running "full control" via the IR remote-control and the phone APP. Start to finish, this took me 4 hours. The robot walking movements are fairly bad, and sometimes it's feet even collide with each other, but this project isn't really about making a walking robot - it's about learning. Learning how to put hardward and software components together, how hardware is controlled via low level software, and learning how to make it do new things yourself. I was really impressed with the whole package, and had a blast playing with it. I would definitely recommend it for anyone who wants to learn, on a detailed level, how things work.
K**R
As soon collaborations tool code runs robot start dancing on the other leg?
L**A
Se lo compré a mi hijo para reyes y está genial, lo único malo es que el chip hay que comprarlo aparte
K**K
Ok
U**R
自由研究に買いましたが、解説動画も説明書も全部英語です。
Trustpilot
2 weeks ago
2 days ago