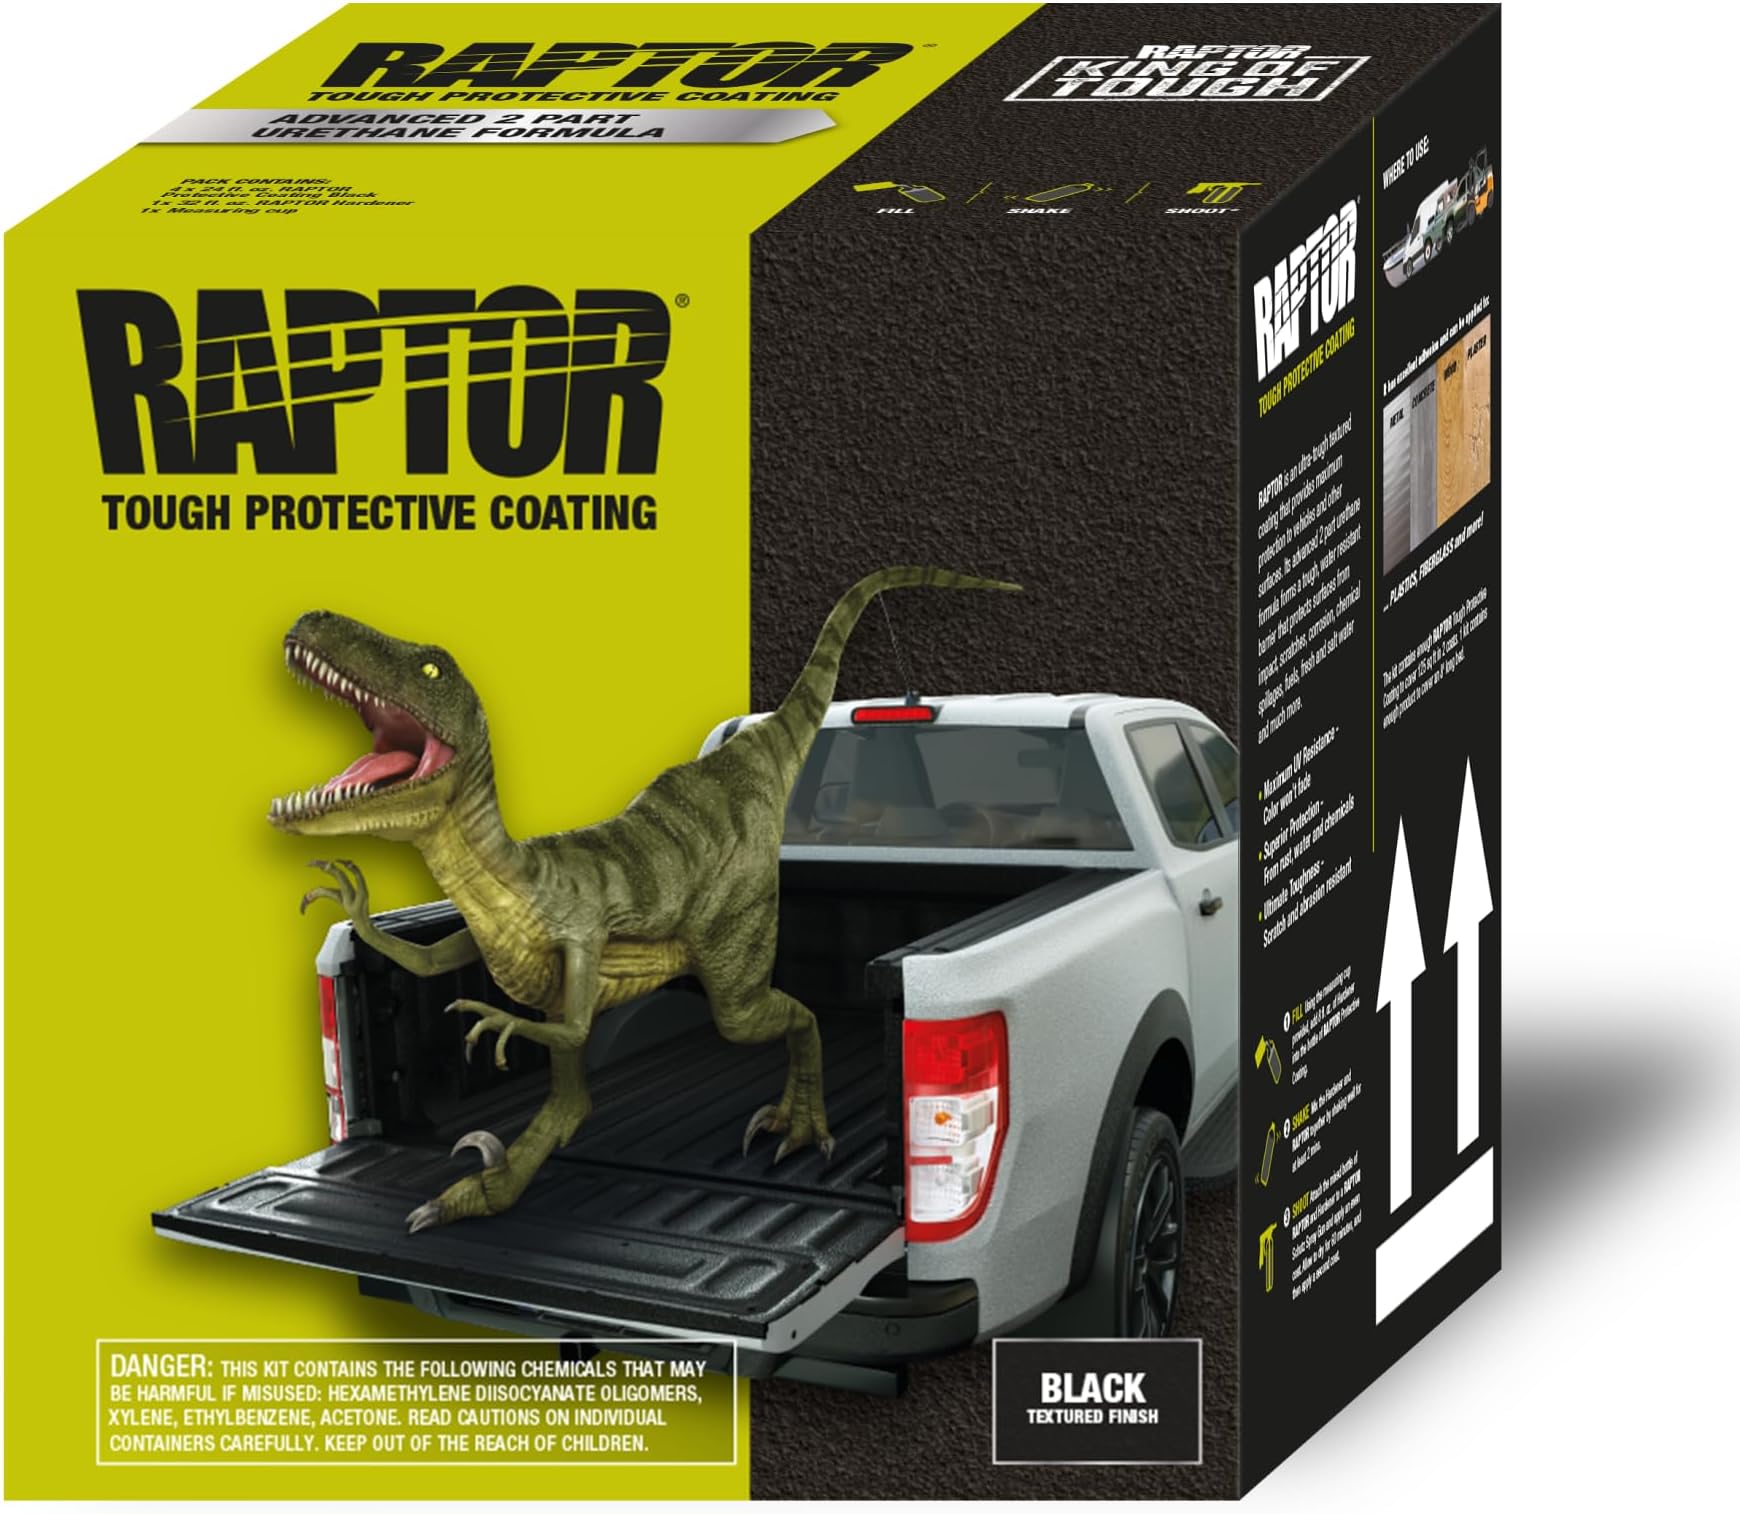


Raptor Liner Kit, Spray-On Truck Bed Liner Kit, Protective Paint For Tailgates and Trucks, Vehicle Undercoating, Black, 1 Gallon
Product ID: 79151201
⚡Rapid-dry formula (multiple coats in 1 hour)
🎯Covers up to 125 sq. ft.
🛡️2K urethane tough coating
Buy anything from 5,000+ international stores. One checkout price. No surprise fees. Join 2M+ shoppers on Desertcart.
Desertcart purchases this item on your behalf and handles shipping, customs, and support to Thailand.
🛻 Spray it, shield it, own the road with Raptor Tough!
The U-POL Raptor Liner Kit is a premium 2K urethane spray-on protective coating designed for truck beds and more. It delivers a durable, flexible, and UV-resistant finish that resists rust, scratches, stains, and extreme temperatures. The kit includes 4 bottles of tintable base, a hardener, and a spray gun, covering up to 125 sq. ft. Rapid drying allows multiple coats within an hour, bonding directly to OEM paint or primer for superior adhesion. Ideal for DIY enthusiasts seeking professional-grade, heavy-duty protection that reduces road noise and vibration while maintaining a sleek, fade-free look.


| ASIN | B01CKE7B1E |
| Best Sellers Rank | #9,300 in Automotive ( See Top 100 in Automotive ) #9 in Truck Bed & Tailgate Bed Liners |
| Brand | U-POL |
| Customer Reviews | 4.7 4.7 out of 5 stars (5,437) |
| Date First Available | March 4, 2016 |
| Is Discontinued By Manufacturer | No |
| Item Weight | 1 pounds |
| Item model number | UP0820 |
| Manufacturer | U-POL |
| Manufacturer Part Number | 820_BOX_WGUN_FBA1 |
| Product Dimensions | 10 x 10 x 10 inches |
R**T
Awesome Reseults!
Let me start by stating that I bought and applied the Raptor Spray-On Bedliner approximately 3 months before this review was written and I am 100% completely satisfied and happy with the results. A little more background info...I have painted 3 or 4 other bedliners in the past using different brands, including Rustoleum and Rhino. Raptor is by far the best so far. I am also nothing more than a guy who likes to do things for himself. I'm not a mechanic or professional "car guy" in any way. In fact, aside from changing out my own head light bulbs, I won't touch anything else on my truck. I'm also not a contractor- my truck gets used for hauling things frequently, but not on a daily basis, so I probably but it through a moderate amount of abuse, but not intense, daily abuse. Ok, to start, I chose this Raptor kit after reading many reviews and watching several online "how-to" videos. In the past I used brushes and rollers to do the job, but I was never fully satisfied with the results- look and durability. I wanted to try the spray-on method to see of it would turn out better. I'm glad I did! Also, I applied this liner to a 2013 Chevy Silverado short bed that was new to me and in great condition, not a beater truck by any means. VERY IMPORTANT- prep is the most important part of the job so DO NOT get lazy and cut corners!!! I started the job in the morning by removing the already installed drop-in plastic liner and sanding down the bed and bed walls. I did not apply to the tailgate as it had the plastic portion installed already and removing it to spray in the Raptor meant having to mess with the wiring for the backup camera and I wasn't interested in doing that. I used a Ryobi cordless sander and a Black and Decker corded electric hand-sander to remove the paint. I probably went a little too far down in some areas and exposed the bare metal, but not a problem because I also sprayed in a couple coats of U-Pol Acid Etch Primer #8. But before that, I washed out the bed with TSP and water followed by a wipe down with Acetone and then taped off all parts I did not want getting painted. Blue painter's tape worked just fine. I also wrapped most of the rest of the truck with plastic painter's tarps so that no mist or paint got on any part of the truck I did not want it on. Once the bed was sanded down, cleaned, taped off and primed, it was on to the bedliner. I chose the Raptor brand because of the spray-in feature, but I did not have an air compressor. I had planned on renting one for a few bucks, but my neighbor had one I borrowed. Nothing heavy duty, but enough to reach the recommended PSI (60??? double check the directions). I also had to buy an adapter (3 or 4 bucks from Advance Auto) because the supplied gun was not compatible with the compressor hose. Not a big deal and easily addressed. Spraying in the liner was easy, but it took me a little bit to get the hang of it. Definitely watch a few videos online to see how others did it. My kit came with 4 bottles of liner and 1 bottle of activator. Make sure you wear gloves- I did not and I paid for it with black hands for a week or so. Follow the directions that come with the kit for mixing and then paint. Its a simple process...make slow, smooth passes with a slight overlap. The first coat should be light and you can go heavier as you do more coats. I think this kit gave me 3 or 4 coats. When I painted in the liner, I actually ran out of daylight as I finished the 3rd bottle. As a result of rushing and trying to finish the job before the sun went down, that last coat was not sprayed evenly and when it dried, there were light and dark splotches that looked like I used 2 different shades of black. Not a problem. The next day I sprayed on a final top coat with the 4th bottle. I took my time, moved slowly and smoothly and in the end everything looked great. I did not use haul anything in the bed for about 2 weeks after spraying in the Raptor liner. I don't remember what the directions recommended, but whatever time frame was, I gave it a couple more days to be extra careful. In the end, I am extremely happy with the results and definitely recommend this product to anyone thinking of doing their own bedliner. It was very easy and in the end mine came out looking almost professional grade., All told, including buying the primer, tape, adapter, tarps, etc. I paid less than $200 for a bedliner that would have cost me hundreds more to be professionally sprayed in. It took me just over a day to do and 3 months later, it looks as good at it did the minute I finished and I haven't noticed any wear whatsoever. I hope this review helps and good luck!
T**G
Great Product...Will Buy Again!
Great Product! I used this on my Ram 1500 and it turned out great. Directions were easy to follow and applying it was pretty simple. Hardest part was the prep work on getting the bed ready for spraying. Set my PSI at 50 and took just a couple of minutes to apply each coat. The final results turned out better than I expected. Highly recommend this product!
W**E
Great product
Excellent product. Easy to apply. Very happy with the results. Highly recommend! 👍
C**9
Great Product
I like to fabricate up weight equipment for my home gym. I was looking for a tough durable coating that could take some dings here and there. Used it today for the first time and it went on flawlessly. I heated a medium bowl filled with water in the microwave for 5 minutes. Then stuck the bottle in the water once I pulled the bowl from the microwave. I let it sit for 15 minutes. Since this is a thick liquid it just makes sense to me to have it warm to improve spraying. Might not make a difference, but everything worked great for my project! The spray gun had a small leak near the handle in the hollow cavity. Dunno if this is normal or not, but it didn’t affect the performance. I set my regulator on my compressor to 60psi to spray this product as well. Purchased the 4 bottle kit, but only used probably 1/3 of one bottle. So it goes a long way and will be used on other projects down the road. Since I fabricated this piece it was bare metal (A36 steel). I sand blasted it down to a bright white finish. Then acid etched it with a UPOL product aerosol spray can. Then sprayed the Raptor product. Awesome look and finish!!!!
C**S
Amazing product for the money!
I’d like to start off by saying that I’m a complete novice when it comes to Bedliners. I did a few weeks worth of research and decided to go with the raptor bedliner kit. My truck was not cheap by any means so I wanted to use a product that was both durable, and looked professionally applied. This was a challenge to accomplish without spending $500 with line-x type products. I feel that raptor is the best option when it comes to DIY applications. It is very easy to use, and looks incredible. I get compliments on how professional the bedliner looks, and my relatives refuse to believe I applied it myself. I will say along with previous reviewers that PREP IS KEY! I spent about 3 to 4 hours sanding the bed of my truck until it was completely free of the factory paint. I then wiped the bed down with acetone, and sprayed u-pol #8 prep primer (I purchased and used 2 cans). The primer is really only necessary on bare metal surfaces, or if there was any light surface rust that needed to be sanded down. I chose to primer the entire bed of my truck as added insurance for maximum adhesion. I did not spray my tailgate, as it already had a plastic liner on it. I wish I would have purchased an additional 2 bottles to add a few more coats to the bottom of my truck bed for a thicker coat. The beauty of raptor u-pol products is that if it fades or scratches, you do not need to re-sand areas to re apply the bedliner. You can simply clean the area with acetone and re-apply. A few weeks ago we needed to haul 3 truck bed loads of mulch, and on the last load I scraped the shovel on the ridge of the bed and scratched the bedliner down to the primer. I also noticed sfger I washed the bed that there were a few nicks and light scratches. I was a little disappointed at first but I would consider myself to blame and not the product. If I would have held the shovel differently or used less pressure, the bedliner would not have scratched. I will soon be buying a few more bottles and fixing the bed before snow falls. I have been recommending this product to friends and family and will continue to do so!
J**N
DIY-Friendly Spray-On Bed Liner – Great Results if You Put in the Prep
DIY-Friendly Spray-On Bed Liner – Great Results if You Put in the Prep Used this U-POL Raptor kit to spray the bed of my 2021 F250 in the driveway. The included gun and “fill–shake–shoot” bottles make it very DIY-friendly, as long as you’re comfortable masking, scuffing, and running a compressor. Coverage was enough for a full-size bed with two good coats, and the texture/finish came out even and professional-looking with solid grip underfoot. It’s held up well against typical use, UV, and minor impacts. The trade-off: surface prep is everything—any shortcuts will show—and you do need a decent compressor setup, so it’s a moderate project, not a quick rattle-can job. For a DIY’er, it’s a cost-effective way to get a durable bed liner without paying shop prices.
K**C
Gun included. Great solid product. Got it quickly
The pictures show a gun included but the description didn't. It was still cheaper than our local supply store so I bought it anyway as hubby had a old gun from his last time using it. It was a pleasant surprise to see the gun actually did come with it. My husband loves this product when he restores cars.
J**S
It has been about 2 months since install, still tough as nails. Love this product!
I researched numerous different brands of bedliner sprays before deciding on this one. They all had plusses and minuses. I decided on Raptor because of its reputation and the spray finish obtainable. I have a Polaris 6x6 Ranger and wanted to protect the bed and abrasion areas like floorpan,s etc. from rust. I had rust to kill to start with. I wire wheeled the loose rust off, then brushed on some muriatic/hydrochloric acid on the rusted areas that were not holes. Thoroughly rinsed off the acid and second coated with acid anywhere that still showed visible rust. After rinsing, drying, and blowing out trapped water with air, I left it sit and dry for a day inside shop. Before coating with raptor I used a propane/mapp torch to warm up the steel until it "sweated" and stopped as soon as the moisture disappeared. I then masked off areas needing protection and sprayed the Raptor product. It looks awesome! It is holding up and I get compliments from everyone that sees it. I now have to replace part of the bed with bad rust through areas. Other than the new area of material being welded in to replace the old rusted areas I will use the same technique. I will etch the new metal after it is installed. I bought 18 gauge steel to replace the damaged area and am using a bending brake to emulate the existing bed steel corrugations. Looks like it will be great and for the most part undetectable repairs. The person I bought the 6x6 from left dirt and other debris in the bed front where it never got to dry out, causing the rust. I am adding a few 1/4" weep holes before spraying the Raptor to prevent further issues over time. This is the best product I've come across, but prep is EVERYTHING! If you prep it well it will bond well. If I think of it then I'll post pics when done...
R**Y
Works well
Good product
飯**光
仕上がりが、最高でした。
とても扱いやすいです、時間経過しても剥がれは無く、満足です。
R**.
Calidad de los productos
Producto llego muy golpeado
レ**パ
軽トラに
軽トラの荷台を錆防止で塗りました 製品側の付属パイプに気づかずそのままハメて出ない出ないとわめき散らしたけど施行後パイプに気づきました 損したけど星5くれてやるわ
C**P
Good product
Good product. Very scratch resistant
Trustpilot
3 days ago
3 weeks ago