
DOWNLOAD THE APP


Customer Services
Copyright © 2025 Desertcart Holdings Limited
DOWNLOAD THE APP

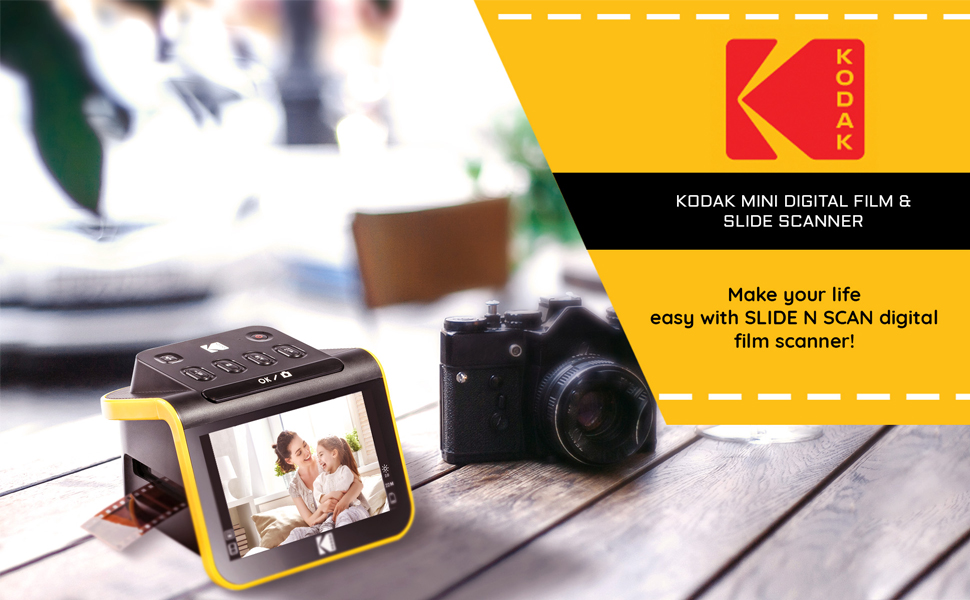
📷 Turn your forgotten slides into timeless treasures—fast, flawless, and fabulously easy!
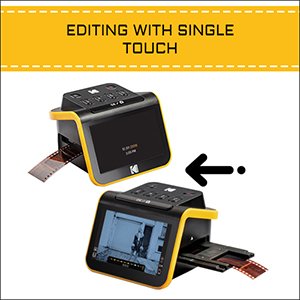
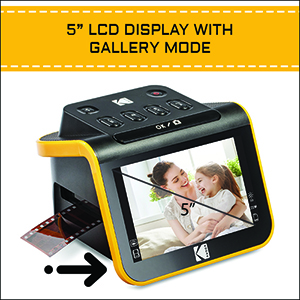
The KODAK Slide N SCAN RODFS50 is a compact, high-resolution 22MP film and slide scanner featuring a 5” LCD for instant preview and editing. It supports multiple film formats (135, 110, 126, 50mm) and saves images directly to SD/SDHC cards up to 32GB. With quick-feed continuous scanning, one-touch editing, and USB-C/HDMI connectivity, it’s designed for effortless digitization of old photo memories with professional-quality results.


| ASIN | B084NVRHYQ |
| Best Sellers Rank | #2,095 in Office Products ( See Top 100 in Office Products ) #1 in Slide & Negative Scanners |
| Brand | KODAK |
| Color Depth | 24 bpp |
| Connection Type | HDMI, USB |
| Connectivity Technology | HDMI , USB |
| Customer Reviews | 4.4 out of 5 stars 11,909 Reviews |
| Global Trade Identification Number | 00843812123013 |
| Item Dimensions D x W x H | 5.27"D x 5.35"W x 3.74"H |
| Item Type Name | KODAK SLIDE N SCAN Film and Slide Scanner with Large 5” LCD Screen |
| Item Weight | 16 ounces |
| Manufacturer | Kodak |
| Media Type | Negatives, Slide |
| Minimum System Requirements | Windows 7 |
| Model Name | KODAK SLIDE N SCAN Film and Slide Scanner with Large 5” LCD Screen |
| Optical Sensor Technology | CMOS |
| Paper Size | 126 millimeter |
| Product Dimensions | 5.27"D x 5.35"W x 3.74"H |
| Resolution | 22 Megapixels |
| Scanner Type | Film |
| Standard Sheet Capacity | 1 |
| UPC | 843812123013 |
| Unit Count | 1.0 Count |
| Warranty Description | B084NVRHYQ |
| Wattage | 15 watts |
A**C
Perfect for family photos, good quality and fun to use
I'm so happy with this little device! As soon as it arrived I tested a 35mm color negative. It's really simple to use, as soon as you set up the scanner and slide in the negative, you can see the image immediately on the screen. It's so enjoyable and quick and the quality exceeded my expectations. You do need to buy a 32GB SD card or 32GB SDHC card. It will not work with larger GB or with SDXC cards. Setup: Plug in the USB-C/USB cable (provided) into the scanner. USB-C side goes into the scanner, and the USB side goes into to your PC or to a wall adapter. Insert the SD card in the back of the scanner (right next to the USB-C slot). Open the hinged slide holder and insert the adapter for 135mm, 126mm or 110mm depending on what film you are using, and then snap it closed again. The manual shows you how to align the adapter inside the hinged holder. If you are scanning slides you won't need an adapter, you will just need the slide holder. Insert the slide holder into the slot on the right side of the scanner. The arrow on the slide holder should be pointing toward the scanner. About an inch will still be visible, sticking out of the slot. This is where you insert the film. How to use: Press the power button (it must be plugged in to PC or wall using the USB cable to power on). Press the large OK button on the front to select film type. Use right/left arrows on the top of the machine to select film type and then click OK. Select the film size and click OK. Make sure your film is right side up, and slide the negative into the slide holder on the right side of the scanner. Smile when you see your image on the screen! You will need to adjust the film so that the image is centered on the scanner, and then press the large OK button again. Slide the film further in until you can see the next image. Press OK to scan. Once you can't push the film in any further, you can insert the next piece of film and it will push the first one through and out the left side. I found a few times where the film was curved and wouldn't go in past the first image. If this happens you can remove the slide holder from the scanner, insert the film into the holder while gently pressing down on the first image. It should slide through and you can reinsert the holder into the scanner with film already in it. It takes about 2 seconds for the image to scan. Transferring photos to your PC. You have 2 options - you can remove the SD card and insert it directly into your laptop/PC if it has a slot. If not you can connect the scanner to your PC using the USB cable (provided) while the SD card is still in the scanner. This will bring up a USB device on your PC and you can see all of the images. They are given file names based on the order you scan them. I have scanned over 1,000 images on the SD card so far. Quality: The quality of the images is better than I expected. For sure up to 8x10 prints would be high quality, I'm attaching a scanned image so you can see. Also please note in the scanned image I didn't center the negative properly. If you are moving too quickly through the images this can happen, so it's good to view the images periodically in case you need to rescan anything. Make sure you keep the film dust free, and also make sure the scanner is dust free. It comes with a cleaning brush that can be inserted into the slot where the slide holder goes to clean out dust. Do this with the soft part of the brush facing down. I didn't do this at first and some of the images ended up with some marks from the dust.
L**E
A good, easy to use basic scanner
It works well - as advertised. I really like the idea of only needing USB voltage to operate it until you decide to transfer the images. Then, of course, the USB cable needs to be from a computer. Then the scanner looks like just another USB drive. Beyond that, the scanner is limited in post scan operations - some brightness and color but these are limited. Along with that it can’t adjust focus, it can’t order or index the scanned and stored images. In addition, if you want to change image names they must first be copied to another drive. If you edit names in the scanner the images will still be there but they will not display. All in all, it’s easy to use, no setup is needed and it’s a small independent device with a nice viewing screen. For quality results it’s best to also have a photo app handy on your computer.
C**P
Quick, easy to use, screen freezes after transferring pictures to my computer.
This product was very easy and simple to use. I had a bunch of slides I got from my parents house with pictures of my dad’s two years in Italy from 1977 and it digitized them like a dream and I was able to digitize about 500 slides in a few hours. It was a fast and easy process. The scanner was very light and small and feels cheap, but works well. The quality of the pictures were really good too. I gave the product 4 stars because every time I transferred the pictures to my computer, I would have to turn off the scanner and turn it back on to keep scanning (I was scanning in batches to keep better track of the order of pictures). When I was done transferring the pictures, I’d push the film button again on the scanner and the screen would freeze up. Turning it off and then on again fixed the problem. I don’t know off it’s a product problem or a something is wrong with my specific scanner
D**E
Perfect - Get THIS Scanner !!
As easy as it gets! I was looking for a scanner that would be easy to use - and I found it! I have a large project of scanning old photo slides, and this is perfect. Easy to use, insert the SD card, insert the slide into the slide holder, then into the scanner, select if its a slide or a negative. From there, click on OK, and that's it. The kit includes the USB plug, an HDMI plug and a cleaning tool. So glad I found this scanner. Good price, well-made and good quality.
N**Y
Best purchase I've made for saving old negatives tips in review
I bought this thinking it wouldn't be that great. I was WRONG! It's amazing. Not very big so it literally can sit on the very corner of my desk as I scan everything and move the scanned photos to my laptop. Almost 700 negative photos scanned so far as of writing this and I haven't even touched the old film negatives yet. It comes with everything that you need minus two adapters you can buy for it here on Amazon for the disk film negatives, and an adapter that allows you to scan multiple slides at once. Colebri is the brand name for the adapters. Just ensure that the one you are buying is for the model of this scanner you are using. As they do sell several of them for different models. I have reviewed the adapters separately with tips in my reviews for those. Tips: This machine with the film adapters you can buy here on Amazon for it are great. If you have the old circle disk film negatives there is an adapter for this just for that! I spent almost 4 hours today going through almost 700 negative disk photos. Including the color and brightness corrections on this machine. Using the adapter for the disk negatives I found here on Amazon. This wouldn't have been possible without that adapter. I would have had to pay someone a lot of money for those to be scanned. That alone makes the cost of this machine worth it. I only give 5 stars to things I truly feel are worth your money and time. This is one of those things. It's easy to setup. Read the instruction manual and you'll be off in no time. I highly recommend getting the SD card it says to use. I went to Walmart and bought a 32gig micro SD card but it has the adapter for the standard old SD it fits into. Place that baby into the machine and then connect the cord to your computer and you're set. Using this is not difficult, unless you have issues learning new technology. But it's truly an easy machine to use. 10/10 worth every penny to be able to save all of your negatives.
K**N
Ease of use
Easy to use with the capability of doing slide, color and BW negatives great for digitizing of past family photo drawers at what I would consider a reasonable price
B**N
An Entry Level 35mm Scanner
For the price point, this is an acceptable 35mm scanner. The 5" display is clear and easy to see. The mechanical aspects of the scanner work adequately. I scanned over 4,000 images with this scanner. The picture quality is good but not great. Obviously, the original quality and age of the film picture is going to affect the quality of the image scanned. The scanner is compact and the controls are simple and easy to use. The software has some issues. After scanning over 4,000 images (black & white negatives, color negatives, and color slides) I found that while the software provides very crude adjustment to color balance, contrast/brightness - the software was flaky. It was not reliable and I ended up setting all of the controls at mid-range, with the plan to make all necessary corrections to the image in Photoshop or equivalent software. On several occasions, I had to turn the unit off and then back on as the image was totally unstable and the screen display of the image fluttered. For color slides, I initially spent some time using the resident software of the scanner to attempt to make color correction and brightness adjustments. You use the right and left arrows to increase or decrease a particular setting. I found that I would increase a setting and that when I went the opposite direction because I had added too much change, that the software did not provide the same display that should have been present. In some cases, that change was extreme. After this happening to me on numerous occasions, I decided to set everything at mid-point and make the necessary corrections in my image editing software. There is a saying that you get what you pay for. This is one of those examples. Each image required about 1 to 2 seconds to complete the scan. While previous reviewers claimed there was no gain on some images to scan in the 22mp resolution, I scanned everything with few exceptions in the 22mp resolution. It was interesting that the B&W images were in the 3.5 to 7 megabyte range. Most of the color scans were less than 3 megabytes in size. Disappointing to me at least. Many color scans were less than 2 mb. All images are in JPG file format. Depending on what you wish to use the scans for, this may seriously limit your options. The JPG file format is not the best image format as it seriously compresses the information about the image. A lot of image information is lost in this format. If this is your one chance to capture family photos for historical purposes, you may want to consider different scanner. I bought this scanner because of the Kodak name. Kodak used to be have an excellent reputation for film and cameras. This scanner is a disappointment. While I am still under the 30 day window for returning the item, I will keep it. As it may be useful.
D**T
Worth the money
This scanner works great for your standard negatives. If there isn't any discoloration of the negatives, they come out great. When they are discolored, there is not enough color control to fix some of the problems. They do come out better though. I wish it was able to change the format from JPEG to TIFF. The instructions are not clear,and takes a couple minutes to figure out, but is not overly complicated. The product is worth the money and I am happy with it.
Trustpilot
1 week ago
2 months ago