
Desert Online General Trading LLC
Dubai, United Arab Emirates
Desert Online General Trading LLC
Dubai, United Arab Emirates

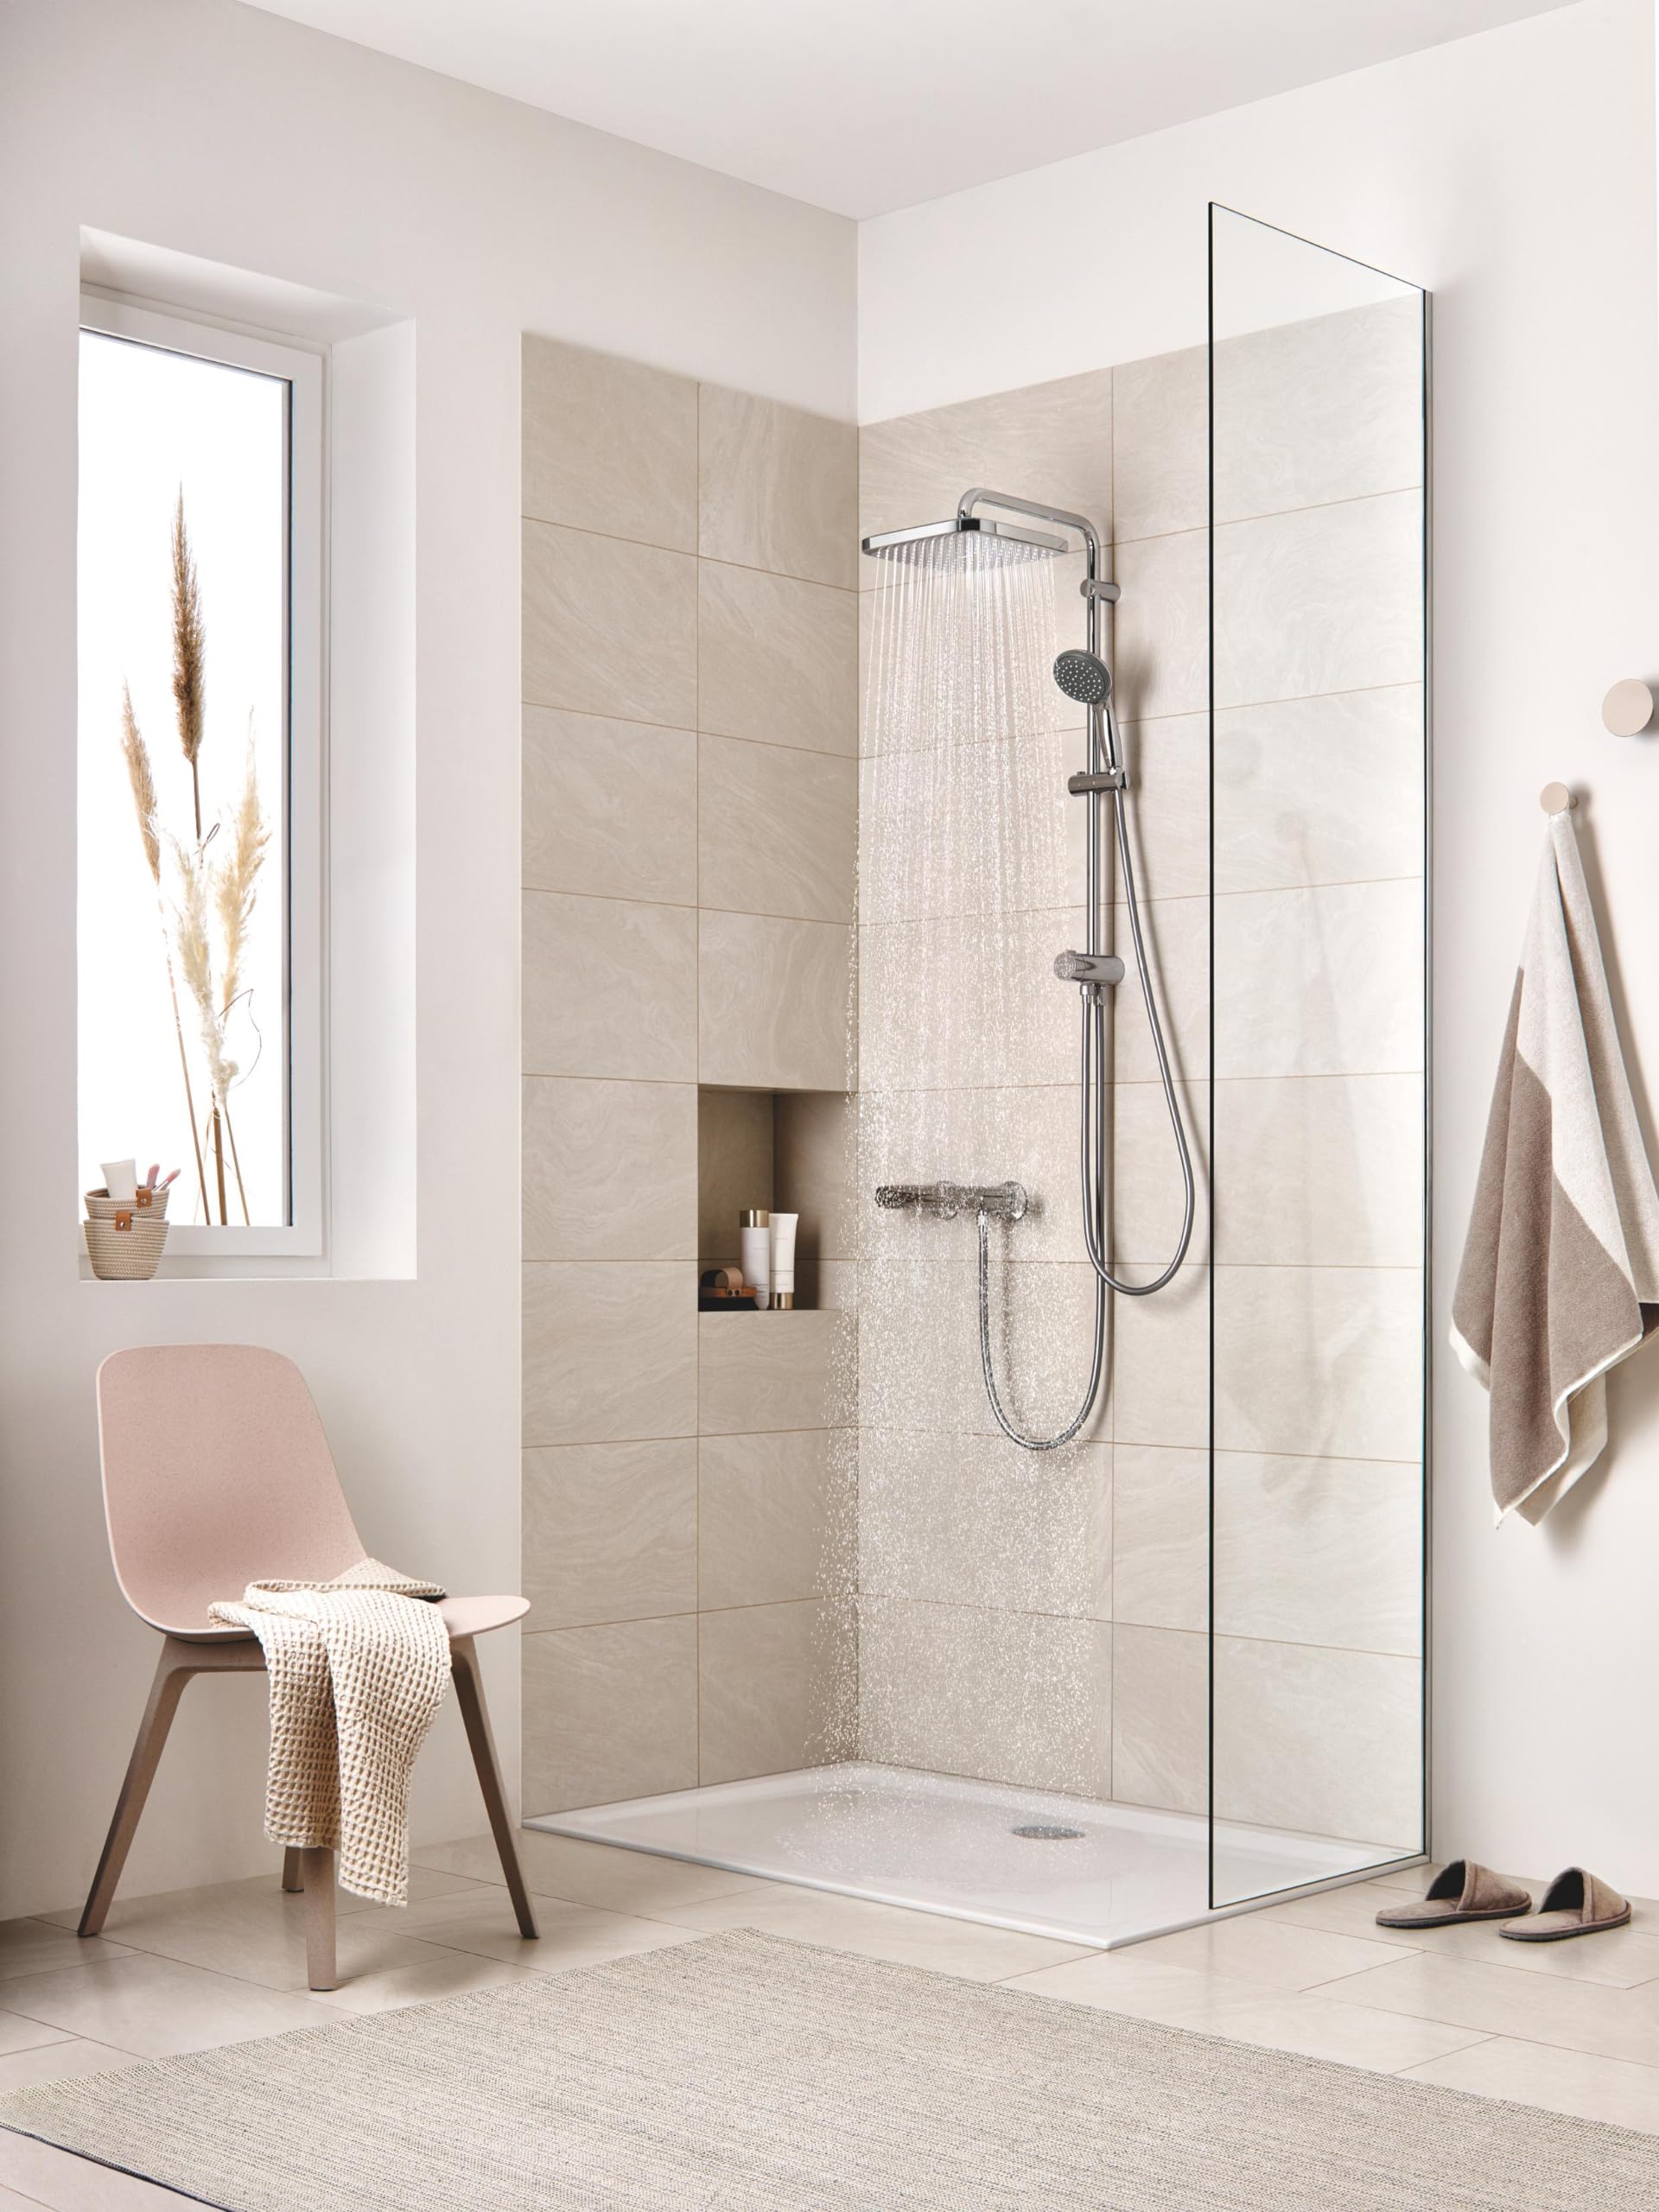
🚿 Elevate your daily ritual with sustainable luxury and smart design.
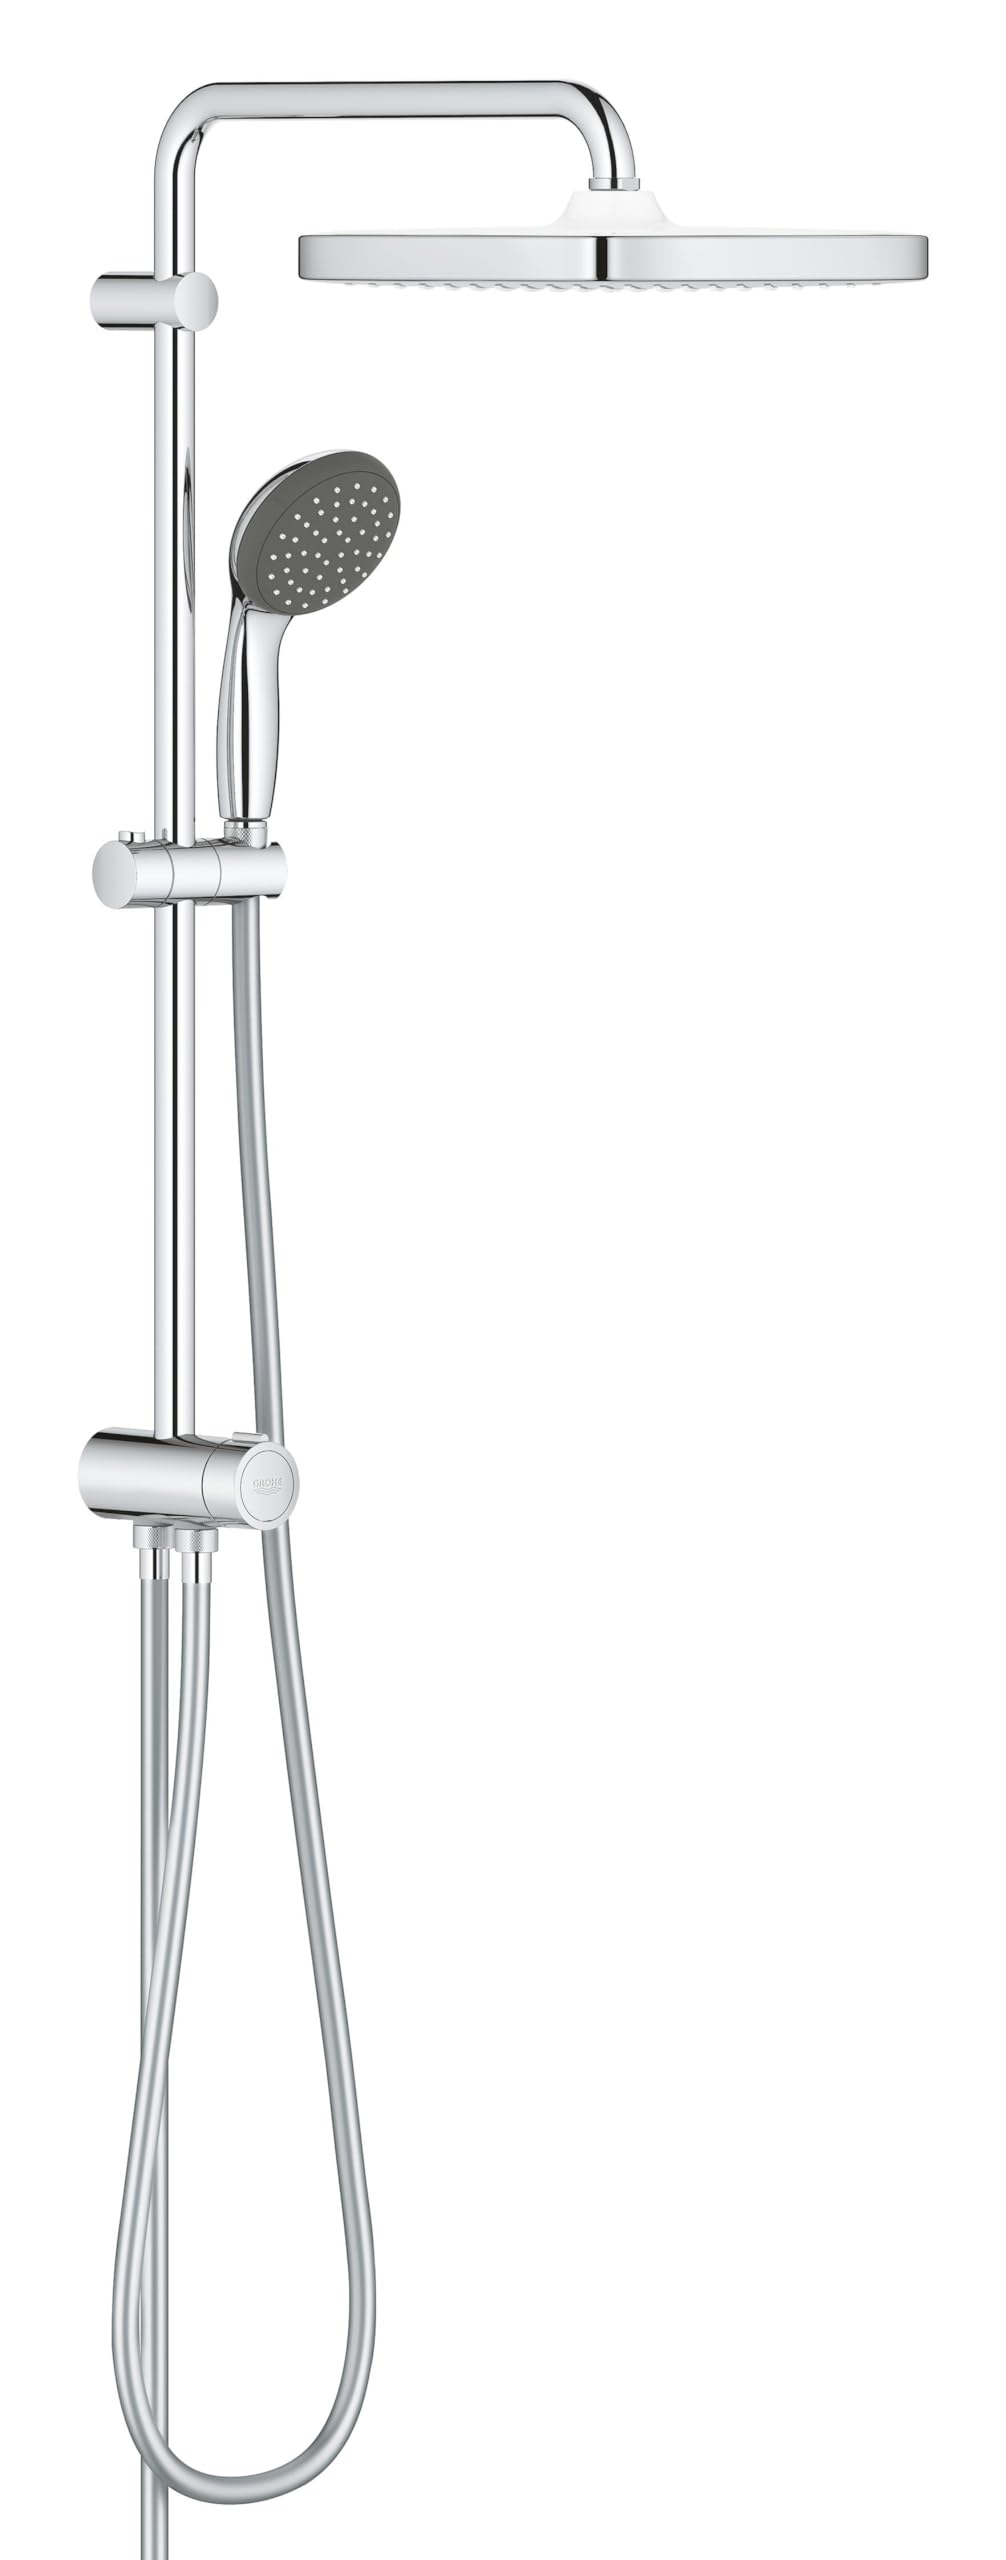
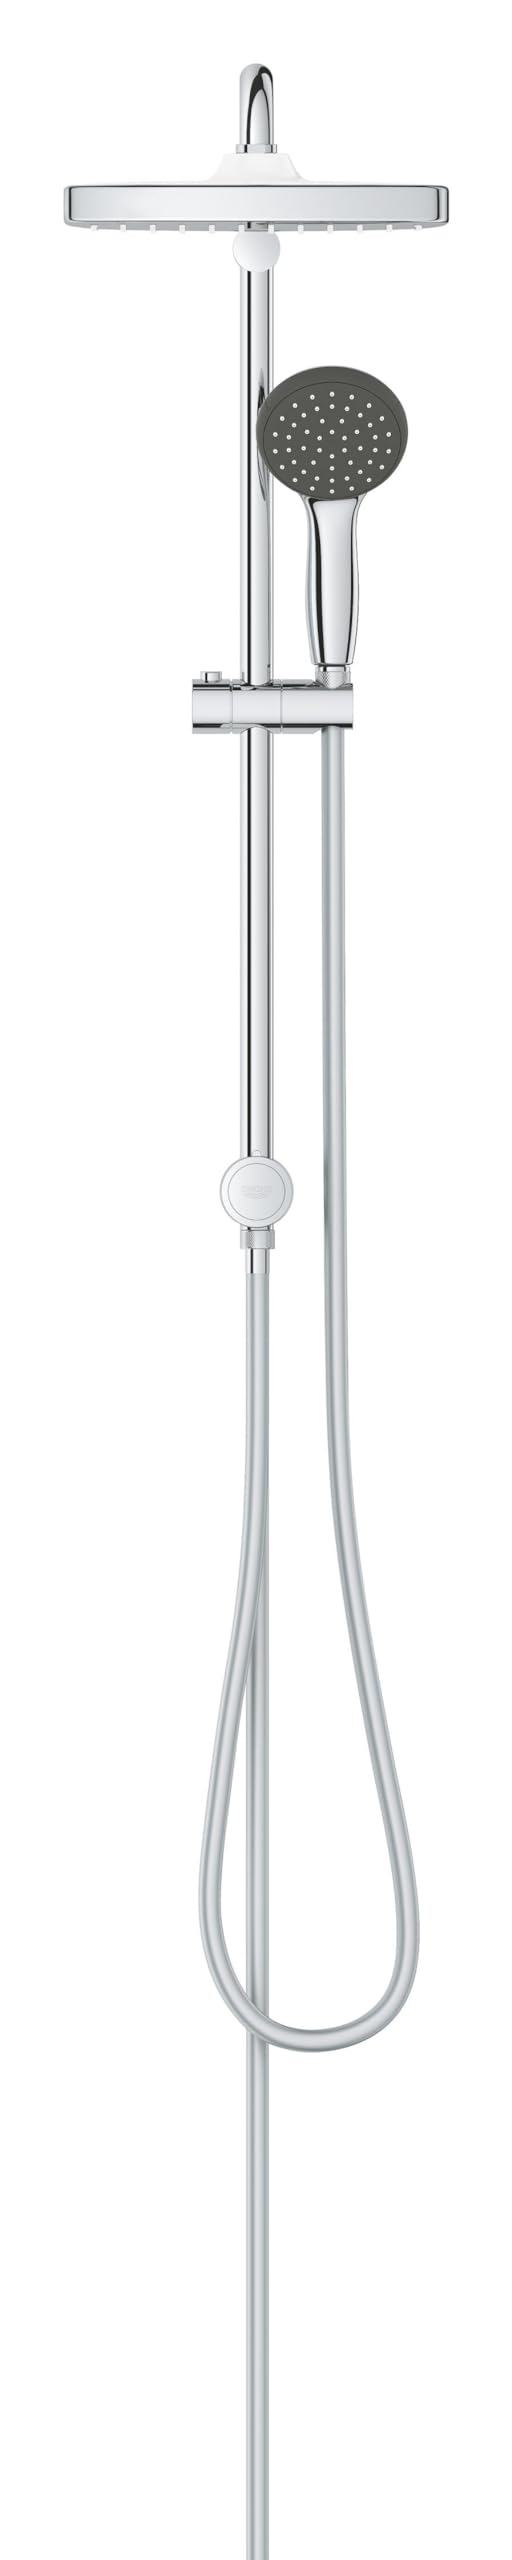
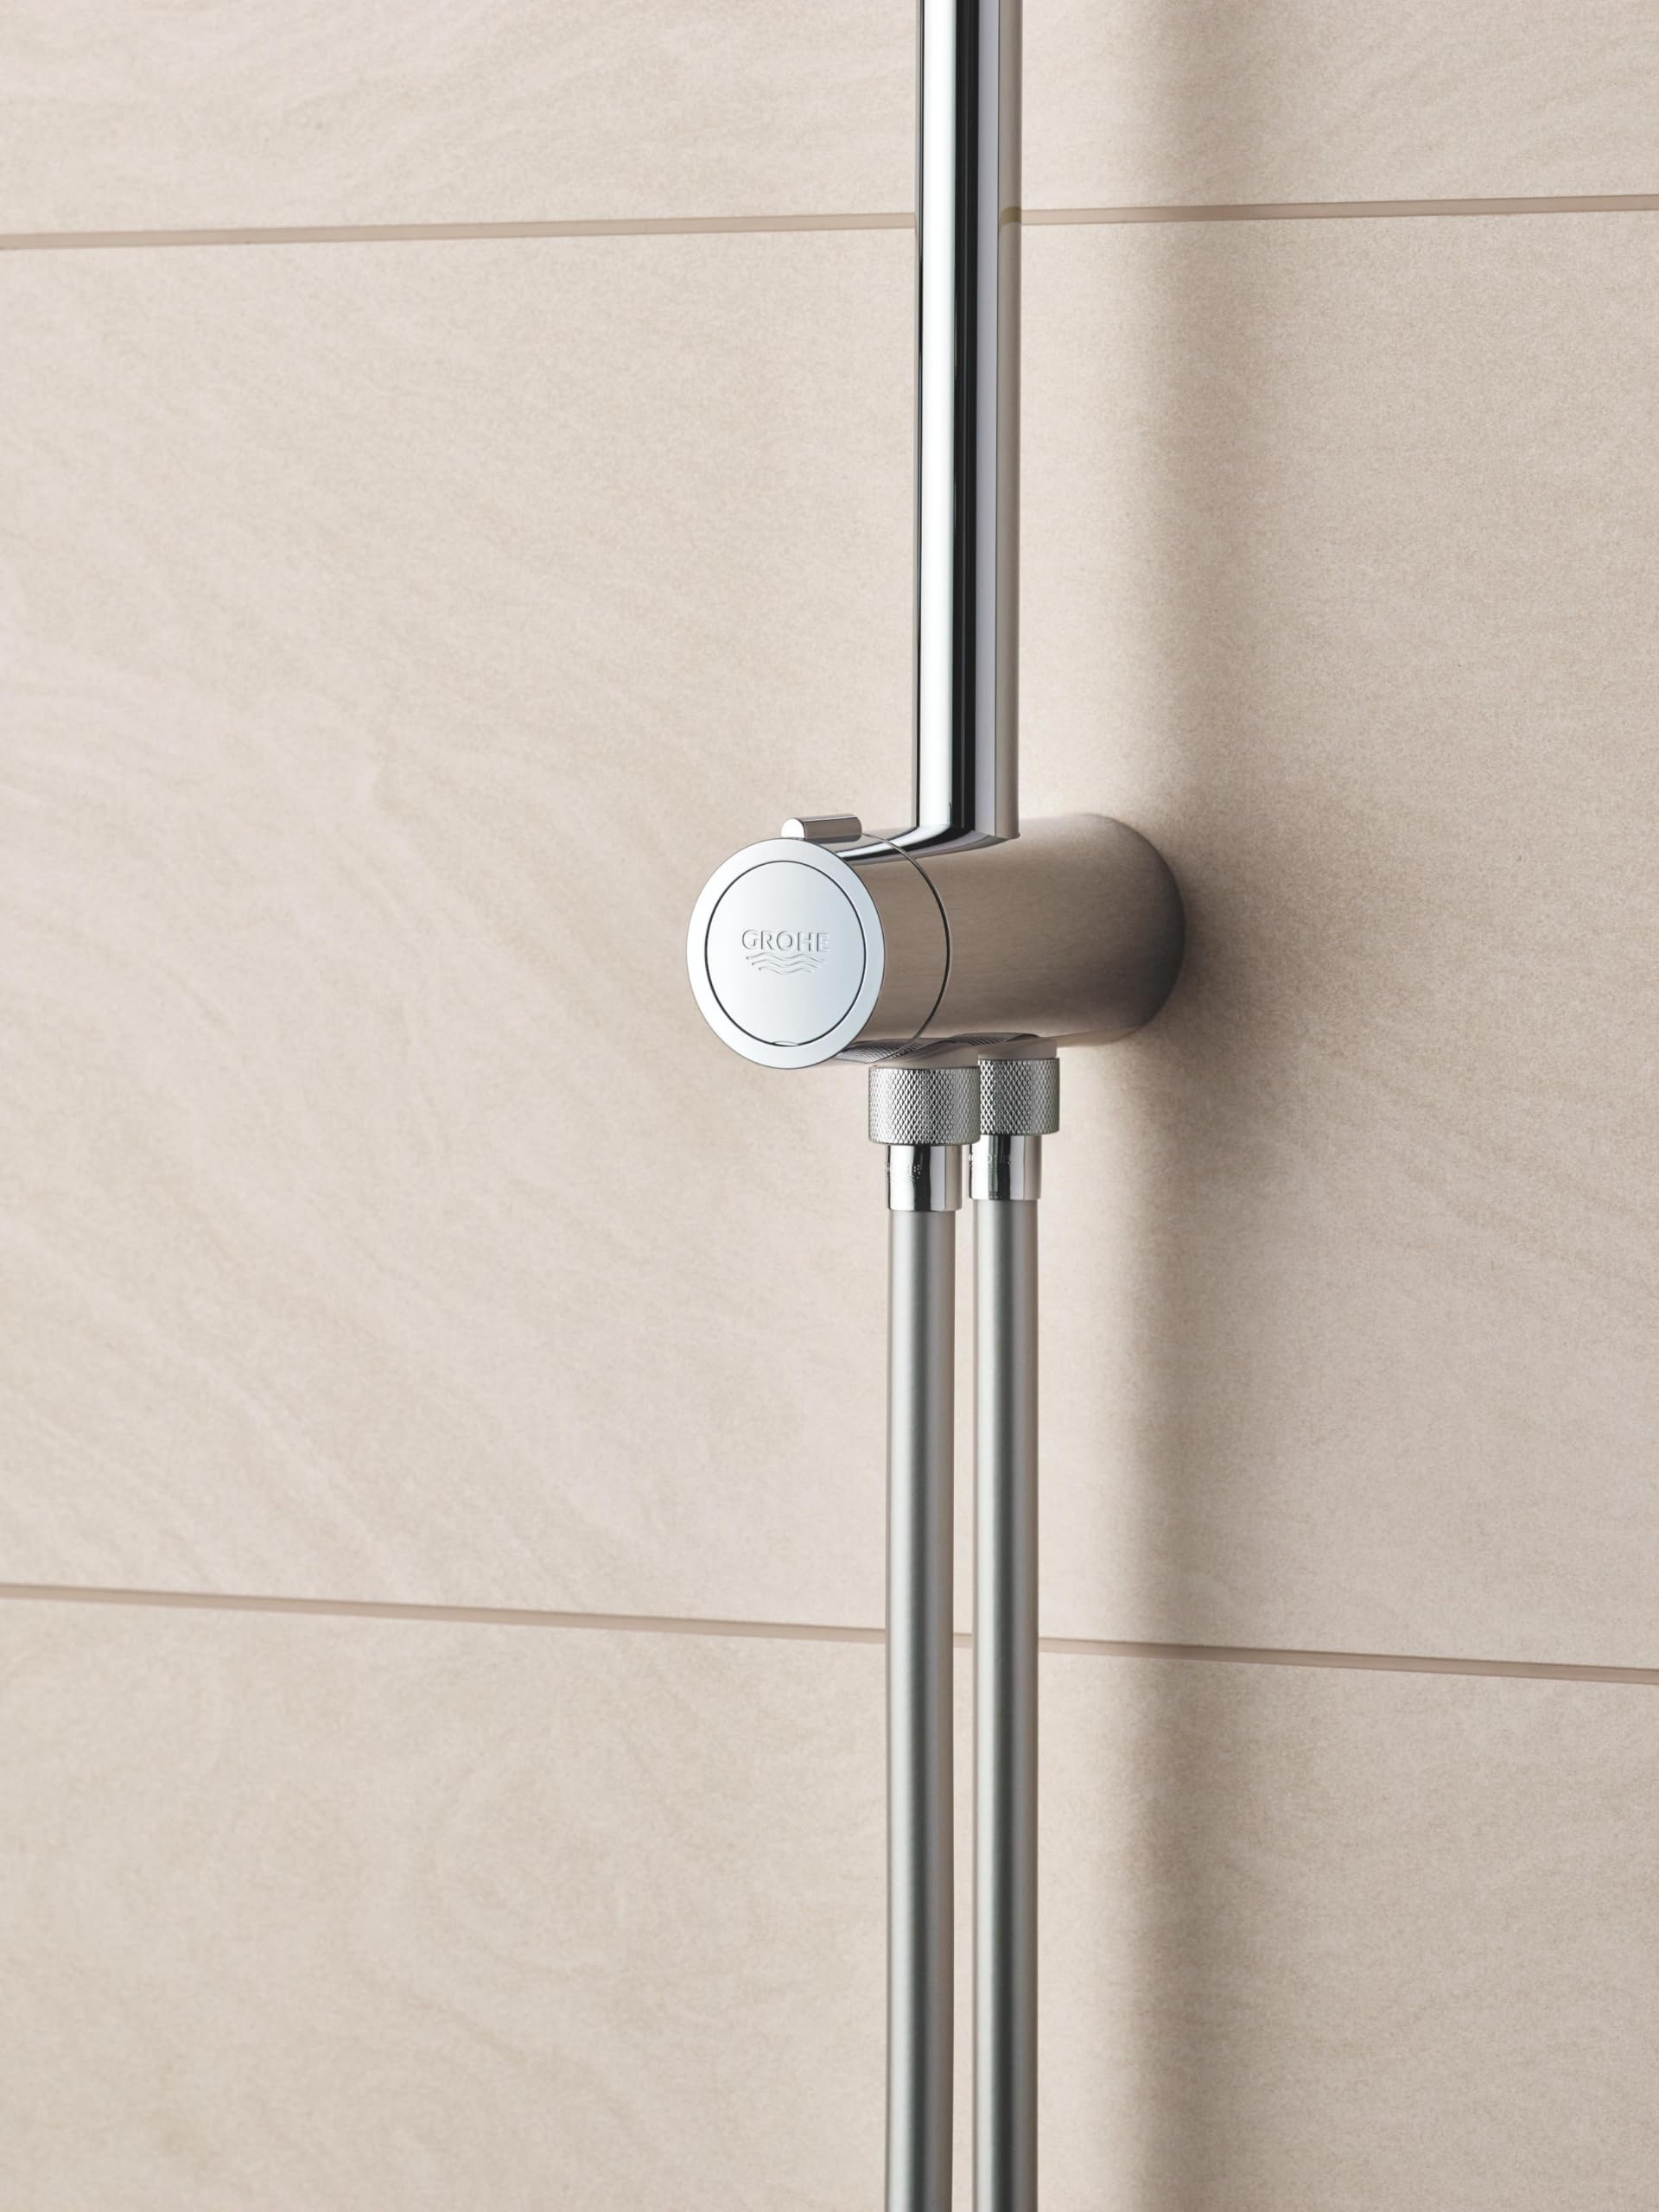
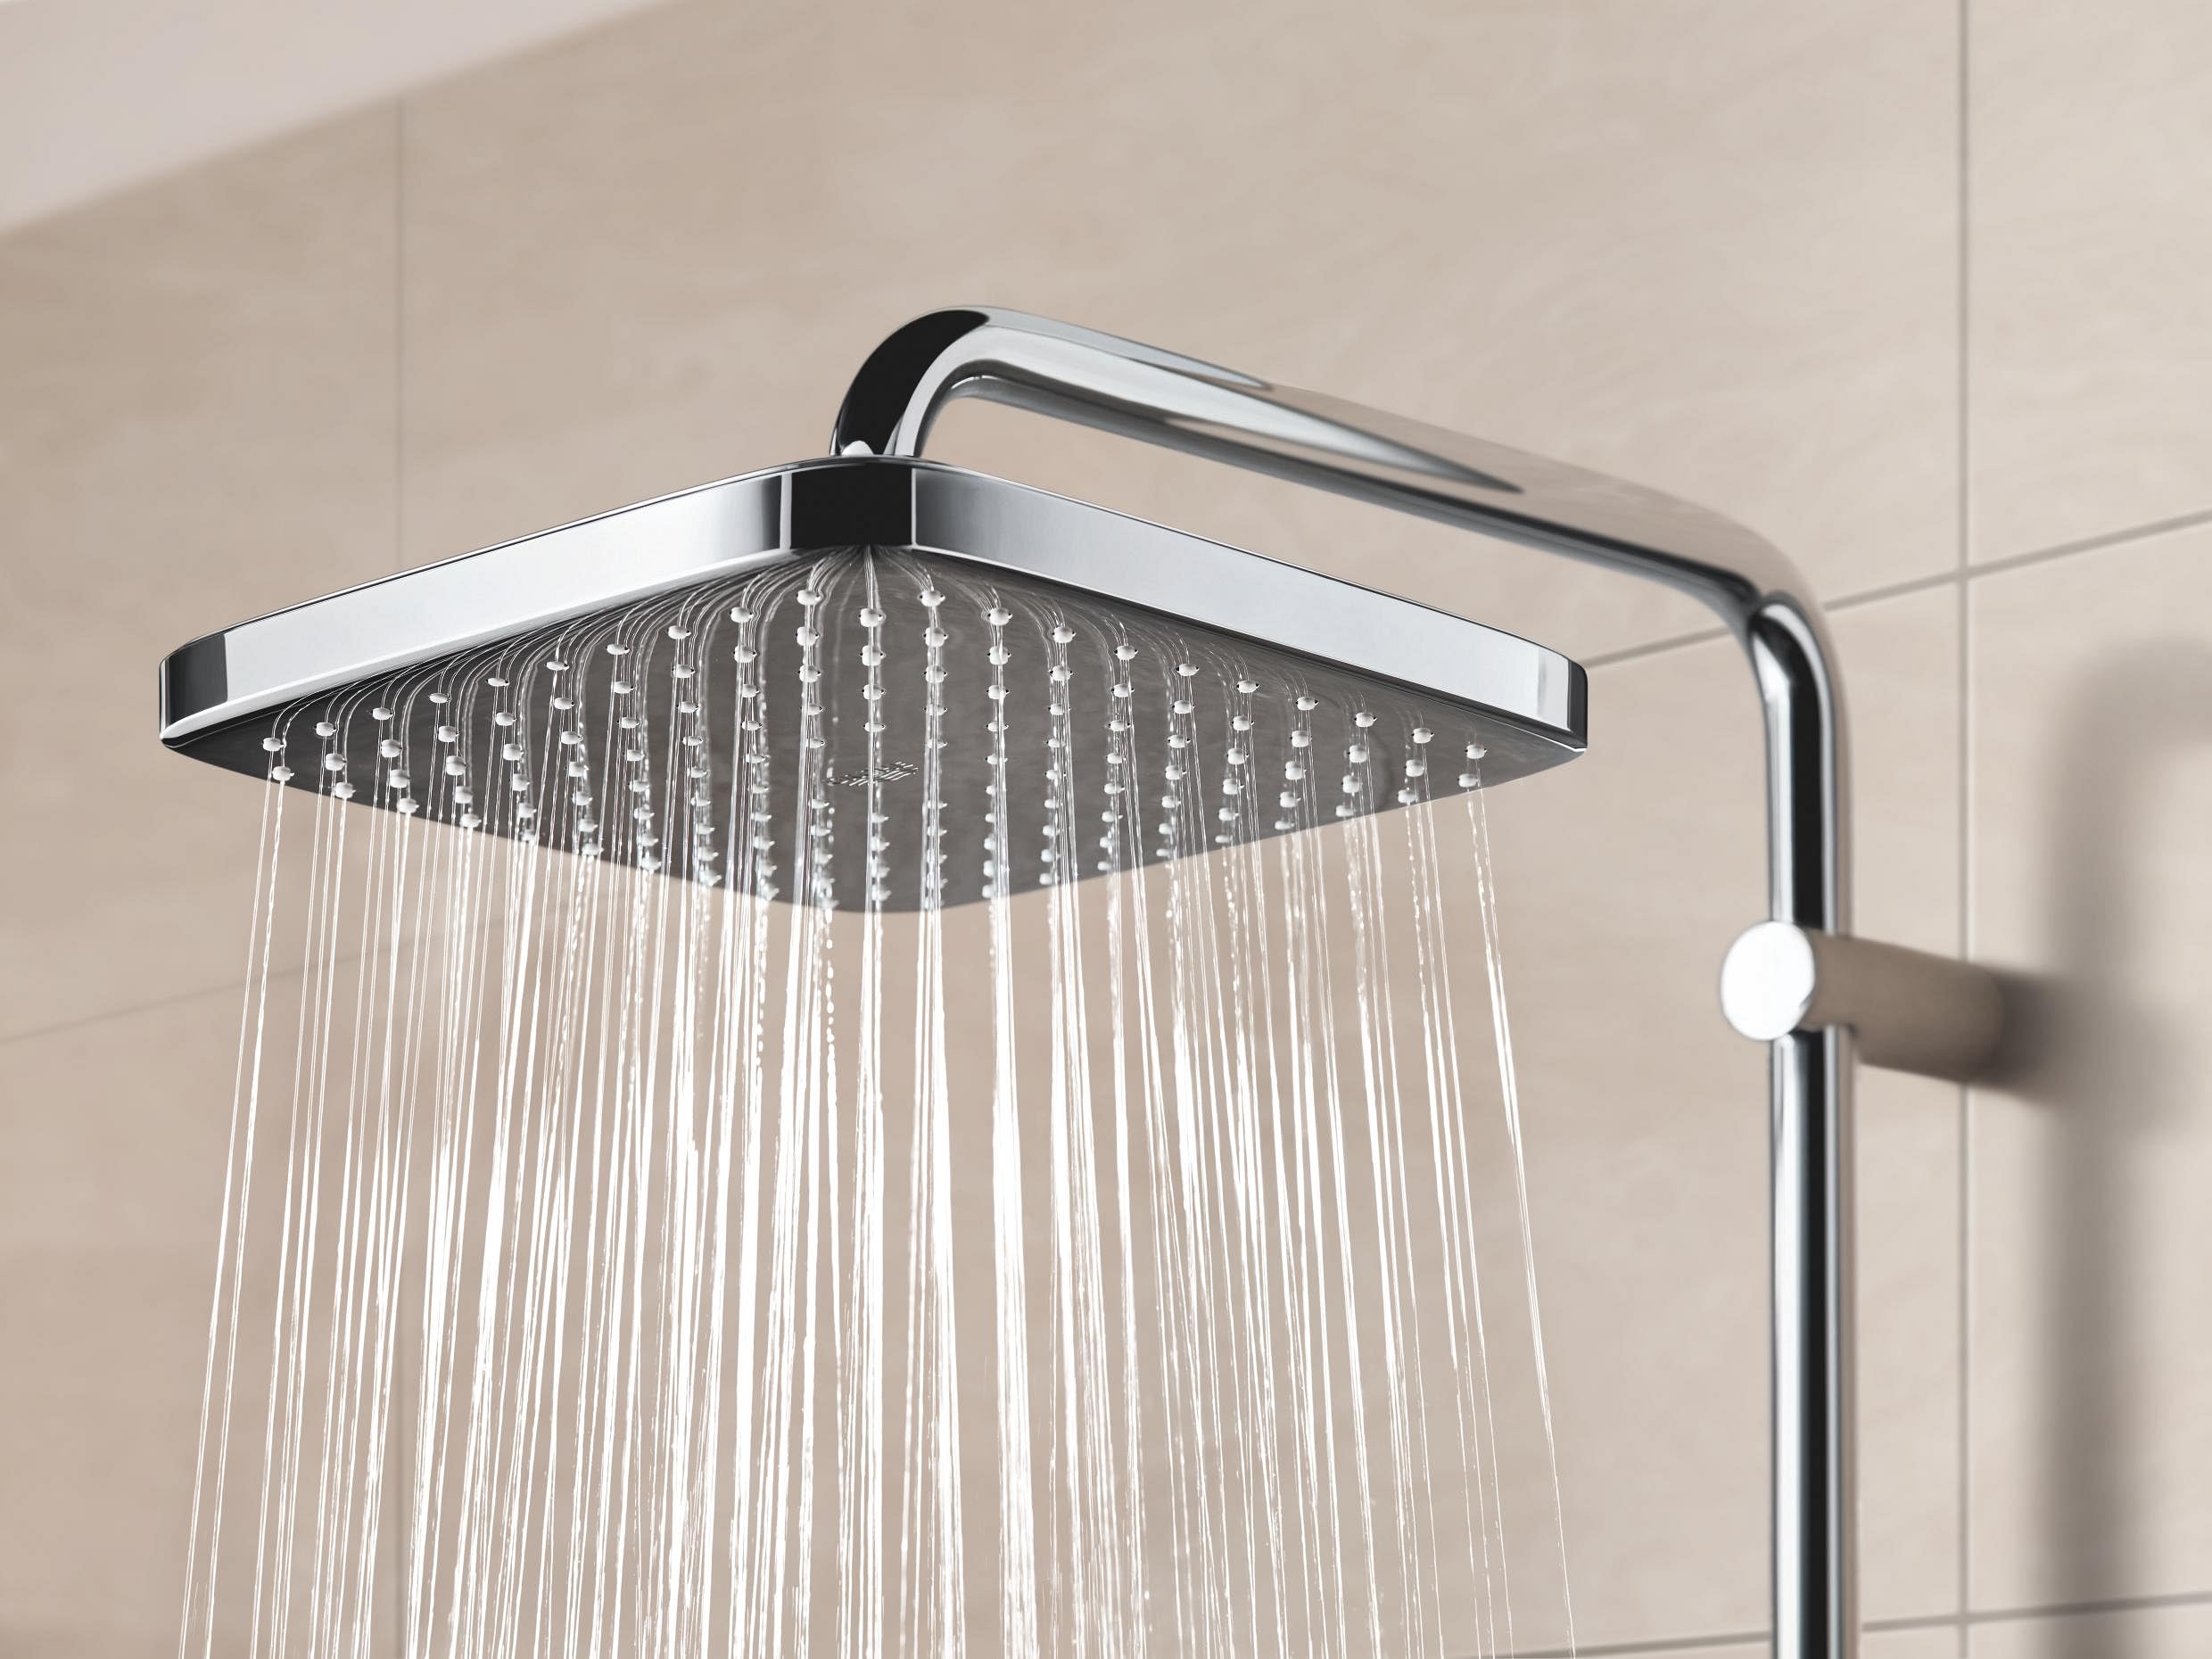
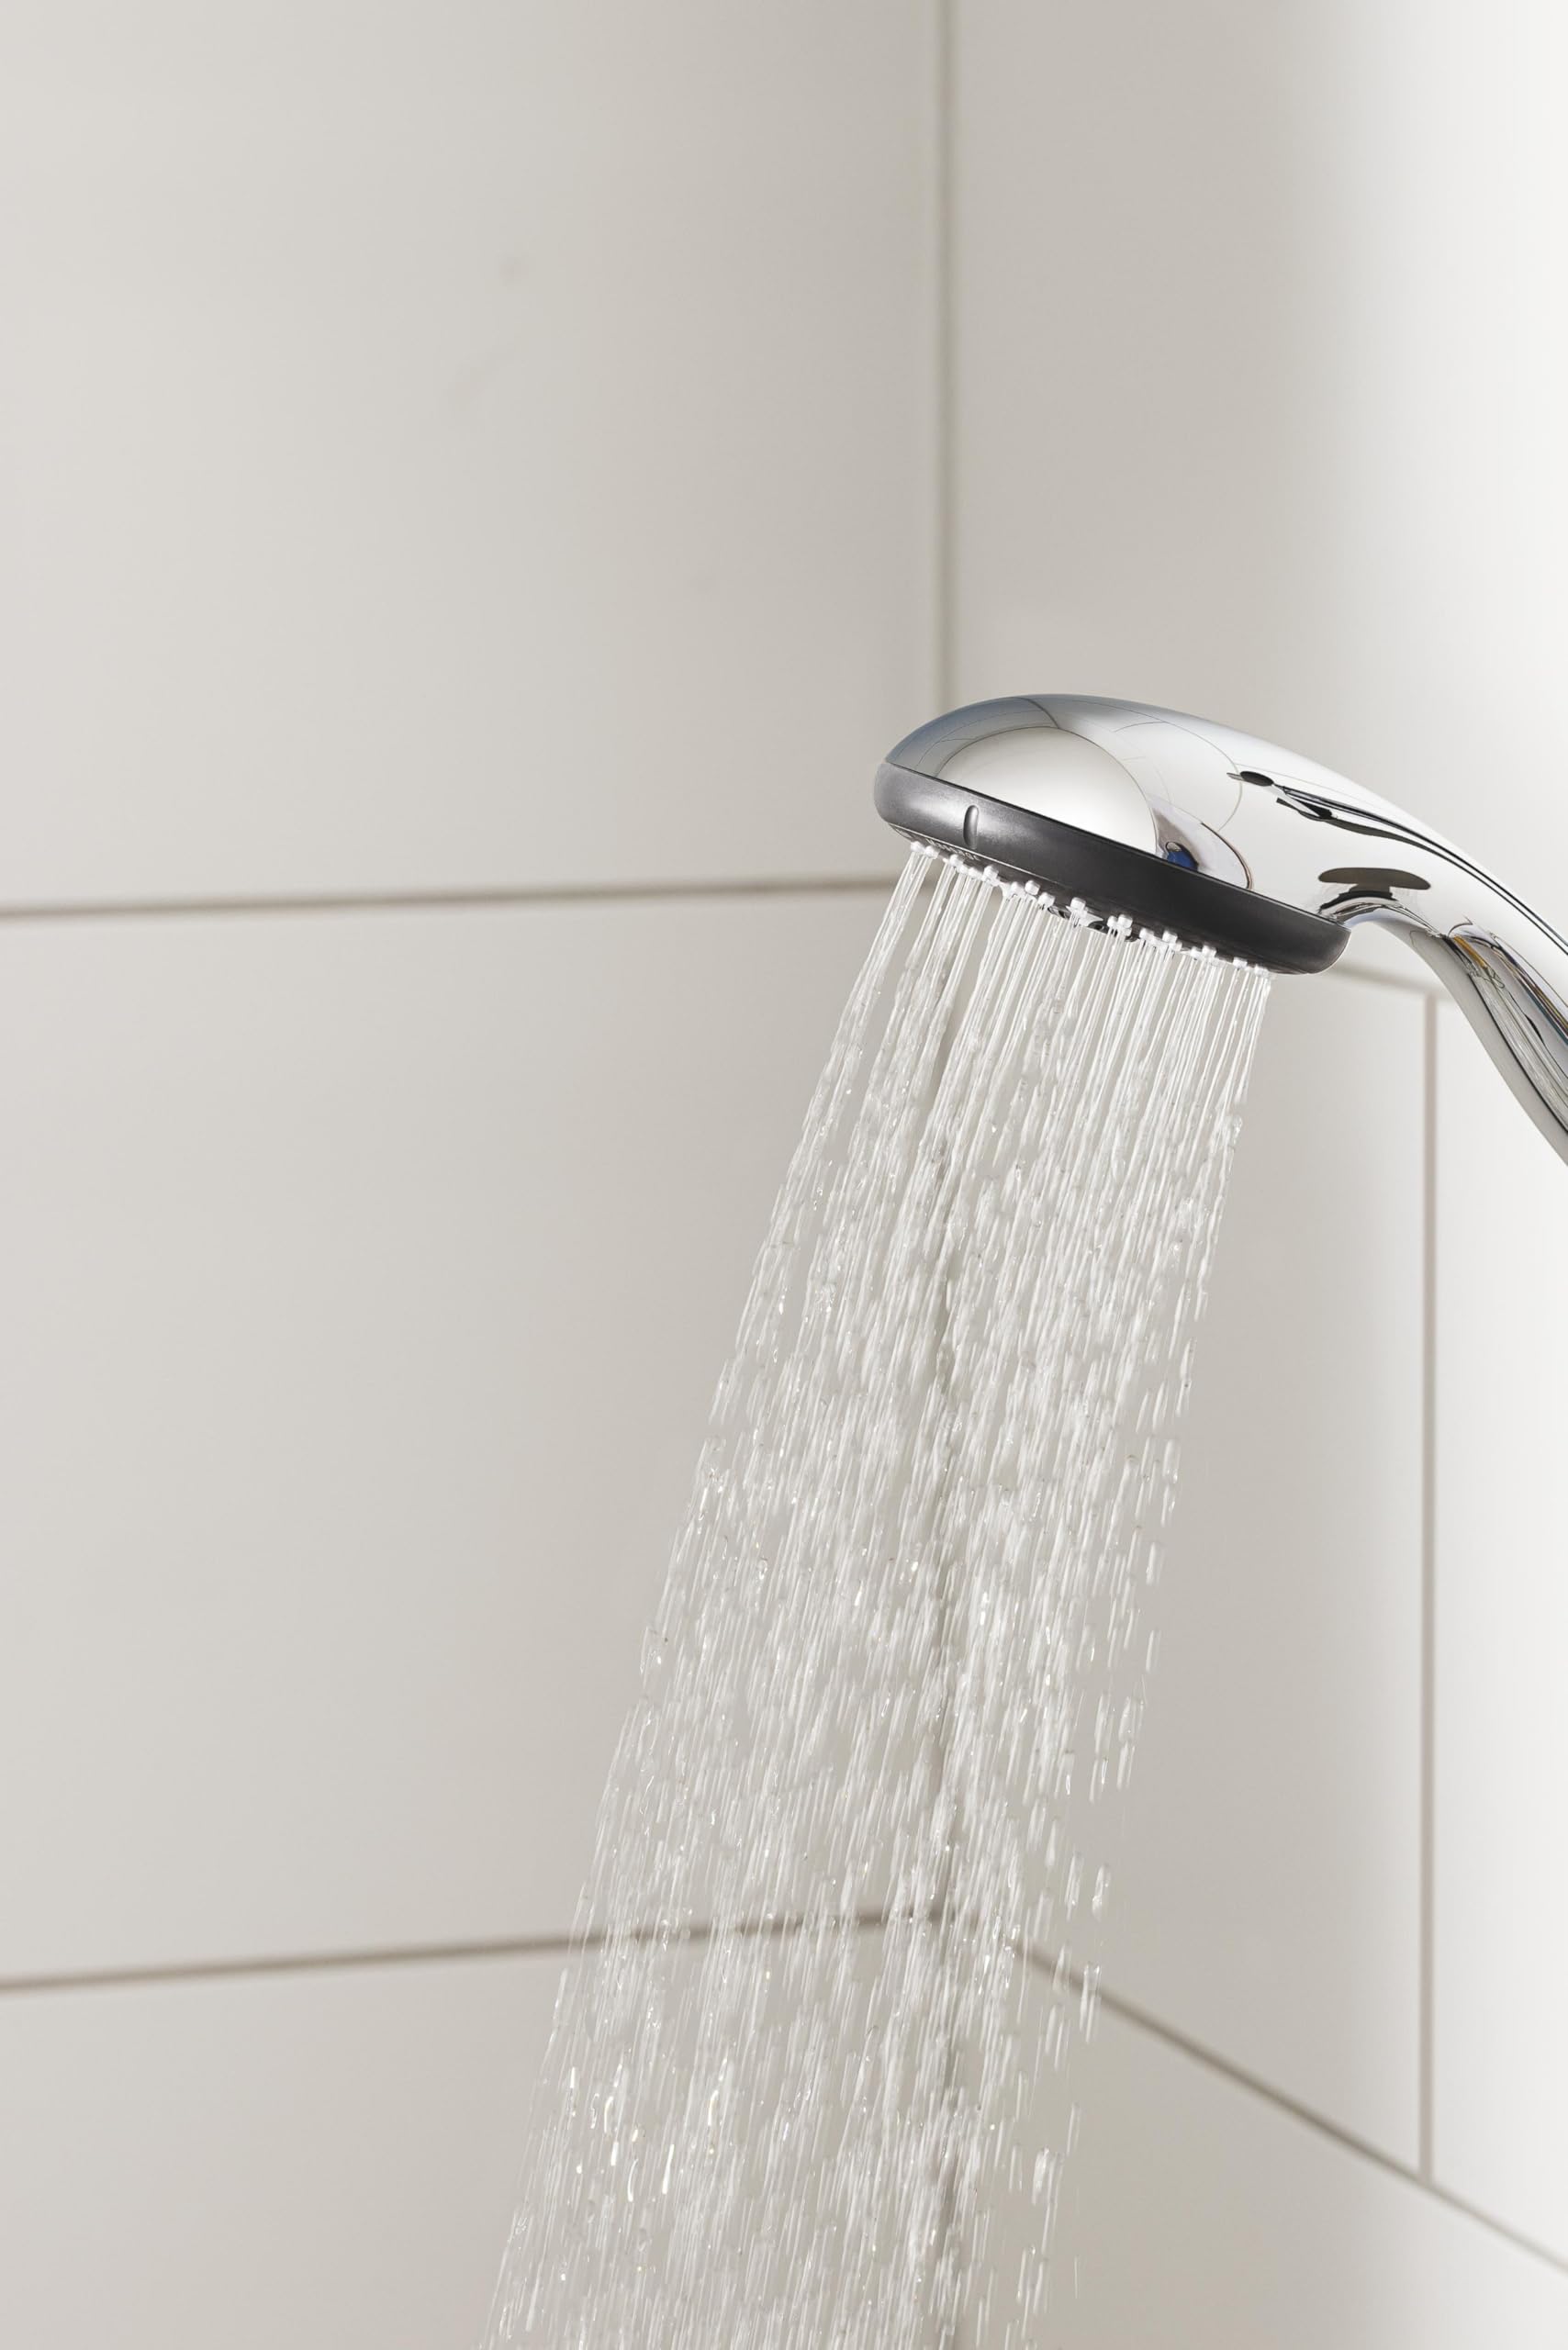
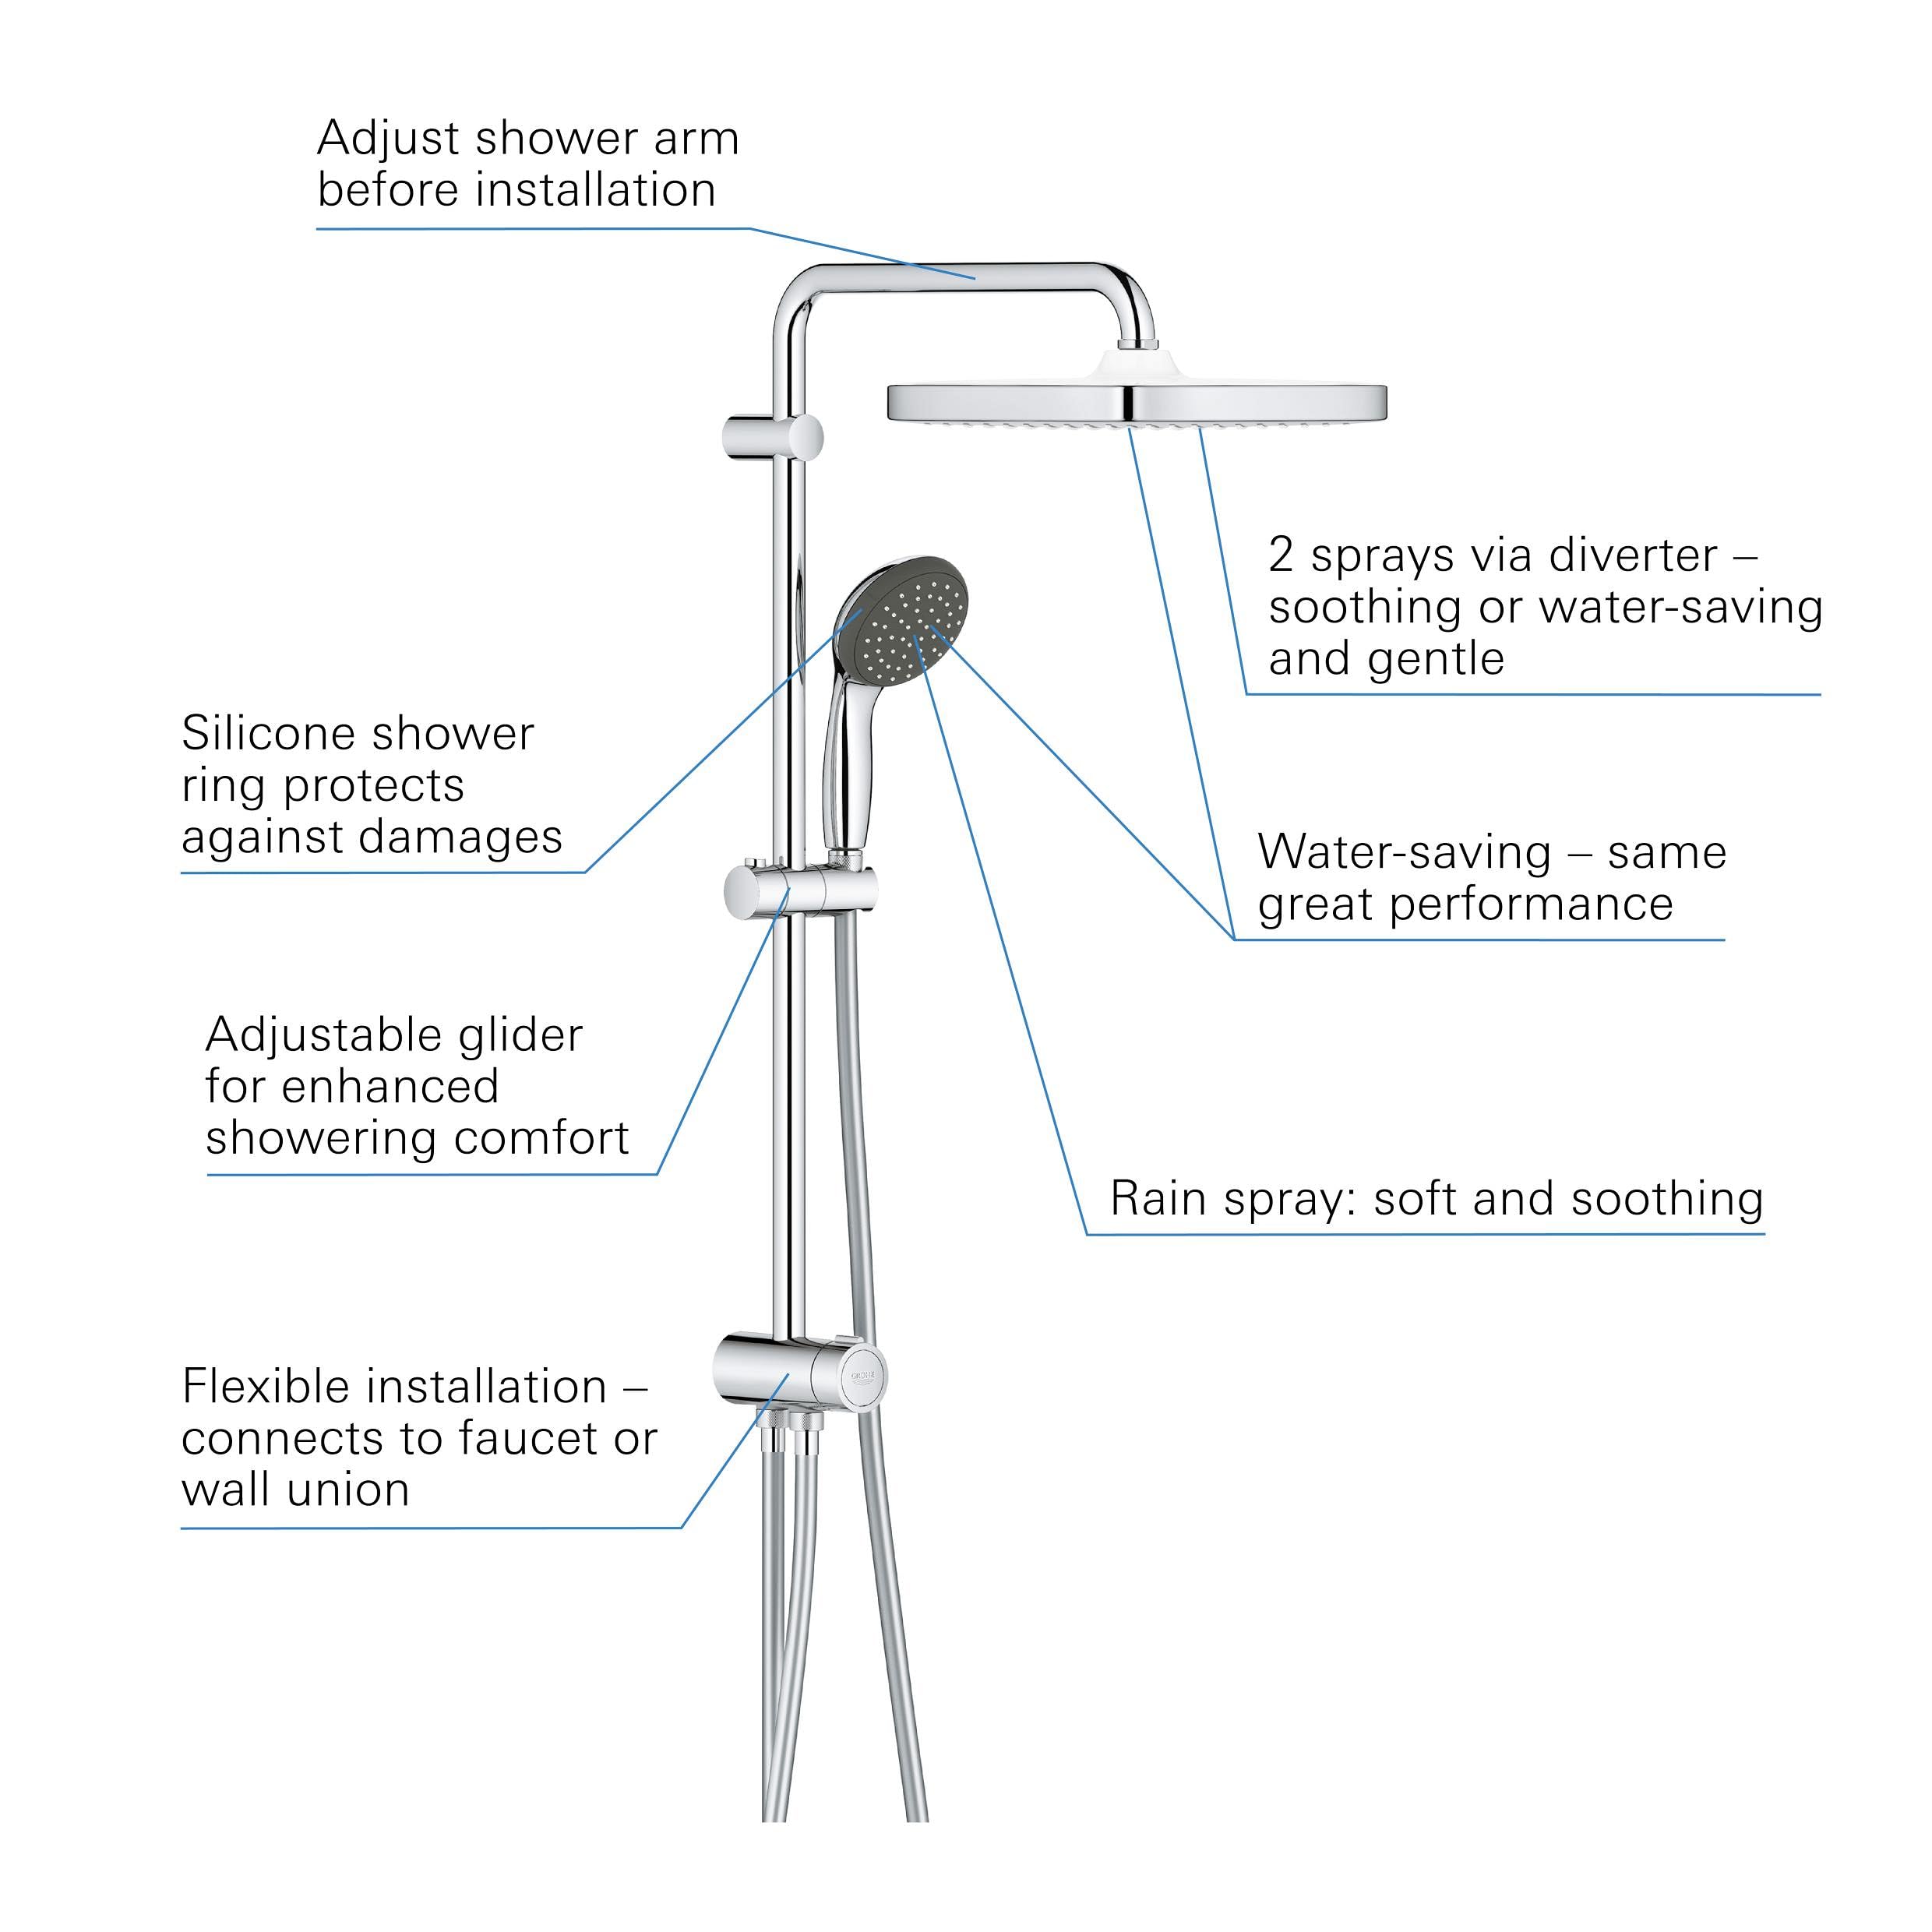
The GROHE Vitalio Start 250 Flex Shower System combines cutting-edge water-saving technology with premium design. Featuring a large 25 cm soft square Rain Spray head and a 10 cm hand shower, it offers versatile, balanced water flow via DreamSpray technology. Its ShockProof silicone ring ensures durability, while the chrome finish provides a sleek, easy-to-clean surface. Compatible with all existing valves and backed by a 5-year warranty, this system delivers eco-conscious comfort and style for the modern bathroom.


| Manufacturer | GROHE |
| Part Number | 26698000 |
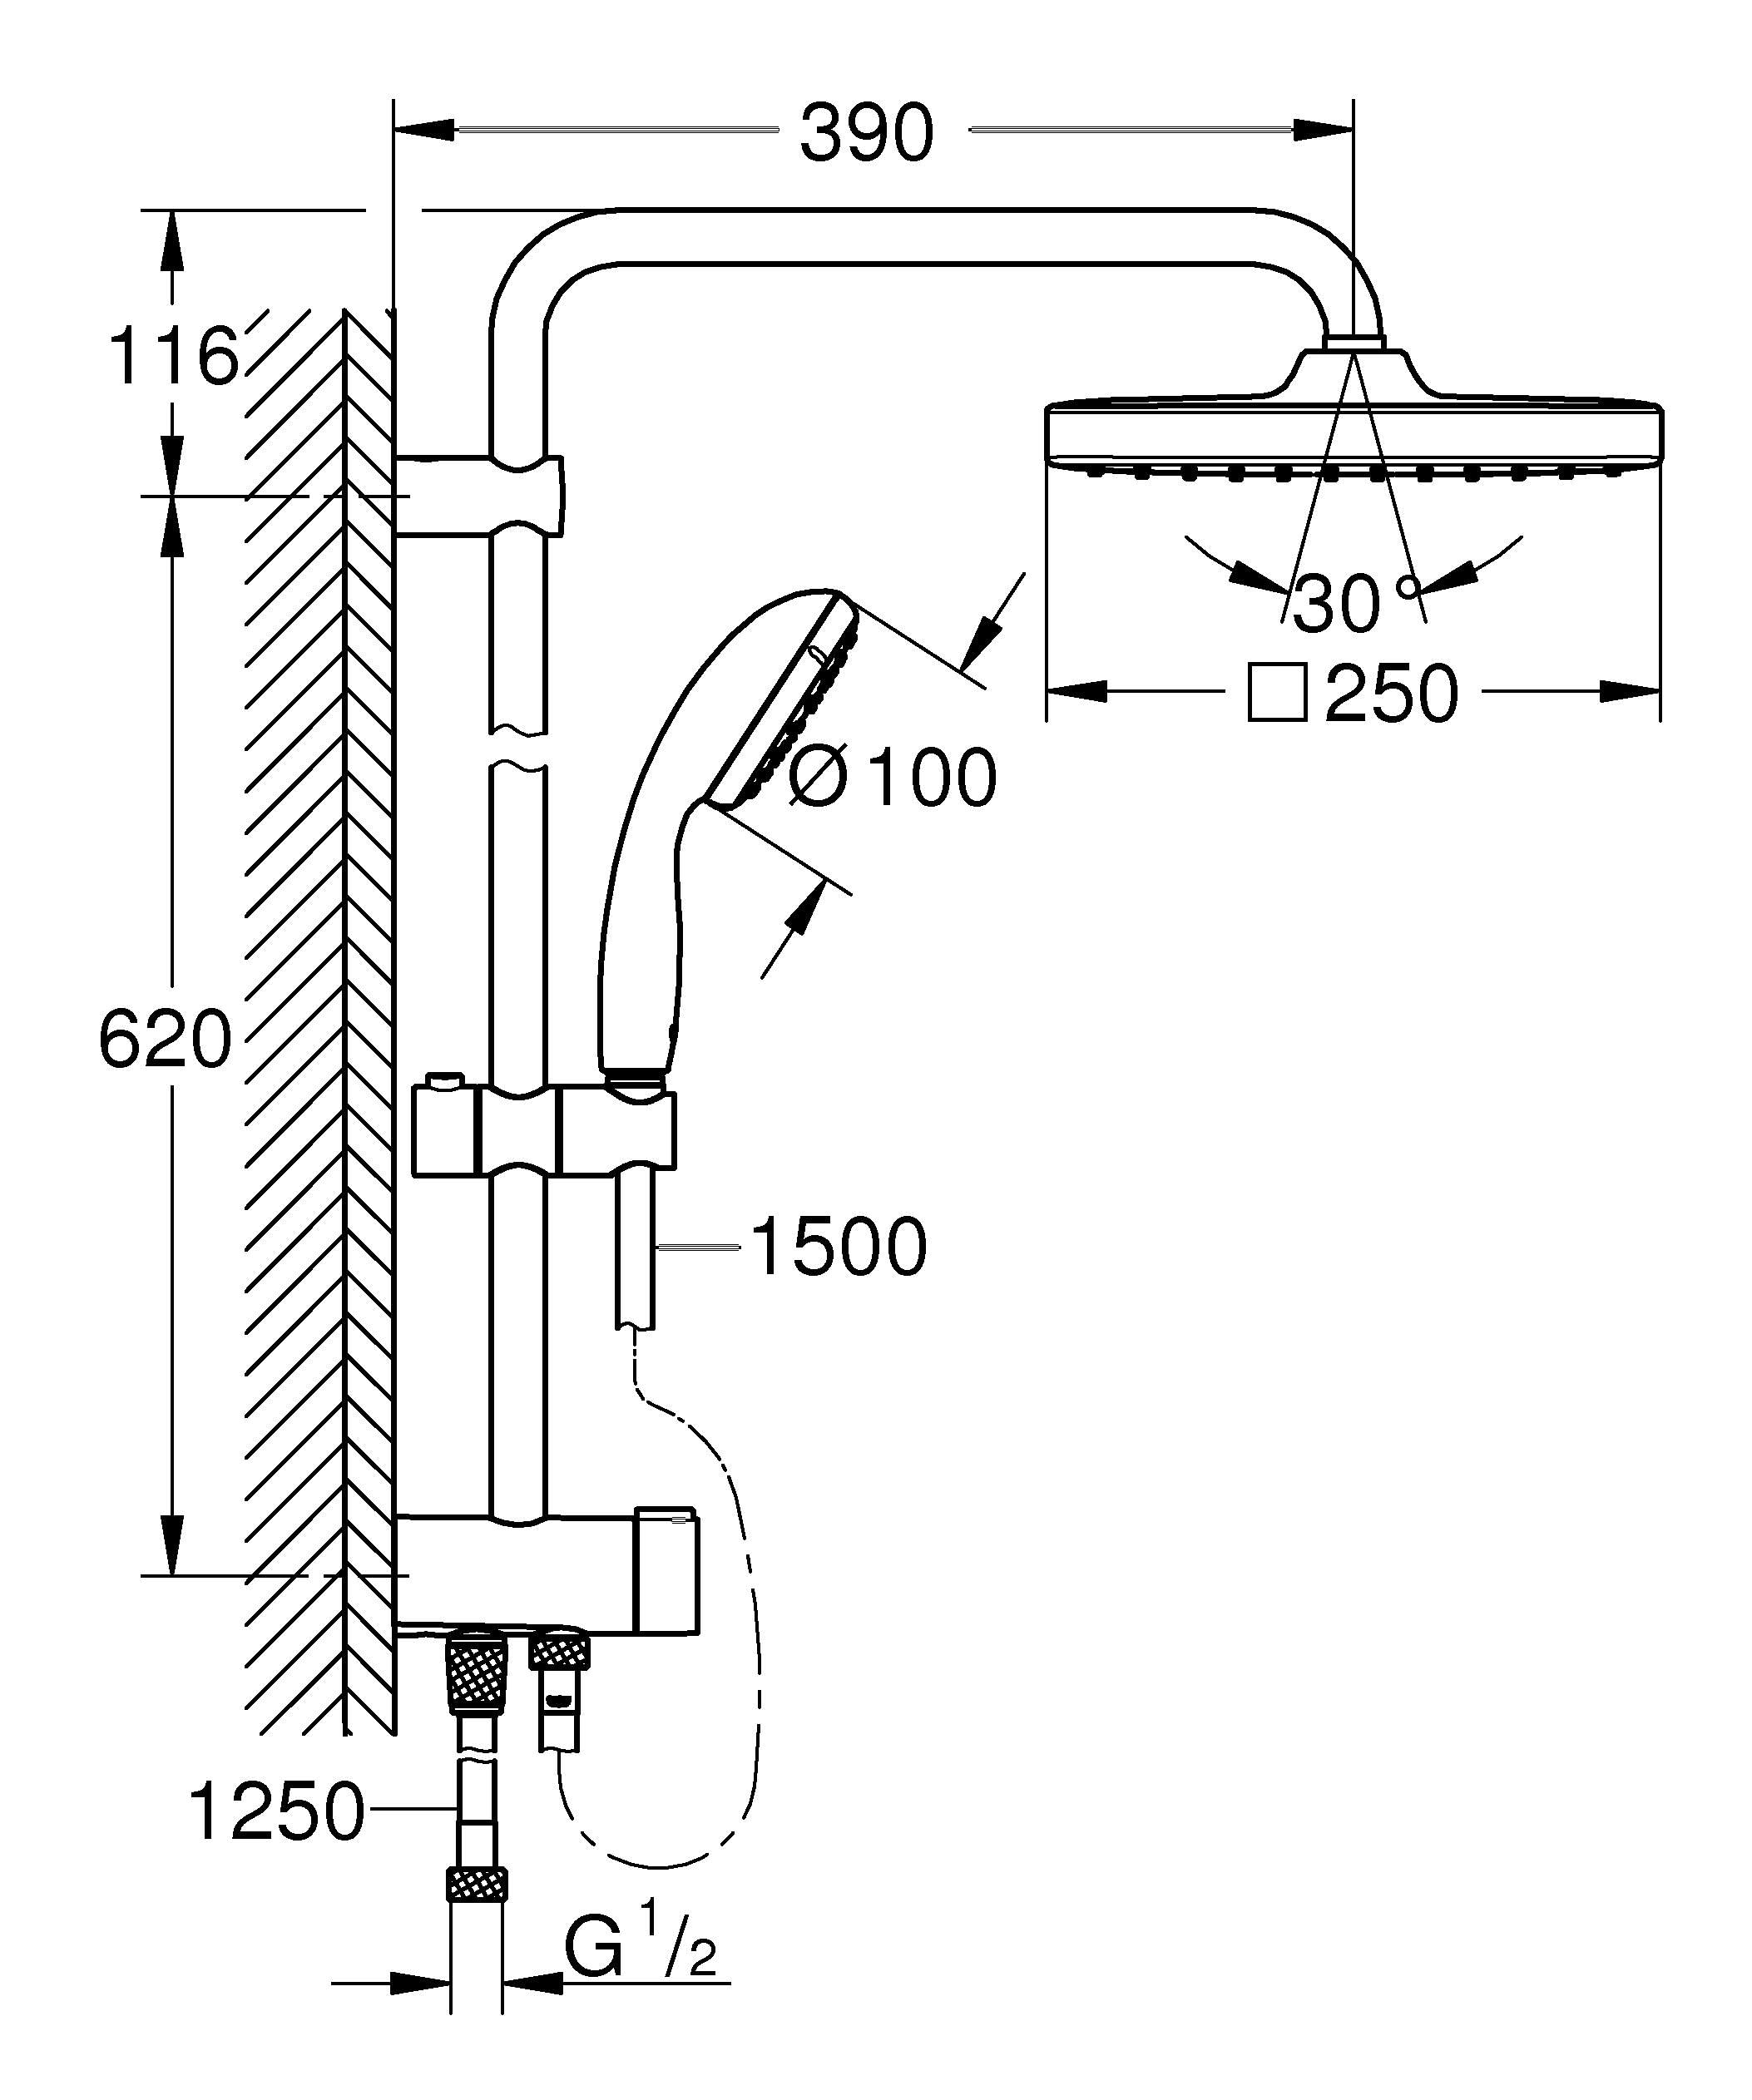
| Product Dimensions | 73.6 x 39 x 14.5 cm; 1 kg |
| Item model number | 26698000 |
| Size | Ø250mm |
| Colour | Chrome |
| Style | Vitalio Start 250 shower syst. + diverter |
| Finish | Chrome |
| Material | Silicone |
| Pattern | Unique |
| Shape | Square |
| Installation method | Wall Mounted |
| Item Package Quantity | 1 |
| Number of handles | 1 |
| Handle material | Chrome |
| Grit Description | Medium |
| Plug profile | Wall Mount |
| Included Components | Square Wall Shower System with Diameter 25 cm, 2 Jets Head, 10 Hand Shower and QuickFix Mounting Tool |
| Batteries included? | No |
| Batteries Required? | No |
| Item Weight | 1 kg |
A**H
Not Upto Grohe Standard
It all felt a bit cheap compared to the Grohe products I have purchased.
A**R
Product failed on installation
I bought this for a bathroom refurb and it wasn't fitted for six months. A plumber fitted it but when it was first used the overhead shower stopped by itself and made a loud groaning noise. We tried to get it going but called the plumber back to replace the old shower. I am now in a position where it's beyond Amazon's return date and Grohe refuse a refund and will only replace it which will cost me to reinstall - wish I had never bought it.
A**7
Nice shower: installation instructions
Nice looking shower set, works well but installation instructions are appalling.Despite being quite experienced, it took me 3 attempts to get it right with no leaks, so I hope my notes will help you!1. The two plastic wall brackets are identical; the upper one (for the rain shower arm) is to be installed with the bolt hole and recieving nut at the top side and the lower one (for the diverter valve) with the bolt hole on the underneath side. Decide the position of the upper bracket, drill the hole and install. Then install the lower one exactly 620cm below that. There's no flexibility in the distance between these brackets for the length of shower rail in my kit. (The instruction sheet indicate a possible longer rail with a distance of 920 cm between brackets, but that must be a different model option.)2. Hold the upper chrome bracket with the screw hole upwards and practice pushing the narrower smooth end of the rainshower arm through the bracket so that it actually comes through the bracket and out the other side. Then remove the rainshower arm.3 Push the main shower rail into the bottom of the upper chrome bracket. It goes in a little way and rests against the inner shoulder. The hole in the shower rail should line up with the lower grub screw hole inside the back of the upper chrome bracket, and the slot near the top of the shower rail should match up with a corresponding piece inside the bracket. Insert the lower grub screw to hold in place.4. The plastic pipe fits inside the main shower rail. The simple end fits into the top of the diverter valve. Practice pushing the plastic pipe through the inner rubber seal of the diverter a few times, and remove it again. Apply the silicone lubricant (in the sachet) to the outer rubber ring on top of the diverter and onto the upper rubber ring of the plastic pipe. Push the top end of the plastic pipe with 2 little wings into the smooth end of the overhead shower arm (it will not come back out). The other end of the shower arm has a screw thread for the rain shower head, but don't put this on yet as it's very heavy.5. Fit the lower end of the shower rail to the top of the diverter valve and hold in place with one hand.6. Push the plastic pipe and the rainshower arm through the upper chrome bracket from above and down into the shower rail. Keep pushing the rainshower arm until it passes through the bracket and it enters the shower rail. At the same time the inner plastic pipe will enter the diverter valve.7. Fit the second grub screw into the upper chrome bracket, but not too tightly so that the arm can be moved8. Slide the whole assembly onto the two brackets and fit the retaining bolts to and bottom. Only the bottom screw has a washer.9. Attach the rainshower head and tighten it up with a spanner.
P**B
Hose issue
The shower heads are all ok and the product looks good but unfortunately the hoses are leaking between the connector and pipe therefore leaking causing pressure loss.Very surprised as Grohe products are generally very good quality so very dissapointed!!
P**.
Poor Quality Customer Service
Product arrived with tarnished Stainless Steel, contacted supplier through the email which was the only way I could, over 3 weeks ago still no reply, if this was a cheaper product I suppose I wouldn’t have minded so much but being closer to the £200 mark I would expect much better quality and better service!PS the pressure on the head is not very good considering I was very happy with the previous shower pressure
A**R
Expected more
This is 90% plastic and the rail is very short (likely to reduce the size of the overal box). I expected more from Grohe at this price point
Trustpilot
4 days ago
1 week ago